
Gate Approval Example - Screenshots
This topic steps through an example approval criteria and illustrates using screenshots for how to build the filter. For additional examples and videos, see Gate Approval Examples, Videos.
You specify approval criteria when you create or edit a gate. When you first open the Gate Approver tab, you'll see the launching point of the approval criteria:
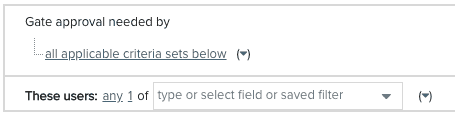
There is an initial "These users" statement (you must finish its definition) because that element is required. Remember that one "These users" element constitutes a complete criteria set. You can optionally add "Who have" and "Then" elements.
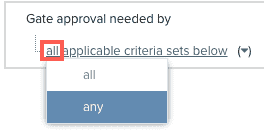
The "Gate approval needed by" statement tells the system whether all applicable criteria sets must be satisfied, or just one (any). To add a new criteria set, click the  control to the right.
 |
 |
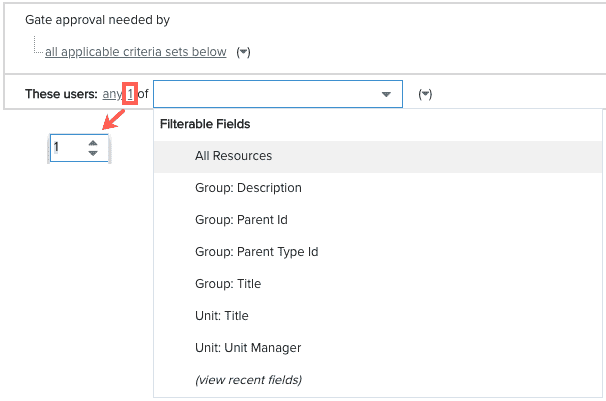
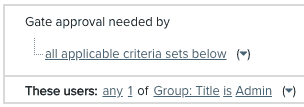
The "These users" segment defines your criteria pool. You can start typing into the field and the system will pull up matches to relevant fields, or click the down arrow to the right of the field to display the list of values from which you can choose where you will be drawing approvers from. Note that you can increase or decrease the number of required approvers by clicking the up/down indicator that appears when you click into the value:
If you choose a value other than All Resources, you'll also need to add an operator:

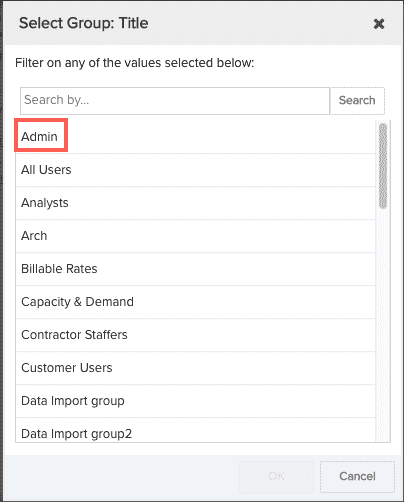
Once you choose the operator, enter the name or click into the remaining field and choose the entity name from the dialog (in this example, the list of Group titles is displayed):
 |
 |
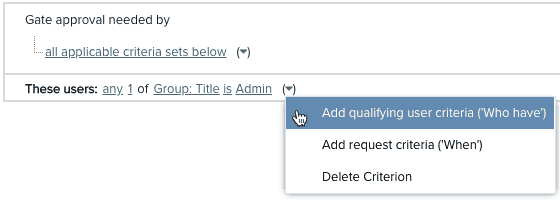
To refine your resource pool you can add user criteria from attributes on the resource record by selecting a "Who have" element. To add criteria drawn from the request itself, add a "When" element. These can be added by clicking the down arrow to the right of the "These users" line:
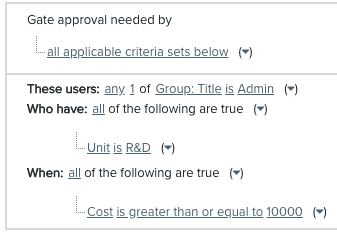
Here is an example of a criteria set with all 3 elements:
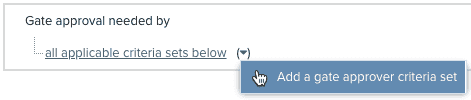
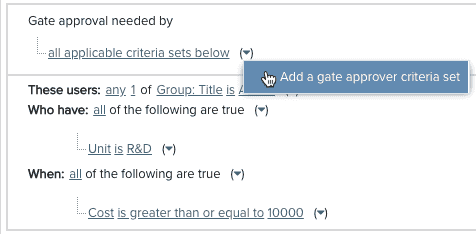
If you want to add another set, click the  at the very top and select Add a gate approver criteria set:
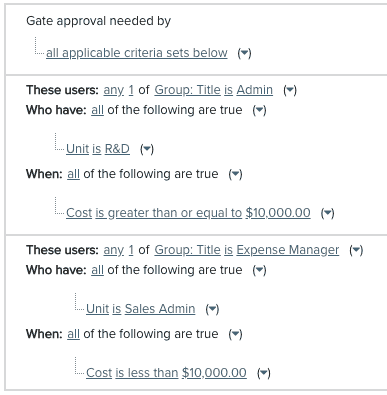
The new criteria set is appended to the bottom of the statements:

And you can build another set. Note that when you compare values, like this example does, be sure to have a statement that covers greater/less than/equal to, or your request might get stuck if it has a value that is not represented by the logic:
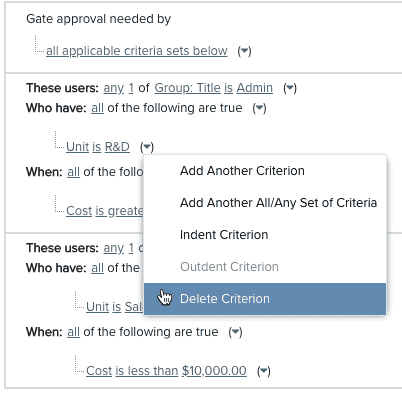
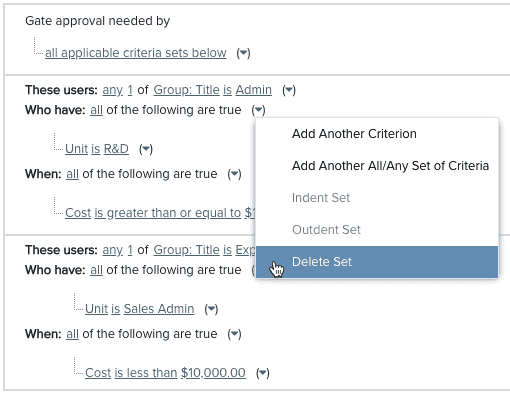
You can delete any single criterion by clicking the  and choosing Delete Criterion. To delete a set, click the
  at any parent statement and choose Delete Set:
 |
 |