Add an Entry to the Timesheet
Once you have selected your timesheet, the next step is to add a timesheet entry. The entry is where you specify what you are logging time to. You can, and usually do, have multiple entries per timesheet if you typically work on multiple projects or tasks. However, you might have only one entry if your work is focussed on one particular task.
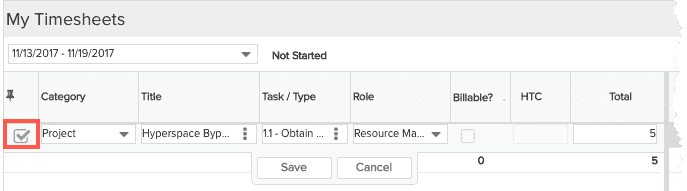
There are several ways to add entries to a timesheet. If you know you just want to add one entry, the most straightforward approach is to click on the Add new control, or to select New > Entry.

Whichever technique you use, the result is a new entry row in edit mode:

There are two other ways to add entries, also located in the “New” menu. “Entries from Previous Timesheets” and “Entries from Browse/Search”.
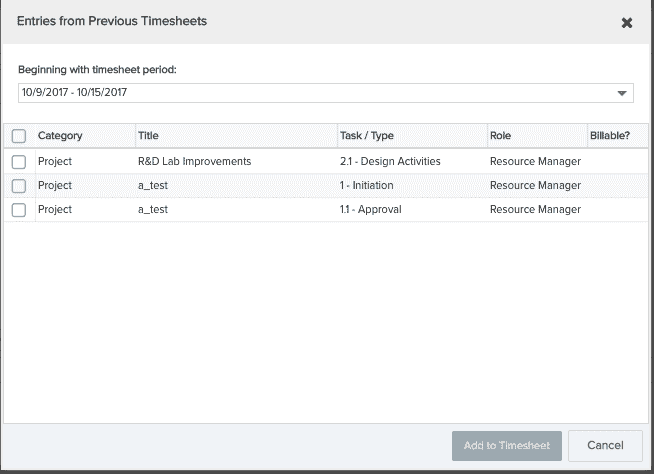
If you select New > Entries from Previous Timesheets, a pop-up appears with the previous timesheet period as the default, but you can select earlier timesheet periods from the drop-down. Only entries that are not already in the timesheet (and that are allowed given the current timesheet rules) are displayed. From here you can select the entries you want to add.
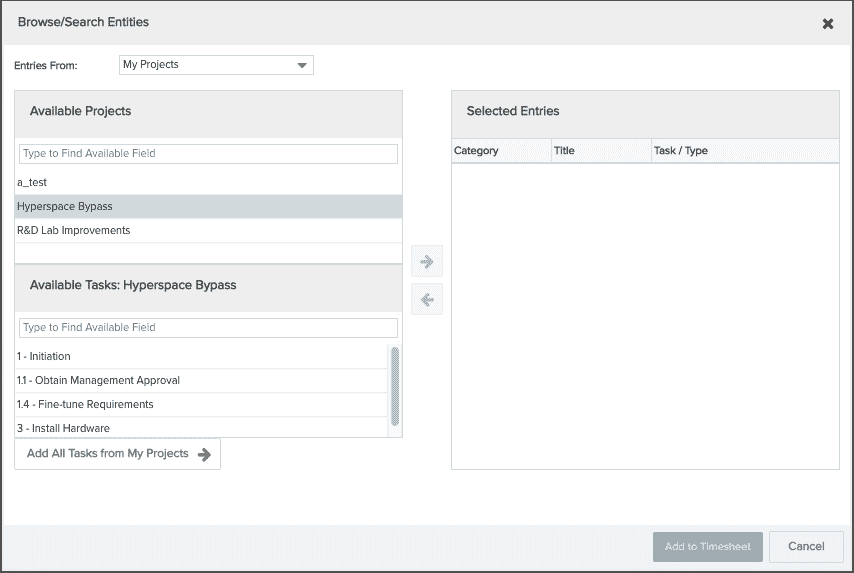
If you select New > Entries from Browse/Search, a pop-up that gives access to not just all of the projects and tasks that you are allowed to add for the timesheet period, but also any portfolios and administrative entries. For each desired project, you can select to add all of its relevant tasks OR a subset of its tasks. You can browse/search portfolios and admin entries.
Reusing (Pinning) a Task in the Future
The first checkbox in the new row is for pinning the entry.If you will be charging time to a task for more than one timesheet period, pinning allows you to automatically add the entry to future timesheet (more on pinning in later). If you plan to work on that task in future weeks, click the Pin button so it will automatically show up on future timesheets. For the purposes of this tutorial go ahead and pin this entry.