Using effective dates for base calendars
Users with administrative privileges and project owners can change base calendar effective dates of project calendars; resource supervisors and members of the Resource standard group can change base calendar dates of resource calendars.
There may be situations where a resource's working hours change, for example becoming a part-time employee or relocating to a different location. In both cases, the resource would need a different base calendar effective on the date the change takes place. You can split base calendar usage - implement two or more base Organization calendars - according to effective dates.
Similarly, a project might have different phases where, for example, the first phase of the project is located in the United States, and the second phase of the project is located in India. In this situation you would implement two different base Organization calendars, each in effect when the project is located in the respective locale.
Note: If you plan on more than one calendar change, make sure you enter the last effective date change first. For example, if you plan to change base calendars on January 1, 2012 and April 2, 2012, define the April change first. Once you split the calendar you can only make additional changes between your dates.
To split a calendar:
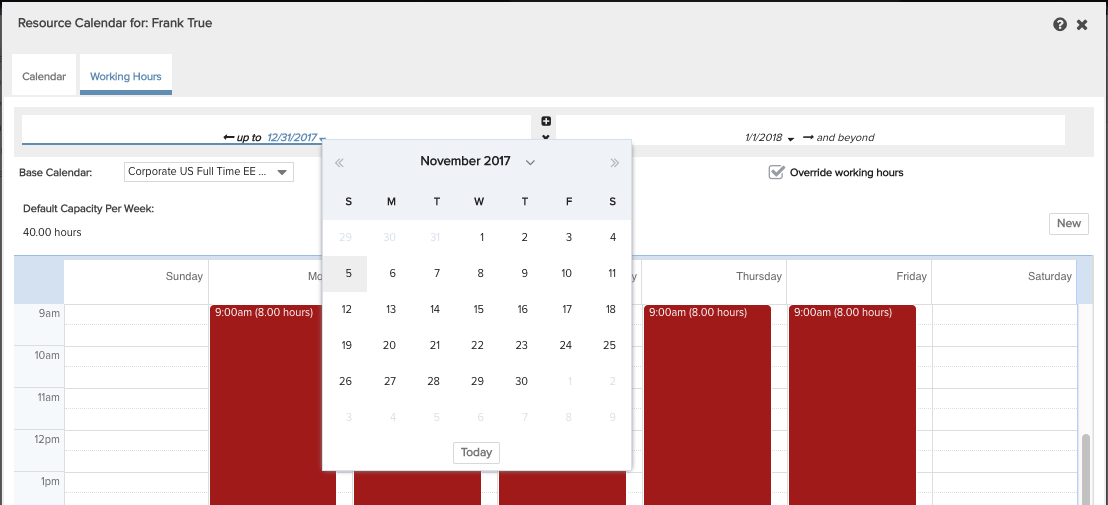
- Navigate to the resource's Resource Info page or the project's Settings section and choose Actions > Edit calendar.
- Click the Working Hours tab and enable the Override checkbox.
- Click the Split Date Range icon (see screenshot below).
![]()
- In the calendar that appears, select the effective date of the first calendar change and click Insert.
Now you can see there are two segments.

- Click the new segment and choose the base calendar to be in effect on the start date of the segment.
You can double-check your base calendar assignments by clicking in each segment and checking which calendar name is displayed in the Base Calendar field. Note that the date of the currently selected segment is bold.
6. If you wish to insert a segment between two segments, click the Split Date Range icon that appears between the two ranges.

To split a calendar for multiple resources at one time:
- From the All Resources tab, select the resources whose calendars you wish to change (use Ctrl-click and Shift-click to multi-select) and choose Actions > Switch base calendar.
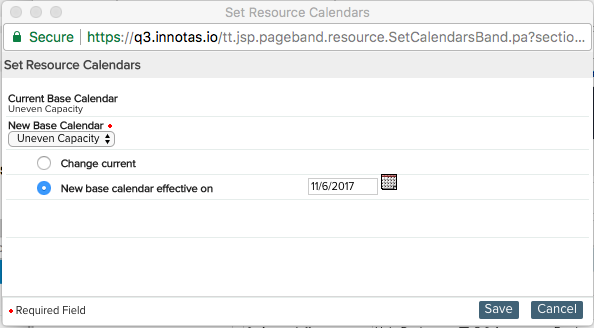
- Select the New Base Calendar.
- Click the radio button next to New base calendar effective on and then select an effective date by clicking the calendar button and choosing a date.
- Click Save.
If you want to remove a segment, click the Merge ![]() icon.
icon.
To change the effective date of a segment:
If you have your calendar segmented but need to change a segment's effective date, click on the arrow to the right of the date and select a new date.