
Hierarchical List reports
This topic describes how to configure the data for a hierarchical List report (click here for example). You will be working with a screen like the one below. At this point you will have already selected a report source, clicked New, and filled out a preliminary Basic Details screen.
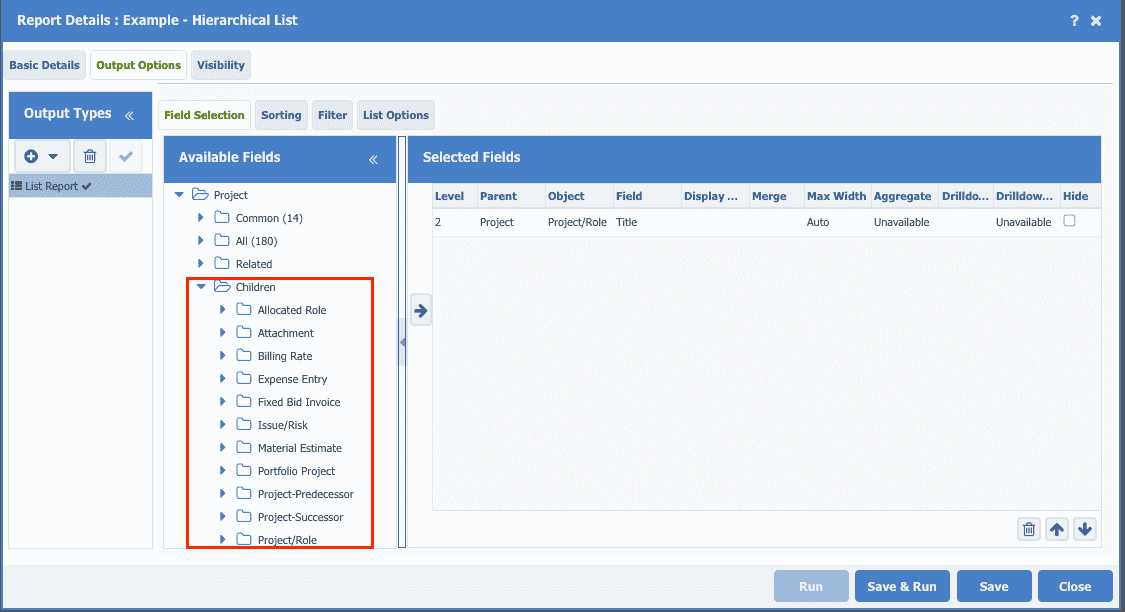
The Output Options screen for a hierarchical report is the same as a list report. To build a hierarchical report you select fields from the Children folder. The Children folder contains components that are child items of the target entity. In the screenshot above, Issue, Task Project Role, Team Member, and Fixed Bid Invoice are children of Project. Child items can also have children. For example, to build a three-level report you might include Tasks (the second level) and then the Resources assigned to the Tasks (third level). You can keep going as long as there are child entities.
All of the other list report features work for hierarchical reports. See Configuring List Reports for more information. The rest of this topic describes the features that are specific to hierarchical reports.
Parent and Level
When you move a child field to the Selected Fields panel, three new columns are added to the panel: Parent, Level, and Merge (discussed below). The Parent column displays the name of the entity that is the parent to the child field. The Level column displays the numeric level of the field relative to the top-most entity. (Note: A Filters tab also appears when you use child fields. See Filters below.)
For example, when you move a child Task field into the Selected Fields panel (the Project Title field is already there), the two new columns appear in panel. Project is the Parent of the Task field, and the level is 2 because the Task folder is a first-generation child of Project.

If you now add a child of Task, for example Task Role, the parent will be Task, and the level will be 3 because Task Role is a second-generation child of Project.

Children at the same level will print in the order they are placed in the Selected Fields panel. Children at different levels will print in hierarchical order: parent, child, grandchild, parent, child, grandchild.
Merging Columns
The Merge feature allows you to combine columns; instead of having two fields on different rows and in different columns, the second field will print in the same column as the first field, but indented to indicate the hierarchical relationship. You can only merge one column with its previous column, so you must be sure to order your fields correctly to get the desired effect. You can only merge fields that are on different levels.

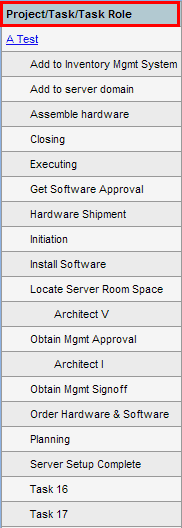
The screenshot above shows that the 3rd-level Task Role title is merged with the 2nd-level Task title, and the 2nd-level Task title is merged with the 1st level- Project title. The result is only the Project title prints, as shown in the screenshot below. Also shown is a screenshot of how the default report would look with no merges.
|
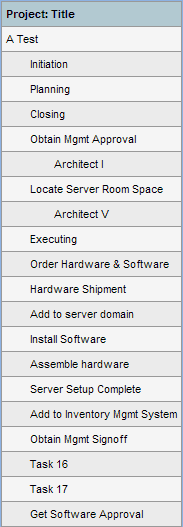
Three levels, no merge |
Three levels, with merge |
 |
 |
Fine-tuning the Display
When you merge columns you lose the headings for the child fields. This might make your report hard to read. You can do one or both of the following to clarify your results:
-
Edit the Display Name of the remaining column heading to make it more descriptive
-
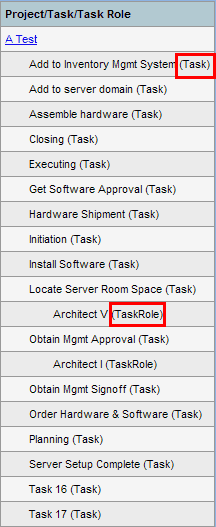
Use the Display Name for Merged Entity option to print the entity type in parentheses next to the data. This setting is on the List Options tab.
Below are examples of both options:
|
Create a descriptive Display Name |
Use the List Option |
 |
 |
Filters
When you run reports you are presented with a runtime filter in the Set Filters dialog; this filter only filters the top-level entity. When you add child fields, a Filters tab appears on the Output Options screen. You use this Filters tab to apply filters on child elements. For example, in the example that shows all tasks on projects, you can use the Filters tab to sort on Task status to include only tasks with a status of open. Note that these filters are part of the report definition and cannot be changed on the Set Filters runtime dialog.
To set a filter, select a pre-existing filter from the Filter drop-down list, or select +Manage Filter... and create a new filter. See Creating Filters for more information.

List Options
There are additional options for hierarchical reports. See List Report Options for more information.