
Attaching Files and URL Links to an Entity
![]()
Note: All entity types can have attachments. This topic uses screenshots from the portfolio entity as an example. Also note that for projects, you won't see the tabs like the screenshot above, but rather will click the Attachments section link.
You can attach documents (files) and URL links to entities from the Attachments tab. The Attachments tab has a right-click menu for performing actions on attachments; the same actions appear under the Actions menu. See About Attachments for general information about attachments, including supported file formats.

To add an attachment
1. Navigate to the entity and click the Attachments tab (or Attachments link if in a project).
2. Choose Add > File or Add > Link.

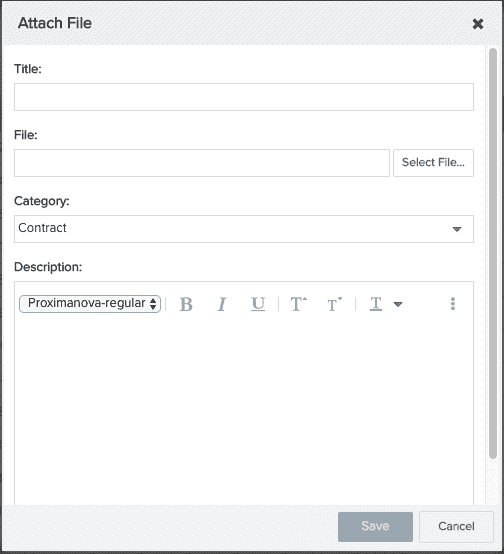
3. Enter the appropriate information in the Attach File or Attach Link window.
4. Enable the "Public" checkbox if you want all users in the system to have view and edit rights to the attachment. If Public is not enabled, then only project team members have access to the attachment.
5. Click Save.