
Creating Filters
This video demonstrates how to create filters. Duration 6 min.
You can create filters from the ad-hoc filter field, from Home/Filters, Admin/Setup/Filters, or from the Manage Filters interface. Regardless of where you create the filters, they are available for use anywhere filters are provided, such as in report and dashboard filter lists.
- When you create a filter from Home/Filters or Admin/Setup/Filters, you must specify what entity the filter is for
- When you create a filter from the Manage Filters interface, the filter is automatically scoped for the entity from which you invoked the interface.
The screenshot below shows the Home/Filters page; the page looks exactly the same when invoked from Admin/Setup/Filters, except the contents of the list will vary according to permissions.
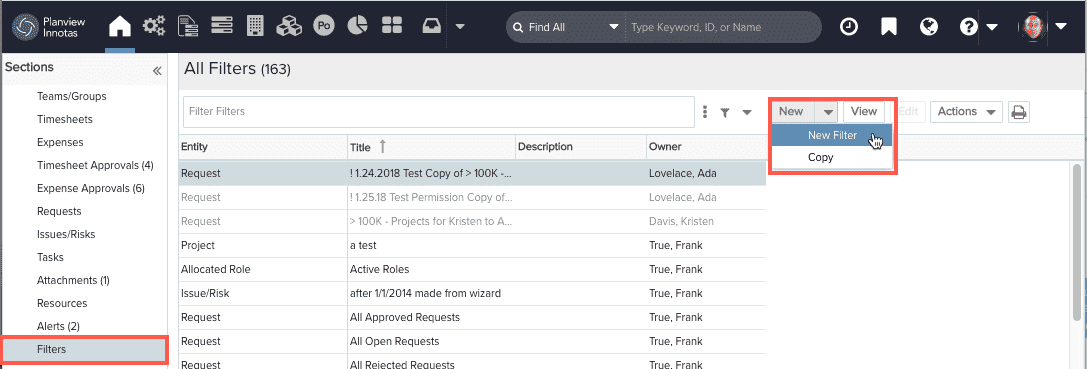
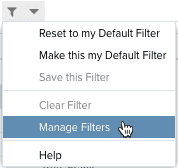
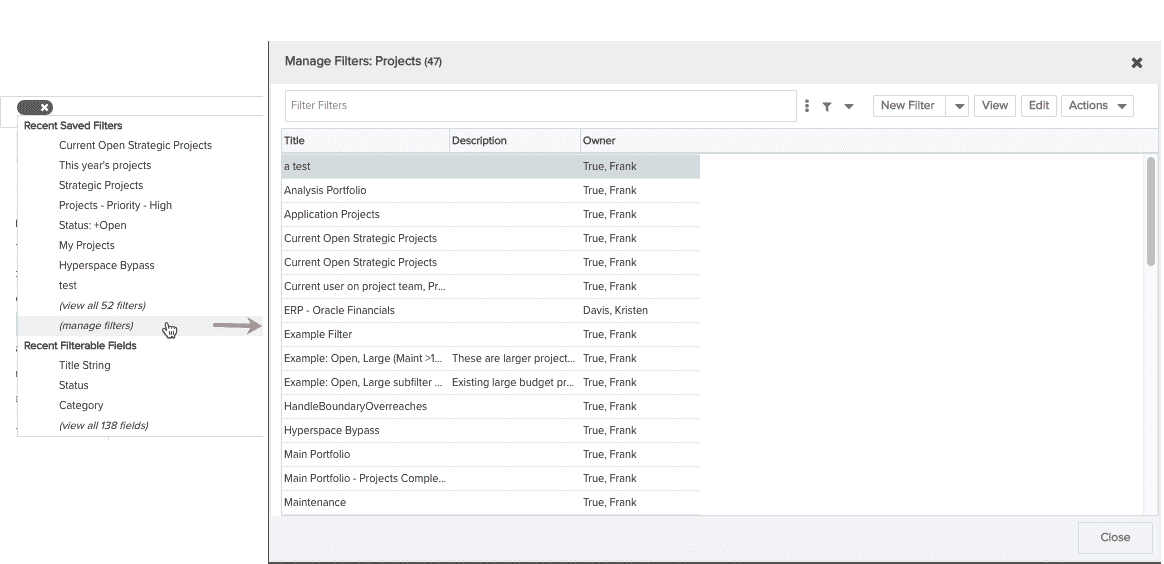
The Manage Filters interface is essentially a shortcut to the interface for creating filters scoped to the current entity. You call it up from an entity list page (or report or dashboard filter list) by selecting the Manage Filters menu option in the ad-hoc filter menu, or from the bottom of any filter list. Both techniques are shown in the screenshots below:
|
Ad-Hoc Filter menu
|
Filter list
|
Filter Components
You can build filters by combining the following filter components:
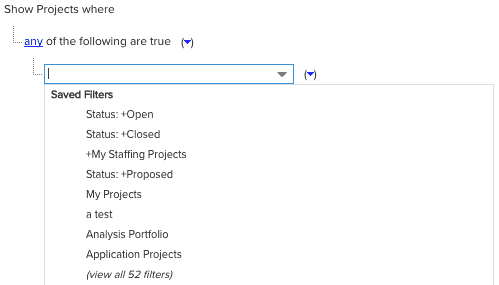
- Saved Filters - Saved filters are any filters you have previously created and saved, as well as any filters accessible to you through team membership. The menu displays up to 8 recently used filters. If there are more than 8 filters, you will see a (view all # filters) link. Click this link to display all saved filters. Note that you can hover your cursor over any custom saved filter to view its definition:

-
Filterable Fields - These are fields configured on the current entity. Since there can be a large number of fields on the entity, up to 8 of the most recently used fields are shown, with an option to view all fields. If you haven't used any filterable fields, then the first 8 fields in alphabetical order are displayed.
-
Free form text - This is any text you type directly into the filter field. If the text matches a saved filter or a filterable field that value will appear in a menu where you can select it.
-
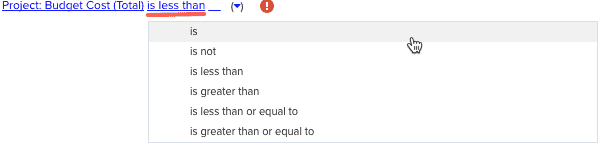
Operands:
|
Operand |
Description |
|---|---|
| is | Exact match of all values chosen from a list |
|
is not |
Exact match of all value |
| is empty | Blank, unselected |
| is not empty | Contains any value |
| contains | If any part of the text is found it is considered a match |
| contains any | ORs together clauses |
| contains all | ANDs together clauses |
| does not contain | Does not contain any of the selected clauses |
| contains current user | Contains current user's name |
How to Build, Format, and Evaluate Criteria
New filters must include a title and at least one filter criterion. After entering a title and optionally a description, you can begin to build the filter.
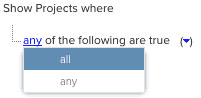
PPM Pro filters use the terms "any" and "all" to instruct the system how to evaluate criteria. In addition, a menu of formatting options is provided to make it quick and easy to add single criterion or sets of criteria. Sets can be indented (moved to the right), outdented (moved to the left), and deleted.
Below are the menus that you use to build criteria:
- "All" means that every criterion that follows must be true. It's like stringing together one or more "and" statements.
- "Any" means that one or more of the criteria that follow must be true. It's like stringing together one or more "or" statements
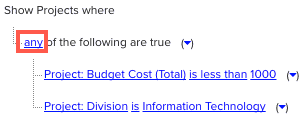
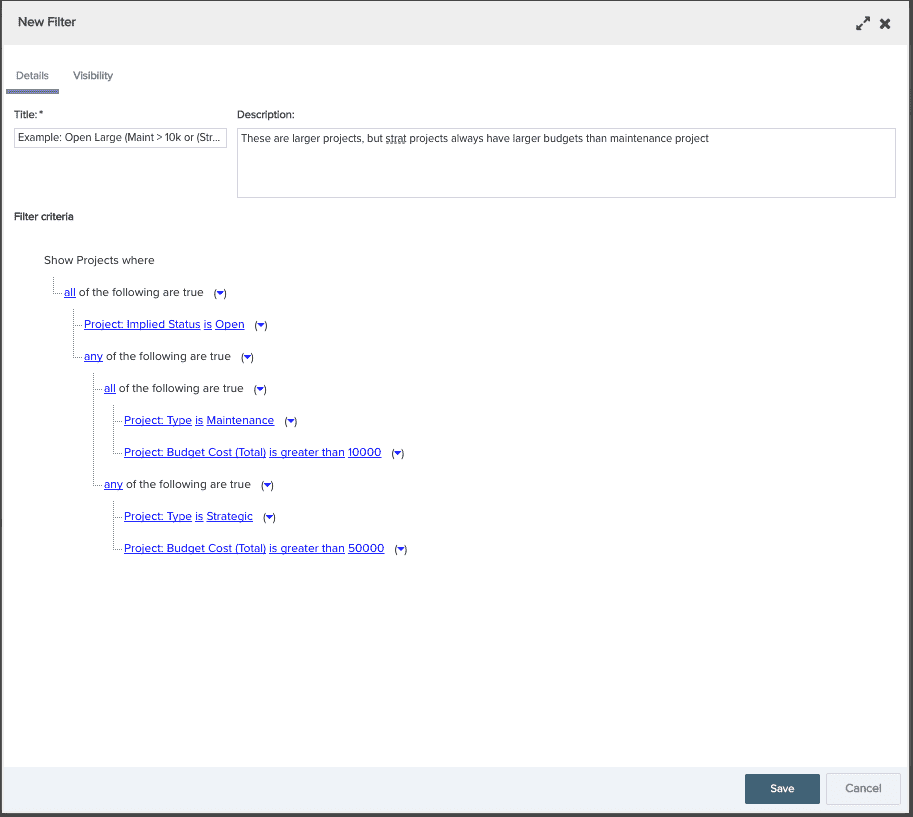
For example, the criteria in the screenshot below can be described as: Show me projects that have a budget < 10,000 OR are in the Information Technology Division:
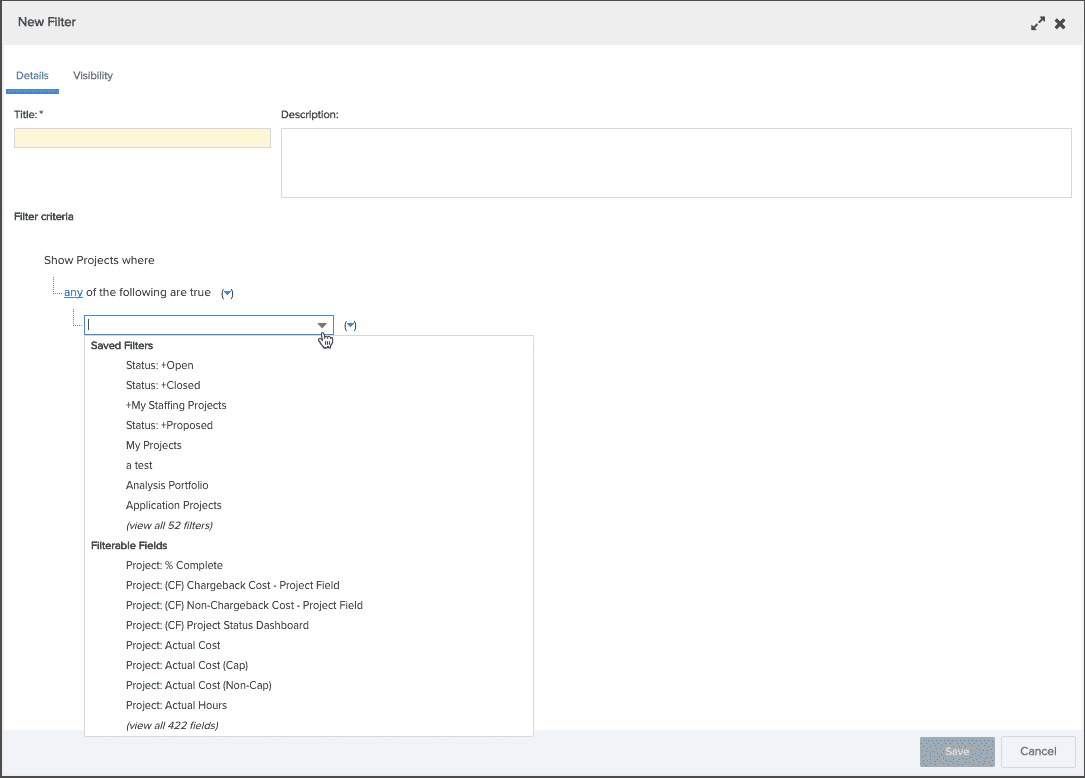
When you start a filter, there will be a blank field; you can start typing into the field and the system will pull up matches to relevant fields, click the down-arrow to the right of the field and choose from Recent Saved Filters and Filterable Fields, or just enter free-form text. The screenshot below shows the starting state for a filter:
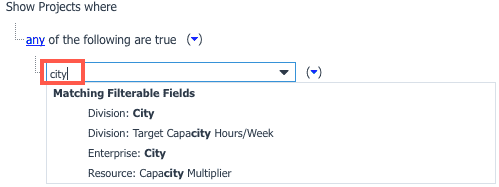
Note that you can also (view all # filters) or (view all # fields) by clicking the respective links. In the example below, the user typed "city":
Once you select an element or type in text, is it rendered as a link, as shown below.

At any time you an click on a link to edit and display a list of additional options:
 |
 |
Adding Criteria
The Criteria menu contains a set of options that allow you to quickly build filters. Each option is described below.
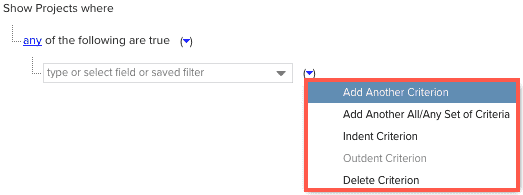
| Criteria Menu Option | Description |
|---|---|
| Add Another Criterion | 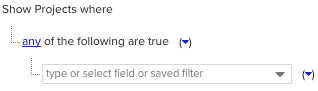 |
| Add Another All/Any Set of Criteria |  |
| Indent Criterion/Set | Shifts a criterion or an any/and set of criteria to the right. When you indent, a new set of criteria is inserted above the current criterion/set to give it room in the hierarchy to move to the right. |
| Outdent Criterion/Set | Shifts a criterion or an any/and set of criteria to the left. |
| Delete Criterion/Set | Deletes the criterion or set of criteria. |
Using Sub-Filters (Filters Within Filters)
You can use a filter within a filter. Simply click into a criteria field and choose either a recently used filter, or click the (view all # filters) link and choose from that list.
Once you choose the filter, the operator defaults to "matches" - alternatively, you can click into the link to select "does not match". Note that PPM Pro-supplied filters always show "matches". You can hover the filter before you select it from the droplist to view its definition, or hover over it after you add it to the filter criteria (as shown below):
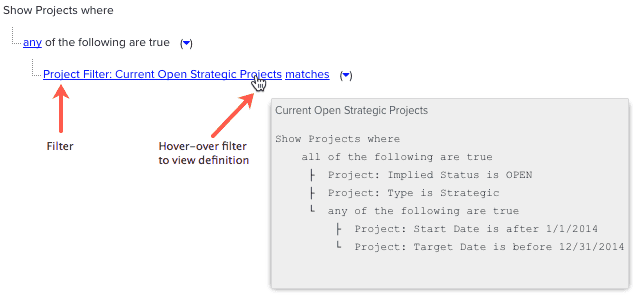
Example
The following example illustrates a filter that evaluates five different conditions.
Condition 1: Projects that have an Implied Status = Open
AND ANY of the following:
Condition 2: Maintenance projects AND Condition 3: budget over 10,000
OR
Condition 4: Strategic projects AND Condition 5: budget over 50,000
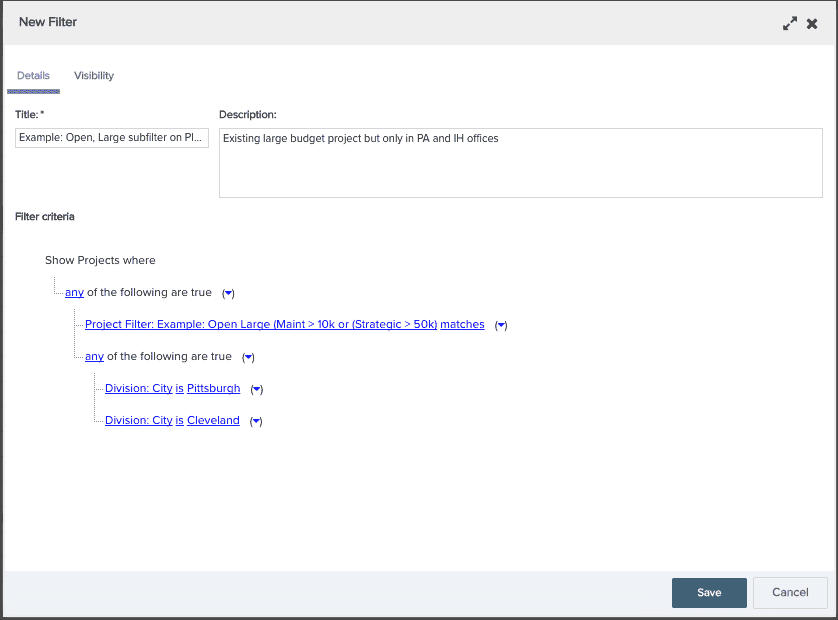
The next example builds on the first example by using the first filter as a subfilter: it wants the projects from the filter created above, but only if they belong to Divisions located in Pennsylvania or Ohio:
Filter Permissions
Filters are shared by adding users/groups/units and a permissions profile to the filter's Visibility tab.
By default, filters you create are visible only to you (owner). The Owner permission profile grants full edit permissions, and may or may not grant delete permission (check the configuration of your organization's Owner profile). Any user can share filters with the All Users group - essentially making them "public", or can share with individual users, groups, or units. Shared filters appear in all filter dropdowns for the specified entity as well as any reports for that entity. Users with the appropriate permissions can edit or delete a filter.
See Sharing Filters for information about the Visibility tab and sharing filters with other users.
Admin Filters
When filters are created in Admin/Setup/Filters, they are automatically shared with members of the Admin group. PPM Pro supplies a default team profile that grants Full Edit permissions to any user/group/unit that is added to the filter team with the Full Edit profile. You can use this profile, or any other Team profile your organization has created, to add team members to the filter.
Note that if you decide to remove the Admin group from a filter profile (either by editing the Visibility tab or using Actions > Bulk Remove Team Members), the filter will be removed from the Admin/Setup/Filters list. Alternatively, if you wish to share the filter beyond the Admin group, you can add specific users, groups, or units to the Visibility tab.