
Creating Projects
This video demonstrates how to create a project. Duration: 6.5 min.

There are several different ways to create projects. You can:
-
create a new project and define all the project elements, including roles, team members, tasks, budgets, and so on (see below)
-
create a new project and use a template project to populate project elements
Who can create projects?
Generally speaking, any user assigned to a profile with the global project Create permission on all project categories can create projects. In addition, Department (Program) owners, and Department (Program) team members with "Can Create Parent Relationship with Projects" can also create projects. Note that project permissions are enforced in the resulting project. For example, if the user had project Create permission, but no other project permissions, that user would not be able to view the project after it was created. Alternatively, users might have permission to create projects for specific categories - <project category name> > Create.
Similarly, if you are populating an existing project from a template, project permissions are enforced. For example, if the template project includes tasks, but you do not have permission to view or edit tasks in the existing project, the template tasks will not be imported into the existing project.
Finally, if you are creating a project from a template project, permission enforcement is temporarily suspended while you are creating the project. For example, if the project creator does not have rights to view tasks, but elects to copy tasks from the template, the tasks will be copied successfully. Similarly, if the project creator chooses an owner for the Owner field who does not have view tasks permission, the tasks will still be copied into the project; the resulting project owner will not be able to view the tasks in the new project.
To create a new project
- Click the Projects tab.
You can also create project from any Department (Program) Basic Info page if you have the appropriate rights to create projects for that Department (Department owner, user with project Create permission and on the Department (Program) team with "Can Create Parent Associations with Projects" permission).
- Click the New button to invoke the New Project Wizard.
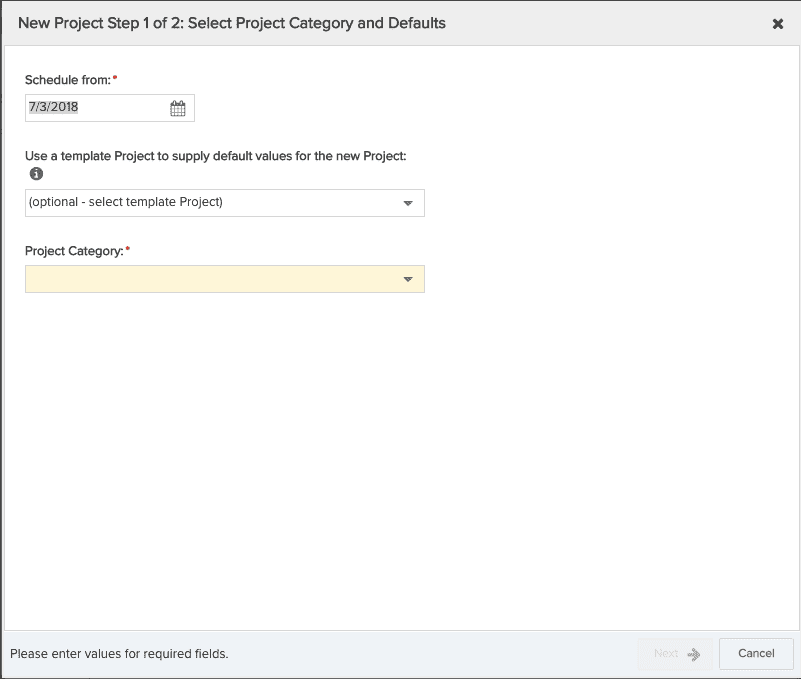
- Do the following in the new project wizard Step 1:
- (Optional) To populate the project's default values from a template project, select the template project. Then, select the specific elements to copy - you can select individually or copy all elements (the list of elements appears when/if you select a template project). See Creating a Project from a Template for more information. Otherwise, leave '(optional - select template Project)' in the field.
- (Required if multiple categories) Select a category for the project. The categories presented to the user are ones they have permission to create - either global Project > Create or category-specific. If your organization has only one project category defined, then you will not see this field on the wizard - the New button will be disabled if the user has no create permission at all.
- (Required) The Schedule From date defaults to the current date. Make adjustments as necessary.
- Click Next. The New Project Wizard Step 2 appears.
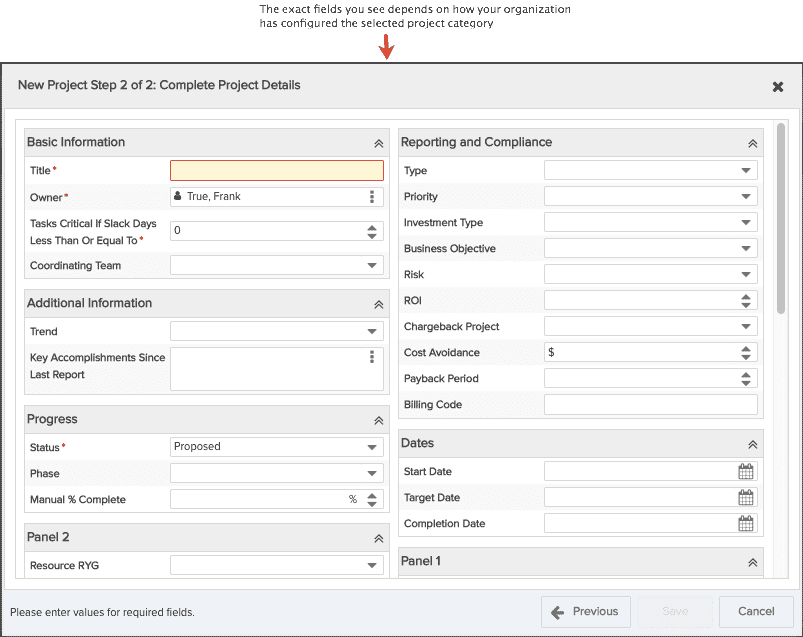
- In the New Project Wizard Step 2, fill in at least the required fields; Title, Owner, and Status are always required. Note that the project creator can assign a project owner during create-time (on Step 2), without needing to have Project > Edit > Owner permission. Additional required and non-required fields you see in the modal depend on how your organization has configured the project category.
- Click Save.
You are now ready to start adding project team members, Tasks, Budgets and Estimates for the project.