
Custom Rates
If you have a scenario where you want to configure a one-off or special rate for a specific resource or role, you can create a custom rate. Custom rates are not shared, but apply to one resource or role only. Since the rate applies to a resource or a role, you create the rate from the resource record or the Roles page.
Note: The ability to specify a currency along with the custom rate is a Beta feature targeted for January 2019 release.
To create a custom rate
- Navigate to the resource record and choose Menu > Edit Rate. To create a custom role rate, navigate to Admin/Organization/Roles, locate the role and click the [Rates] link.
The Rates dialog appears.
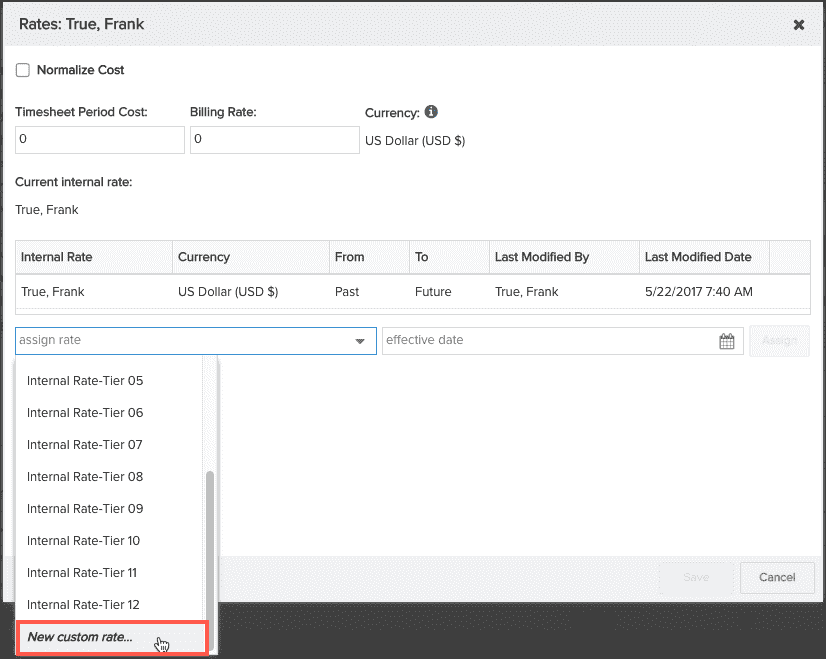
- Click in the Assign Rate drop list, scroll to the bottom and choose New custom rate... .
The New Custom Rate dialog appears. Note: The Currency droplist is a Beta feature targeted for the January 2019 release.
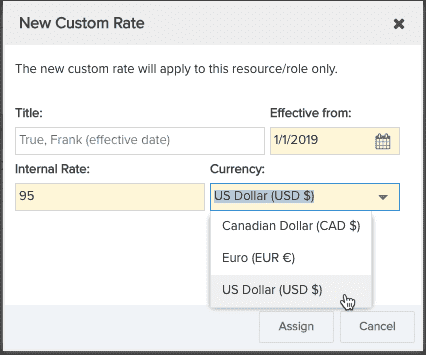
- (Optional) Enter a title or use the default. The default text will be the user or role name and the actual date.
- Enter the date from which the rate will be in effect in the 'Effective from' field.
- Enter the rate(s). (If you are using a two-rate system, enter 2 rates (they might be labelled something like OpEx and CapEx).
- Select a currency - if your organization is using the multi-currency feature, then select the appropriate currency, or leave Organization default currency. The Currency droplist is populated with currencies created in Organization/Finances/Currencies.
- Click Assign. If you need to make any changes, click Cancel and create the rate again.
- If you are happy with the rates and dates and rate title, click Save.
If you need to make a change after you save, you can create a custom rate and use the same rate