
Designing the Details Page
This video demonstrates how to setup entity details. Duration 6 min.

Note: All entity types have a Details page. This topic uses screenshots from the project entity as an example.
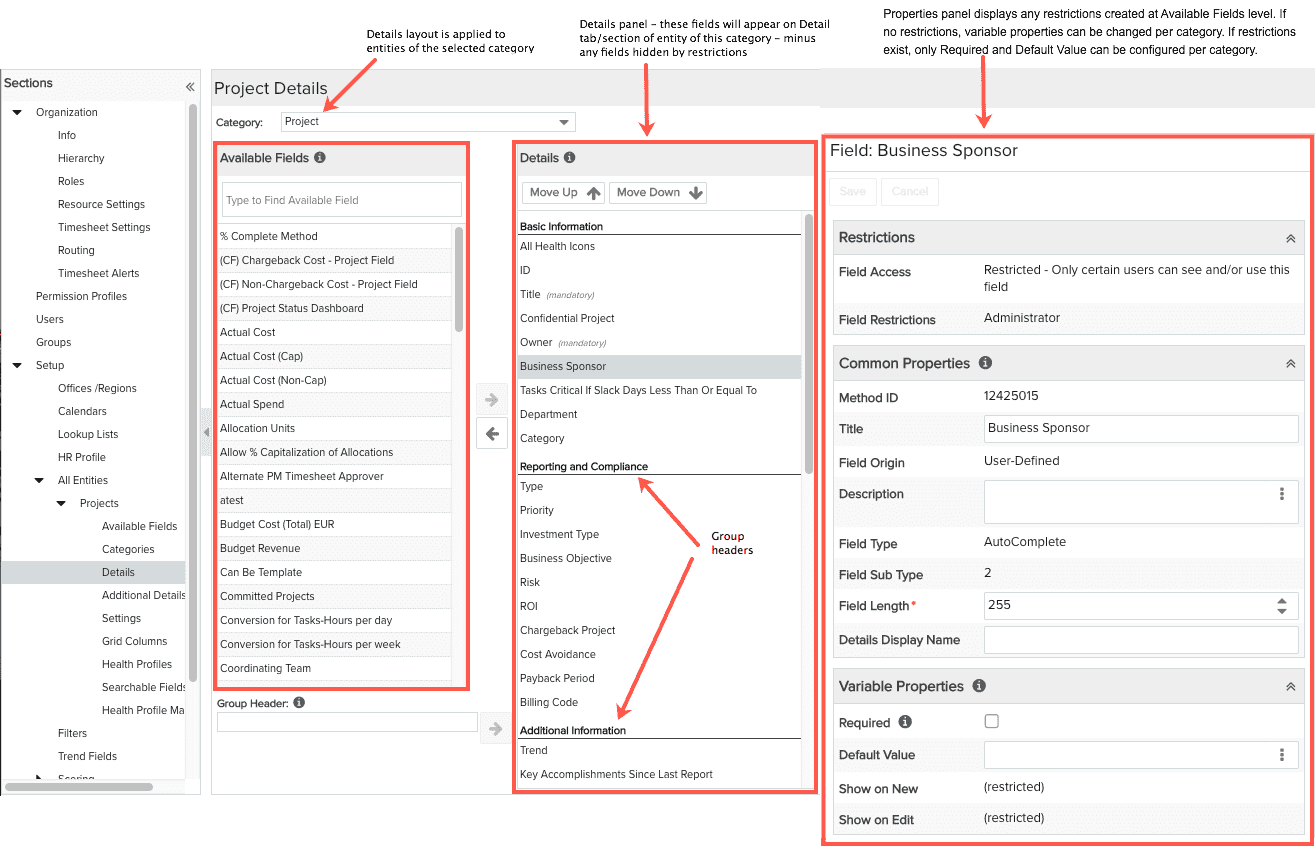
The Details page is where you determine the layout of the Details tab/page for an instance of an entity. You can place fields on the panel, create group headers and organize the fields under them, and modify field properties. A different Details layout can be configured per category, if desired. Note that you cannot remove "mandatory" fields from the Details. See Required vs Mandatory Fields.
The Available Fields panel displays all fields that can be placed on the Details panel. This list excludes any fields that were hidden on the Available Fields page.
The Category droplist will be disabled if you only have one category. If you have multiple categories, select the category and then lay out the Details fields. You can have different combinations of fields on different categories. In some cases, the Variable Properties for a field can also differ (if there are no field restrictions).
Field restrictions are configured at the Available Fields level and apply to all category Details that include the restricted field(s). The Detail page displays a read-only version of any field restrictions created on the Available Fields page.
You can create field-level PMO Lock restrictions on the Details page.
Understanding Details Layout
The layout for each entity's Details page will be based on the Group Headers and Fields you specify here on the Details page in Admin (this page will be referred to as the SSA Details page). You define a SSA Details page for each Category. Typically, the Details page will be different for each category (different fields included, different field groupings, for example). Any changes you make to the SSA Details for a specific category will be reflected in rendered project Details sections with the same category.
Outside of SSA, when you customize a rendered project Details section, the changes will be reflected in the rendered project Details sections of projects with the same category.
Please note the following:
As stated above, if you modify a rendered project Details page outside of Admin (say you change the layout or move a section), that modification will be reflected on all rendered Details pages for projects using the same category. Note that changes propagate only to projects whose Details pages are EXACTLY the same. Consider this example:
-
Project A and Project B are both Category 1, but Project A has scoring turned on and Project B does not. The Details page for Project B will not include the Scoring group/fields, while Project A will include the Scoring group/fields.
-
This means that the Details sections for those projects are DIFFERENT, although they use the same category. Any change you make to the Details layout of Project A will NOT be reflected on the Details section of Project B; the reverse is also true.
Out-of-the-box Standard Default Fields
Every entity has a set of standard field. A subset of those fields are placed on the entity's Details by default. To see the available fields for each entity type, as well as the default fields, click the appropriate links below:
Placing Fields on the Details Panel
You can drag and drop fields from the Available Fields panel to the Details panel, or you can select a field in the Available Field panels and click the right arrow. You can add/remove/rearrange fields - note that fields labelled (mandatory) must remain on the Details. See Required vs Mandatory Fields.
Creating Group Headers
It's common to group like fields together on the Details panel. You can create headers for field groupings by entering the header text in the Group Header field and then clicking the right arrows.

Adjusting Field Order
You can move fields up/down by dragging and dropping, or selecting the field clicking 
Removing Fields
To remove a field from the Details, select the field and drag it back to the Available Fields panel, or click the left arrow.
Updating Fields
The PPM Pro administrator can update the fields at any time (even after deployment) by adding, removing, or reordering the fields on the Details panel. If your Innotas Administrator removes a field, the field will be removed from all users' Details panels. If the administrator adds a field, the field will appear for all users.