
Configuring the Staffing Screen Display
This topic covers:
-
staffing screen panels
-
staffing screen views
-
filtering views by roles
-
the Memo field
-
the Settings dialog (allocation units and contour intervals)
Staffing Screen Panels
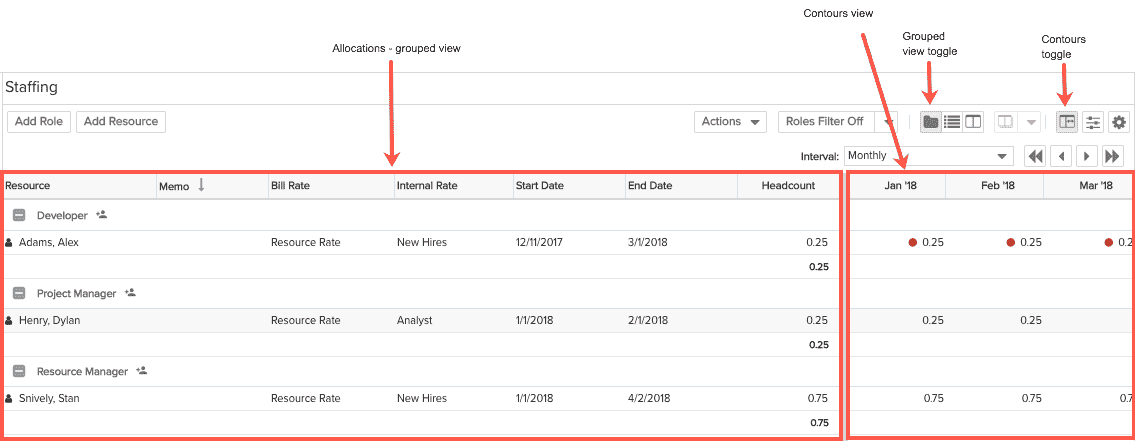
The Staffing screen has 2 panels: Allocations and Contours. The Allocations panel is always visible; the Contours panel can be toggled on and off.
Staffing Screen Views
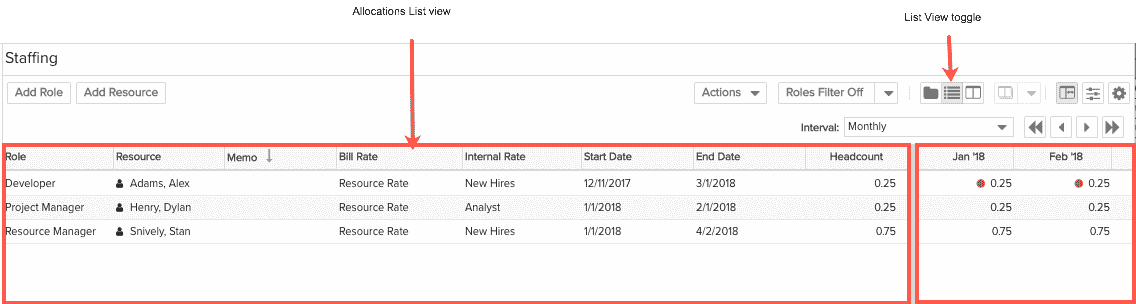
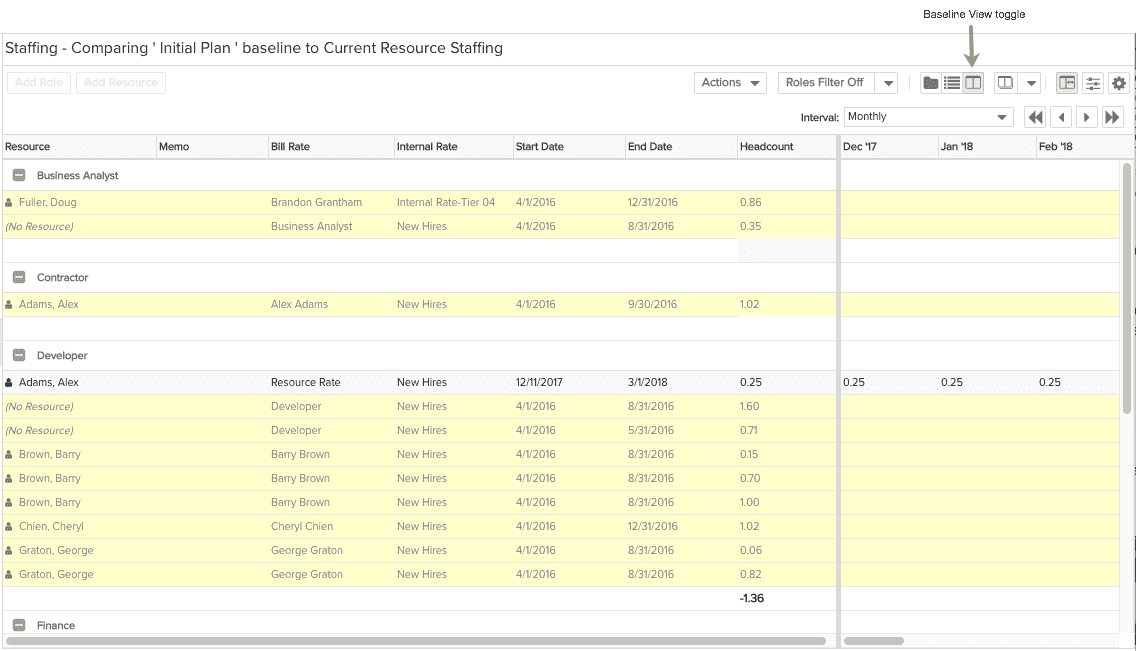
You can display allocations in two ways: grouped by role, and in a list. The whole staffing screen, including the Contours panel, can be displayed in Baseline view (see below).
Grouped View
List View
Filtering Views by Role
On any Staffing screen view you can filter the list to display only specific roles.
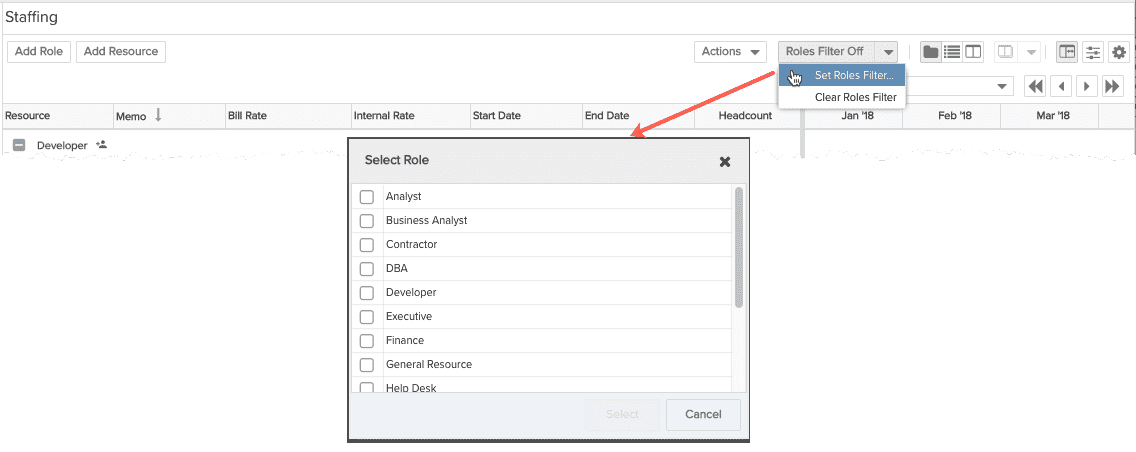
Click the Roles Filter droplist and choose Set Roles Filter.... This displays the Select Role dialog, which displays the list of all roles that have been allocated to the project. Select the roles to filter by and click Select. The Staffing screen will display only the allocation for the roles you selected.
To view all allocations, choose Clear Roles Filter.
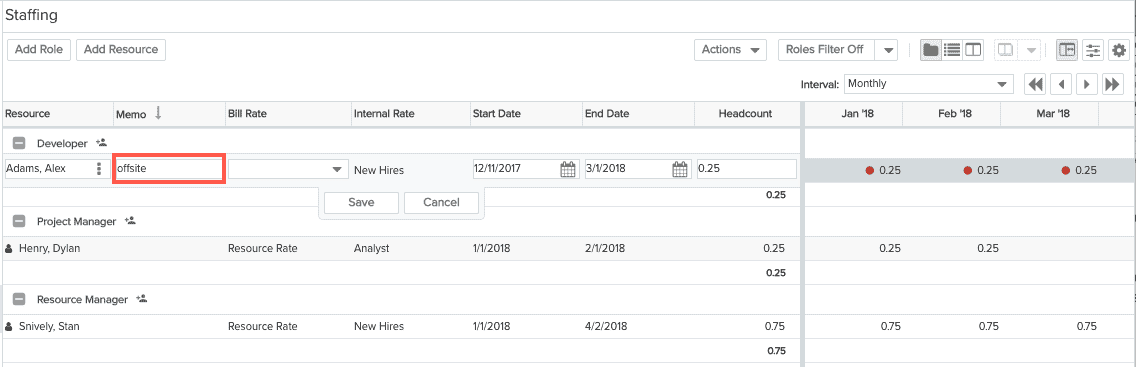
Memo field
A free-form text field for differentiating allocations that have the same role and resource (and overlapping dates) when entering time. For example, you can configure allocations to use different rates for the same Primary Organization role, if, for example, you want different rates for onsite or offsite work, or junior or senior staff. Rather than create separate Organization roles, you can enter title in the Memo field. Once that allocation is scheduled to a task, the user can charge time to "Developer: onsite" or "Developer: offsite". Double-click in the Memo field to enter text.
Settings
The Staffing Settings dialog contains various settings to configure the Staffing screen. To display the dialog, navigate to the Staffing screen and click the settings icon.
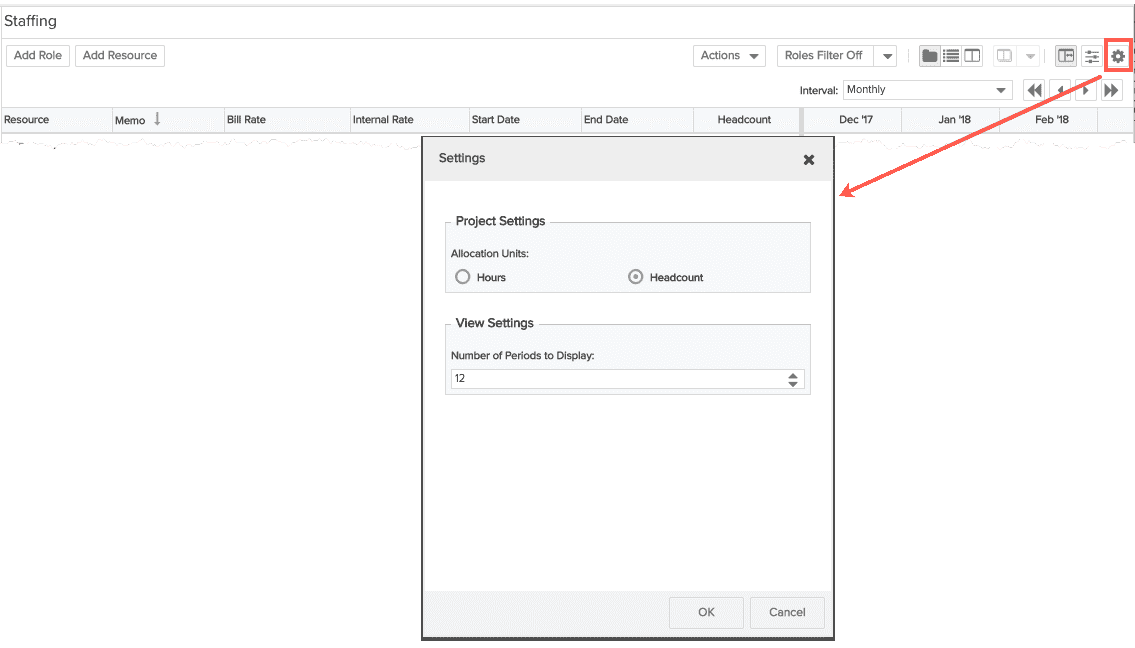
Allocation Units
You configure the allocation units on the Project Info screen for each project. You can change the setting from within the Staffing screen from the Settings dialog.
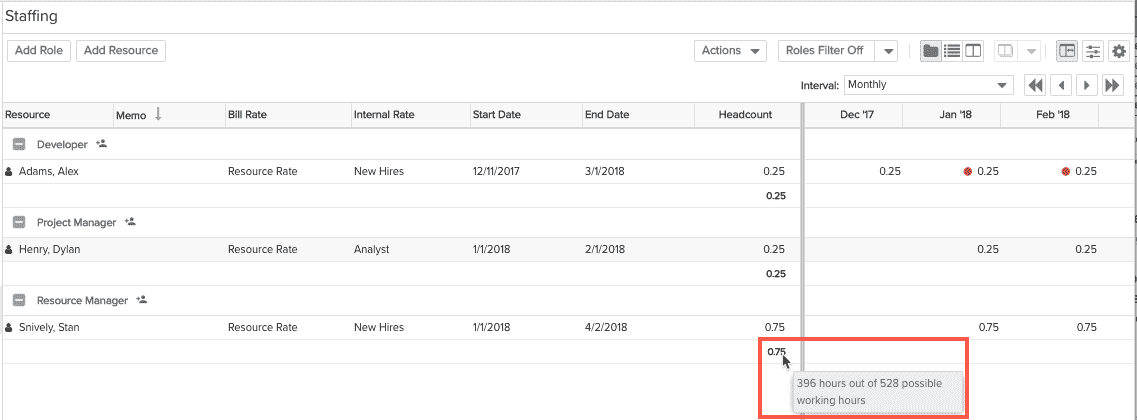
Note that if you are expressing demand as Headcount, you can mouseover the Headcount fields to display the hourly equivalent; if you mouseover the total for a role, you'll get the sum total equivalent, by hours and days.
Contours Pane - Configuring Intervals
The contour interval is determined by the Interval drop list on the Staffing screen (Monthly/Weekly). The default number of periods to display is 12. You can change that setting on the Settings dialog. Specify the number of periods to display; limit is 30. To move through the intervals, click the single left or right arrows to move one period, click the double arrows to move a set of periods (as specified in the Settings dialog). The horizontal scrolling (with the << >> buttons) is sticky, so on subsequent visits to the same project the interval should be where you left it.
How intervals are displayed
On a user's first visit to the Staffing screen, the screen will initially display the most meaningful window of time. The rules are based on the start and end dates:
- If the project starts in the future, show the first period (0).
- If the project starts and ends in the past, show the last n periods of the project.
- If the project is currently going (starts in the past, ends in the future), show one period before today.
- If the project has no dates, pick today.