
Creating events
Note:
- Must be user with administrative privileges to create calendar events on Organization calendars
- Events for resource calendars can be created by the resource's immediate supervisor and members of the Resource standard group.
- Resources can edit their own calendar they have "Can Edit Calendar" setting enabled on their Resource Info tab.
- Events can be single or recurring, working day or non-working day (Administrative), and can add to or remove from calendar working times/days. Project events scheduled during working hours will impact the project schedule; resource events do not affect the schedule.
Events can be created in batch using the Web Services API.
Non-working Events - Full and Partial Day
The non-working day event types match the Administrative billing types used in PPM Pro timesheets. Contact your PPM Pro administrator if you need to modify this list.
Note that all of the non-working event types are hard-coded for NOT working all day (8 hours, or whatever your working day is set to). If you want to account for a non-working event that is less than a full day, you need to create a working event that reflects the remainder of the working hours. Think of partial non-working events as overriding existing working hours, rather than adding non-working hours. Full-day non-working events simply replace a full working day.
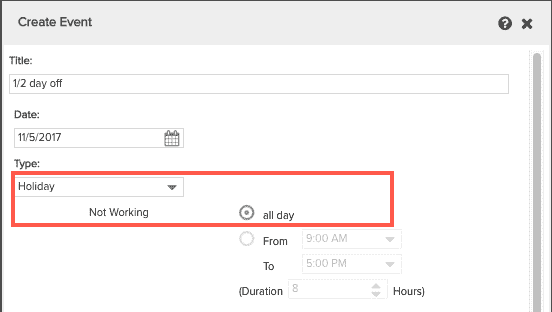
For example, a non-working Holiday is automatically configured for a full day:
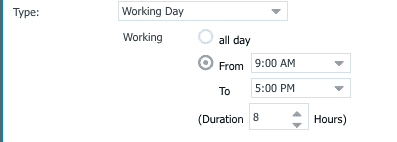
If you have a non-working event that will only use only part of a working day, select Working Day and then configure the remaining working hours. For example, if you were on Jury Duty for 5 hours, then set the Working Day hours to 3 hours duration (assuming an 8-hour work day):

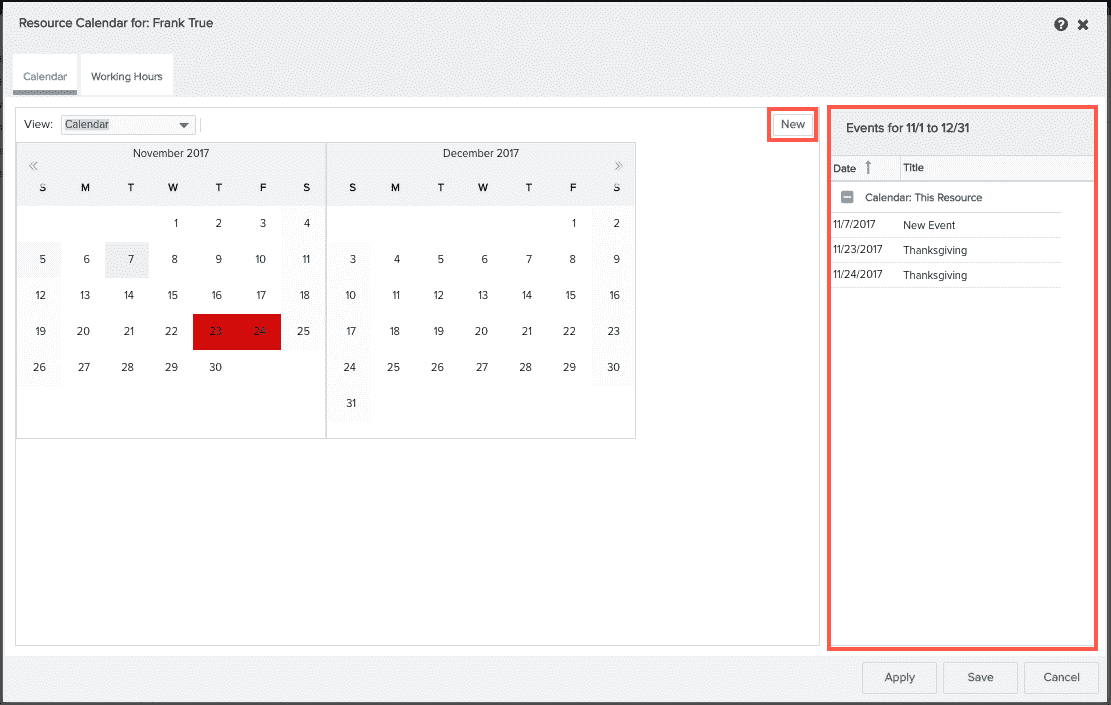
Calendar tab
You create an event by going to the Calendar tab on any calendar (Org, Project, Resource) and clicking the Create Event button; this button displays a dialog that you fill in with information about the event (see below). Existing events are listed in the Events panel; doube-click the event to edit it, or right-click the event and choose Edit from the menu.
Shaded boxes around calendar dates indicate that one or more event is scheduled for that day. The lightly shaded boxes indicate non-working days.
- Navigate to either a resource's Info page and choose Menu > Edit Calendar, or navigate to a project's Settings page and choose Actions > Edit Calendar. For Organization calendars, navigate to Admin/Setup/Calendar; right-click on the calendar you wish to edit and choose Edit.
- Click the Calendar tab if it is not already selected, then click the Create Event button. The Create Event dialog appears.
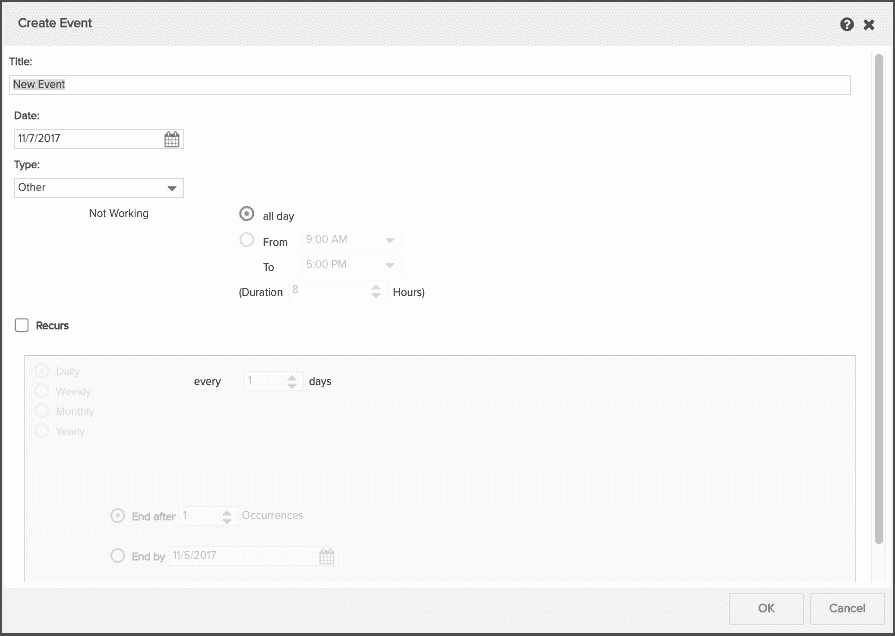
- (Required) Enter a Title for the event. This is the name that will appear in the Events panel.
- Choose the Date.
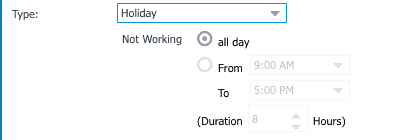
- Select the Type of event. Remember - if you choose Non-Working event, it will be hard-coded to "All Day". If you have a partial-day non-working event, simply configure the Working Day for the remaining working hours.
Holiday (full day)
.
Working Day - can configure hours
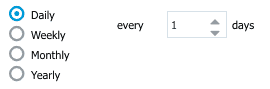
- If the event is recurring (happens more than once in a predictable manner), select the Recurs checkbox.
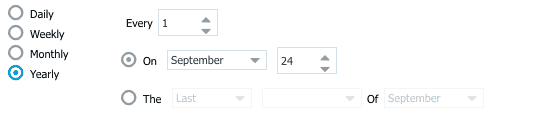
- Set recurrence pattern by choosing the interval (Daily, Weekly, Monthly, Yearly).
-
If you choose Daily, enter how often then event will happen (for example, every 1 day, every 3 days, and so on)
-
If you choose Weekly, choose the day of the week and the weekly frequency

-
If you choose Monthly, choose the number of the day of the month and the frequency, or the day of the week and frequency

-
If you choose Yearly, set the yearly interval, and then choose either a specific date, or the day of the week, the week number of the month, and the month.
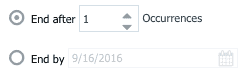
- Specify when the last event will occur. Either:
- end the event after a certain number of occurrences by selecting the radio button next to End after and picking the number of occurrences
- end the event by a specific date by selecting the radio button next to End by and selecting a date
- Click Save.
API for Creating/Updating Calendar Events
PPM Pro's WS API supports creating and deleting calendar events. See the Javadoc for this call by navigating to Admin/Web Services, clicking the View API Documentation button, and searching for "calendar" in the TTBusObjService class.
Note: the API supports non-working day and non-recurring events only.