
Designing Request Forms (Details)
The Admin/Setup/All Entities/Requests/Details page is where you determine the fields and layout of the request form (Details tab) that appears in the Request modal when you create/edit requests. You can create groups of fields, and add, remove, and rearrange fields in those groups. Each field has properties that you can configure, such as whether a field is required, or is visible or editable when you create a request. If you are using gates, then you can also specify what gates fields should appear on, and whether they are editable. Note that if you created a restriction on a field (see Creating Field Restrictions, then the restriction determines which users can view/edit the restricted field.
The Requests/Details page is also where you map request fields to fields in associated entities.
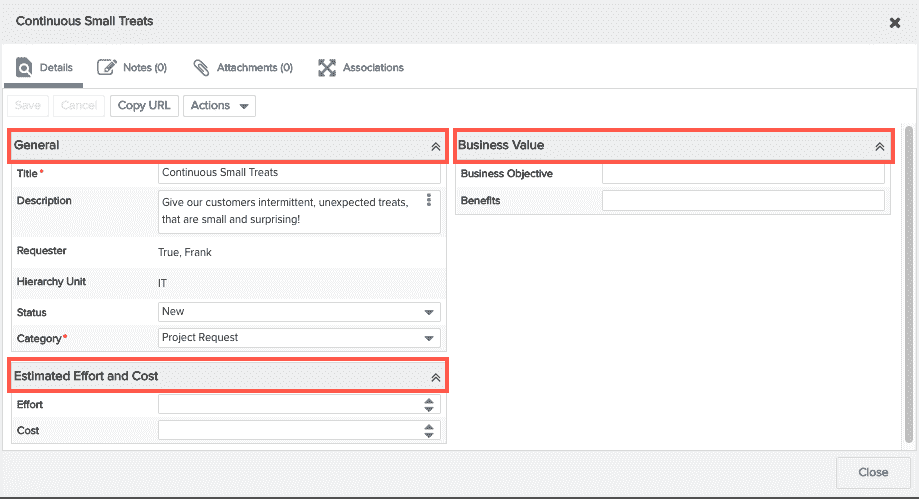
Below is a screenshot of a request form (Details tab that the user sees) for a request that includes three group headers (General, Estimated Effort and Cost, Business Value) and their fields:
You choose the fields to display on your request form from the Available Fields panel on the Admin/Setup/All Entities/Requests/Details page. This list excludes any fields that were hidden on the Admin/Setup/All Entities/Requests/Available Fields page, as shown in the screenshot below.
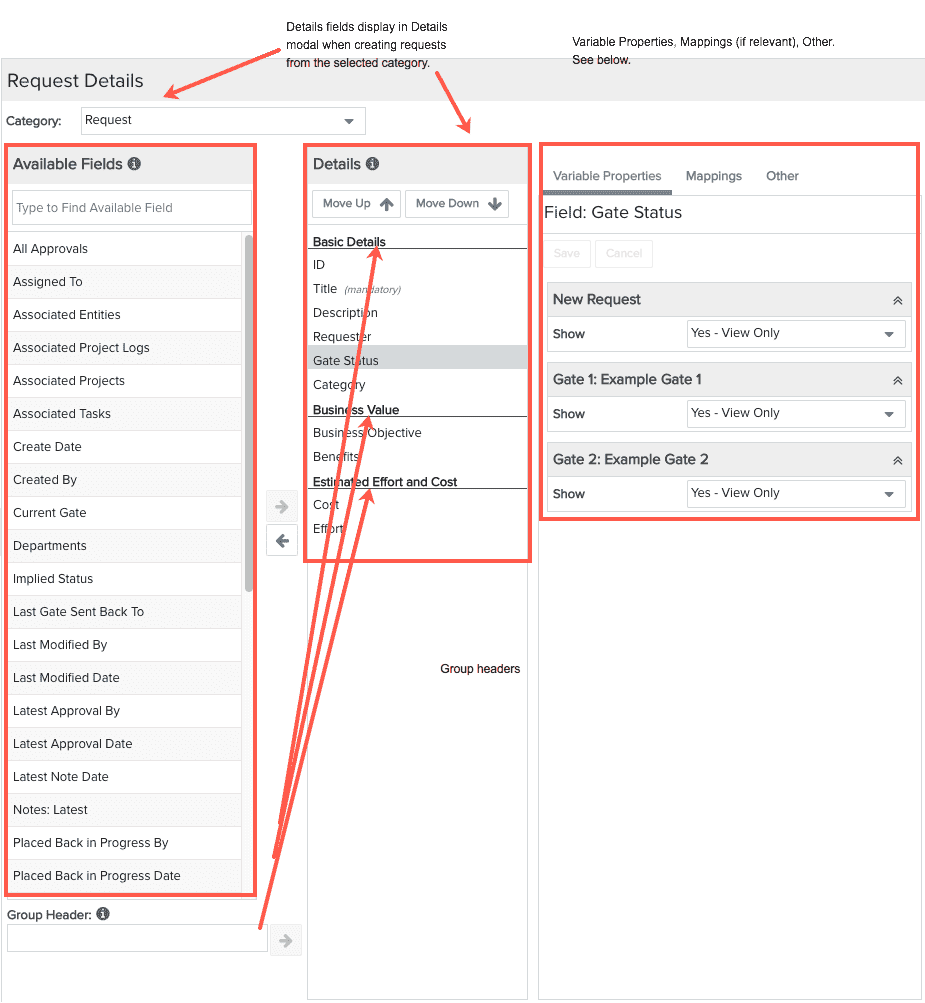
If you have created multiple request categories, you associate each form with a category (if you are using only one category, then you will build only one request form). You can provide different combinations of Details fields for different categories. You pick the category you want to associate with the Details page by choosing it from the Category droplist near the top of the screen. Note that if you have configured only one category, the droplist will be disabled. If you have multiple categories, select a category and then lay out the Details fields.
Any restrictions you configured on the Available Fields page will apply to those fields on the Details page.
|
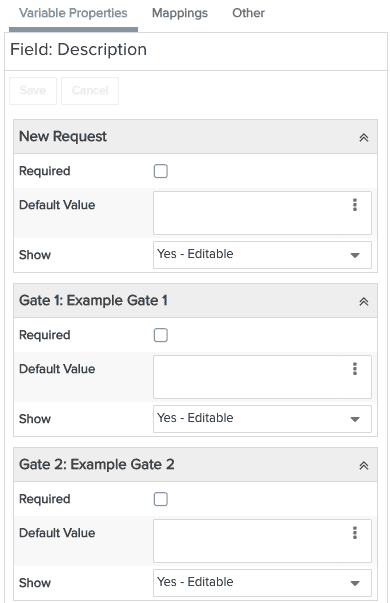
The Variable Properties tab is where you configure how the field should show/be editable for the new request itself, and for each gate (if using gates). The tab is broken out into multiple sections - the "New Request" section for how the selected field is configured for a new request, and one or more "Gate:" sections for each gate. |
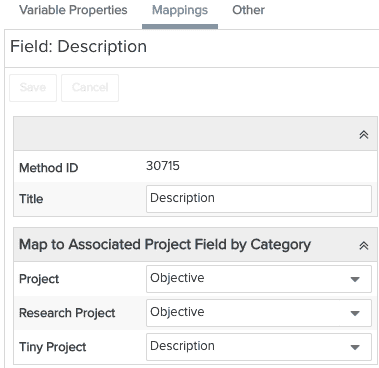
The Mappings tab appears only if there is at least one associated entity defined for the request category and the selected field is "mappable". Each category for associated entities will be displayed along with a droplist possible fields to map. In the example below, the project entity is associated, and the 3 project categories/fields are displayed. See Mapping Request Fields for more information.
|
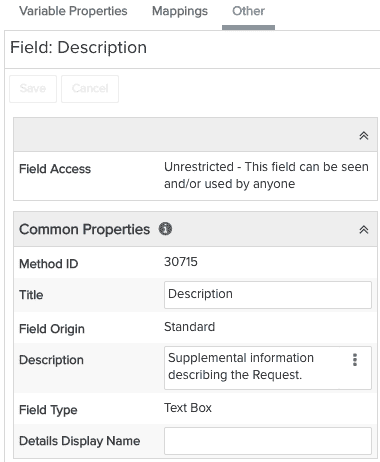
The Other tab reflects any restrictions configured in Available Fields for the selected field. See Creating Restrictions for Requests. This tab is also where you can enter a field description, modify the field title, or configure a different title to display on the Details modal. Example with no restriction:
Example with restriction: |

Understanding Form/Details Layout
The layout for the Details tab is formed by the Group Headers and fields you specify here on the Details page. As mentioned earlier, typically the Details tab will be different for each category (different fields included, different field groupings, for example).
If an end user adjusts the layout of a Details modal, let's say by dragging/dropping a section to a different position, the changes will also be reflected in the Details modals of other requests with the same category.
Note also that some fields are marked "Mandatory" and cannot be removed from the form. Please see Required vs Mandatory Fields
Default Details Fields
The following required fields will appear on any request category's Details panel - you can customize as desired.
- ID
- Title
- Requester
Status and Gate Status Fields
Placing Fields on the Details Panel
You can drag and drop fields from the Available Fields panel to the Details panel, or you can select a field in the Available Field panels and click the right arrow. There is a large set of standard fields that are useful to put on the request form and/or the requests grid. See Standard (OOTB) Fields for Requests
Creating Group Headers
It's common to group like fields together on the Details panel. You can create headers for field groupings by entering the header text in the Group Header field and then clicking the right arrow.

Adjusting Field Order
You can move fields up/down by dragging and dropping, or selecting the field and clicking  .
.
Removing Fields
To remove a field from the Details, select the field and drag it back to the Available Fields panel, or click the left arrow.
Updating Fields
The PPM Pro administrator can update the fields at any time (even after deployment) by adding, removing, or reordering the fields on the Details panel. If your PPM Pro administrator removes a field, the field will be removed from all users' Details panels. If the administrator adds a field, the field will appear for all users.
What's Next?
If you've got your categories and Details taken care of, it's time to configure the grid columns for your Requests grid. See Laying Out the Grid Columns for Requests.