
Configuring the Resource Workbench
You can configure the resource list (upper) and allocation details (lower) panes of the workbench using the Configure Settings dialog.
Customize the Resource Workbench
Use the Resource Workbench Settings dialog to configure the following:
-
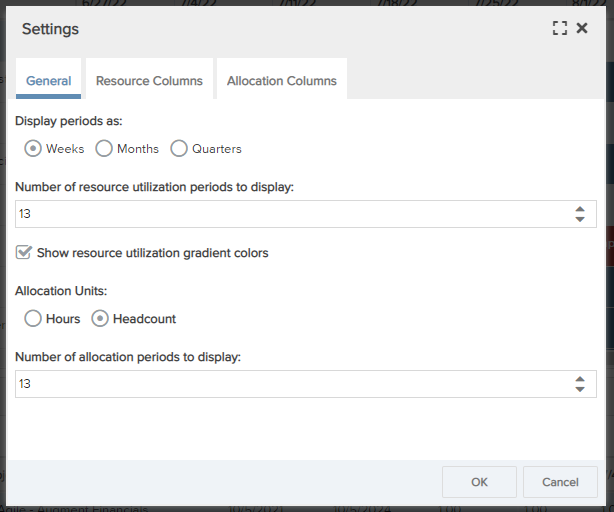
the calendar period to display - weeks, months, or quarters
-
the number of periods to display in the Resource Utilization pane (upper grid)
-
whether to display gradient colors to represent different utilization values (see Configuring Resource Availability Settings for details about configuring the color scheme - must have Admin privileges to configure)
-
whether to display allocation units in Hours or Headcount
-
the number of allocation periods to display in the Allocations pane (lower grid)
-
the columns to display on the grid
-
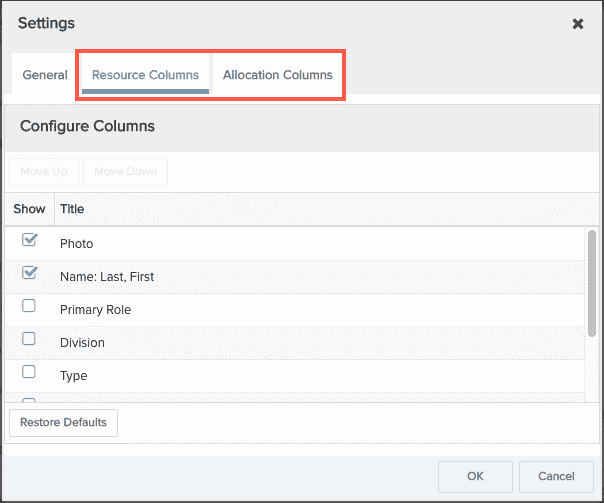
Resource Columns tab - select columns for the Resource List pane (the available columns are the same as the columns in the Resources view)
-
Allocation Columns tab - select columns for the Allocation Details pane
-
-
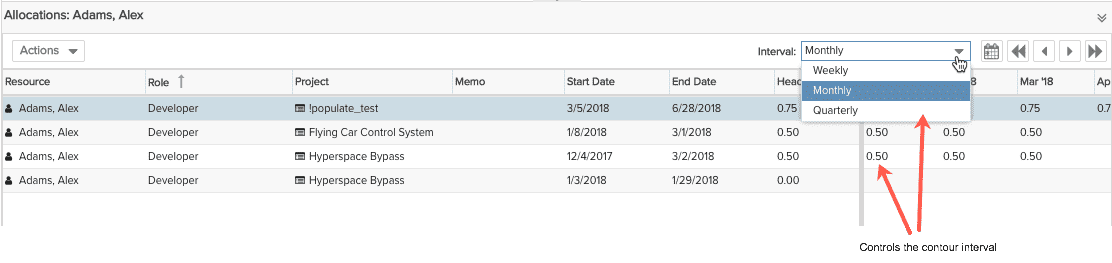
the interval in which to display the allocation periods in the bottom pane (weekly, monthly, quarterly)
To configure settings
- Click the gear icon in the Resource Workbench toolbar to display the Settings dialog:
- Configure the General settings.
- To add/remove columns in the Resource List, click the Resource Columns and select/deselect columns. Repeat for the Allocation List by clicking the Allocation Columns tab.
- Click OK.
Display a Resource Photo
You have the option to display a column that contains a resource photo for each record in the Resource List pane. Users often find it easier to scan photos of resources rather than their names. You can upload a photo, and then hide/show the Photo column (see above).
![]()
If you have an image registered with Gravatar.com, this image will be used automatically to populate your resource photo if you do not already have a photo.
If you do not have an image registered with Gravatar.com and have not uploaded your own image, PPM Pro will generate a unique “identicon” and use it wherever the resource photo is displayed.
Upload a photo
- Select Change Photo from the Resource menu located in the right-hand corner of the application, or navigate to your Resource Info page and choose Menu > Change Photo.
- Browse to your image and select it.
- After you upload your image, the system crops it to a square. If you like the composition, just click Save. You can also adjust the cropping and then save the image.