Creating New Entities From Requests
- Users with the Request User license type cannot create entities from requests as their license limits access to other entities.
- Both the request and the target entity must be configured to support request associations. If you do not see an Associations tab in your request, then the request category is not configured to allow associations at that step of the workflow or is not configured to support associations at all. Check with your PPM Pro administrator, or use a different request.
- To create entities from a request, you must have Create permission on the target entity (for example, Project > Create)
Requests that support associations also allow you to create instances of supported entities (project logs, tasks, projects) - provided you have create permission for the target entity type (for example, Create > Project permission). A newly-created entity is associated automatically with the request. Note that you do not need to decide in advance what type of entity to create, as long as you administrator configured the request category to support all available entity types. Your organization's business processes will determine when entity creation is expected, but generally speaking you can create an entity from a request at any time during the approval process or post-approval.
In addition, you can copy data from a request into an associated entity at any time, including when creating an entity from a request. See Copying Data from a Request into Another Entity below.
Read on to learn about:
- Creating an Entity from a Request
- Copying Data from a Request to an Associated Entity
- Reporting on Associations
- Customizing the Associations Grid
Creating an Entity from a Request
Creating a new entity from within a request follows similar steps as creating an entity from its main view, except there is an additional option to map request fields and copy data to the target entity.
- Open (double-click) the request you wish to create the entity from.
- In the request modal, click the Associations tab. If you are creating a new request (not opening an existing one) then you will need to save the request before the Associations tab will be active.
- In the Associations tab, open the section (project, project log, or task) for the entity you wish to create and click the New button.
- In the New entity wizard, for creating a project or project log fill out the fields on Step 1. For creating a new task, fill out the fields on Step 1, click Next, and then also select the parent task on Step 2.
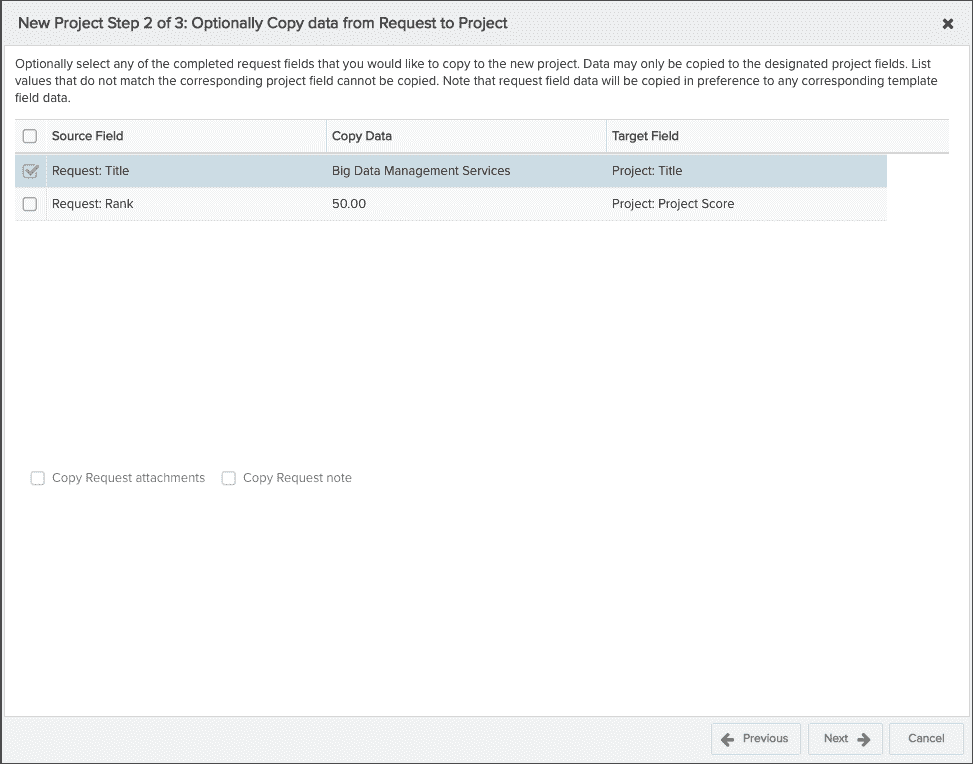
- Click Next to go to Step 2 (for project or project log) or Step 3 (for task). This is an optional step that allows you to copy mapped data from the request to the new entity; select the request fields you would like to copy into the new entity. Note that if you are creating a project from a template, any value you supply from the request will take precedence over an existing value in the template. See Rules for Copying Data. The set of fields available to map was determined by your PPM Pro administrator (Mapping Request Fields to Fields in Associated Entities).
- Click Next.
- Fill out the fields (at least the required fields) in this last step. Note that if you chose to copy data into a project, that data should populate the appropriate fields on Step 3. For example, in the screenshot above the request Title is selected - that title value will automatically populate the project Title field on Step 3.
- Click Save.
- The new entity will be added to the Associations list.
Copying Data from a Request into another Entity
You can copy data from a request into an associated entity at any time, including when creating an entity from a request. The data you can copy is determined by the field mappings created by your PPM Pro administrator. As described above with regard to associating entities, in order to copy data the target entities must be configured to display/manage associations.
Rules For Copying Data
When copying data from a request to an entity - whether just copying data to an existing entity or creating an entity and copying data at the same time - standard permission/validation rules apply. For example:
- When copying the Department field from a request to a project, you (current user) must be on the Department team with "Can Create Parent Relationship with Projects" permission, or in the Organization group. Otherwise, you will not be able to select the field.
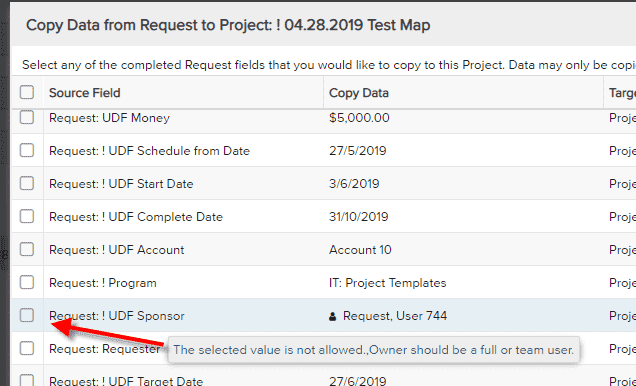
- When copying a human resource value from the request to the project owner field, the resource must be an active, full/team user. Otherwise you will no be able to map the field.
- If you are copying data to a project and there are no tasks in the project, the Start and Target dates can be mapped to the Project Entity. If there are tasks, the project Start and Target dates are populated by the earliest and latest task dates and will no be mappable.
If you try to select a field that does not pass the pre-copy validation, the checkbox will be disabled and you will see a hover-text message, as shown below:
Copy Data From a Request
- Navigate to the requests List or Card view.
- (Open) double-click the request whose data you wish to copy into an existing project.
- Click the Associations tab.
- Open the section (project, project log, or task) section and select the entity to copy the data to and choose Actions > Copy Request Data into Project (or Project Log or Task).
- In the Copy Data dialog that appears, choose the request fields you would like to copy into the project. See Rules for Copying Data.
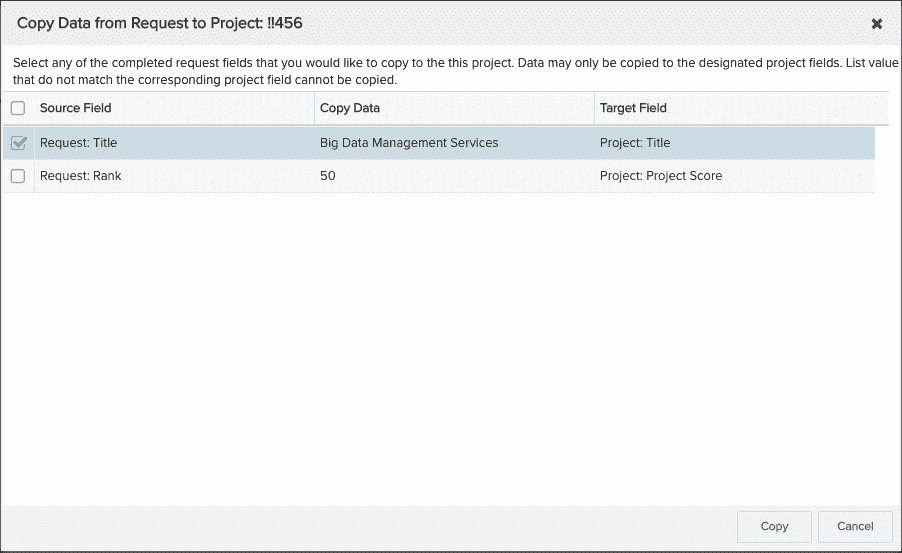
- Click Copy.
Reporting on Associations
Notes:
- The nature of the hierarchical report sources does not allow for reporting on associations between the same entities (for example, an issue's related issues, a task's related tasks). For example, if you are using a Portfolio report source and want to include associations, you can include, for example, issue -> task associations, or task -> request associations.
- When reporting on associations, it's best to limit the report to one level of associations. If you include multiple levels (2+), the report is likely to include recursive associations that will repeat content and exponentially inflate the size of your report.
- Associations are not child entities. However, when reporting on associations you choose the associated entity from the Children folder. For example, for 'Project > Children > Task > Children > Finance Entry', the finance entries that are shown will be the ones associated to the task, and not the project.
You can report on associated entities by including fields from the Children folder of the target entity. For example, if you want to report on all the associated entities for a request, you would:
- Choose your report source - this example uses the All Requests report source.
- Select the List output type.
- Choose the fields you want included in the report and drag them into the Selected Fields panel. This example simple uses the request Title field.
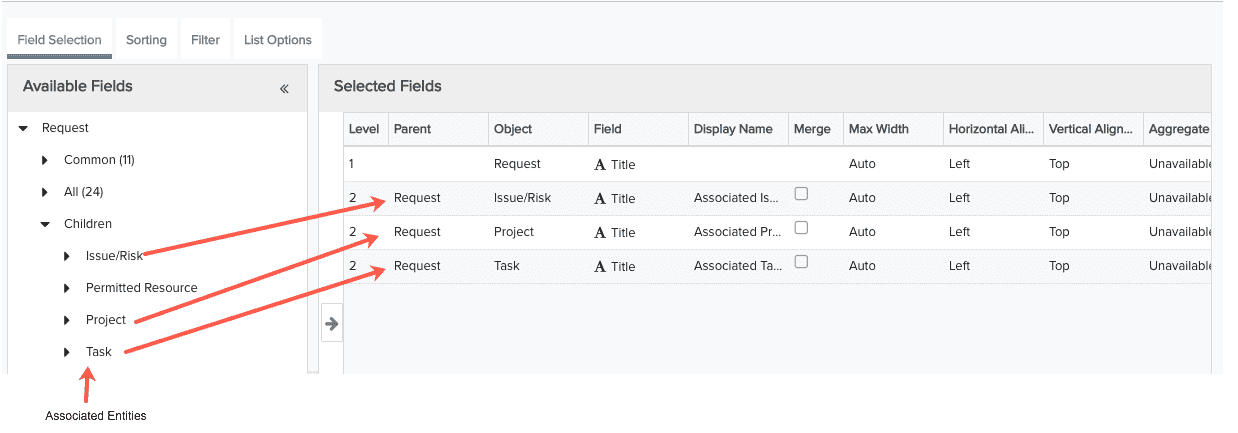
- Go to the Children folder, locate the folders of the entity type(s) you are interested in (such as Task, Project, Issue/Risk).
- Select the fields you want to include from the associated entity (this example uses the Title of each associated entity - note that we added a Display Title of "Associated <entity name>"). Your report definition would look something like this:
- Run the report.
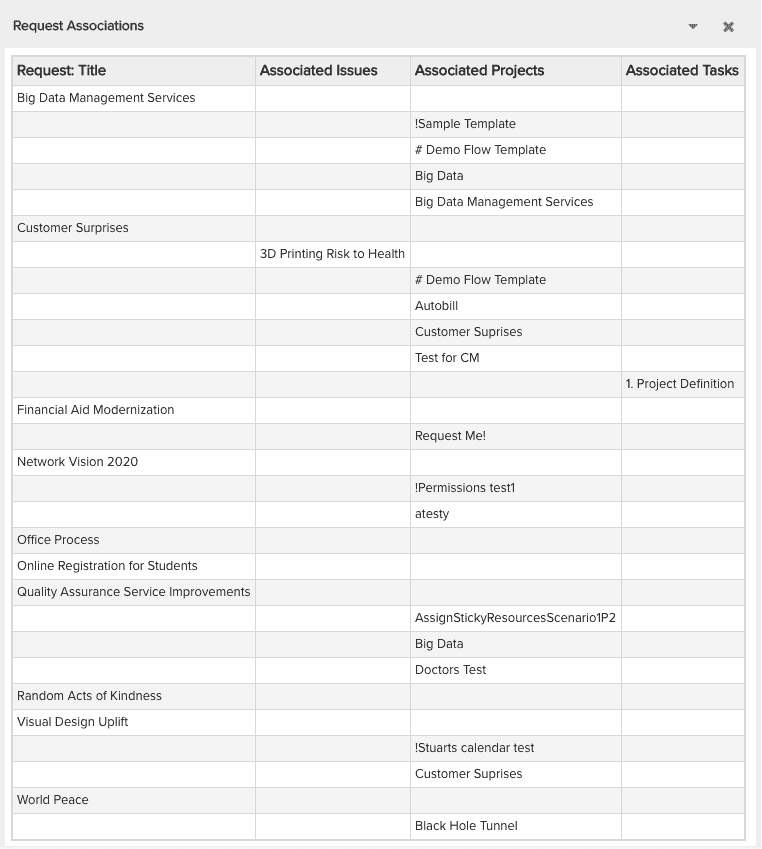
The example report is shown below:
Customizing the Associations Grid
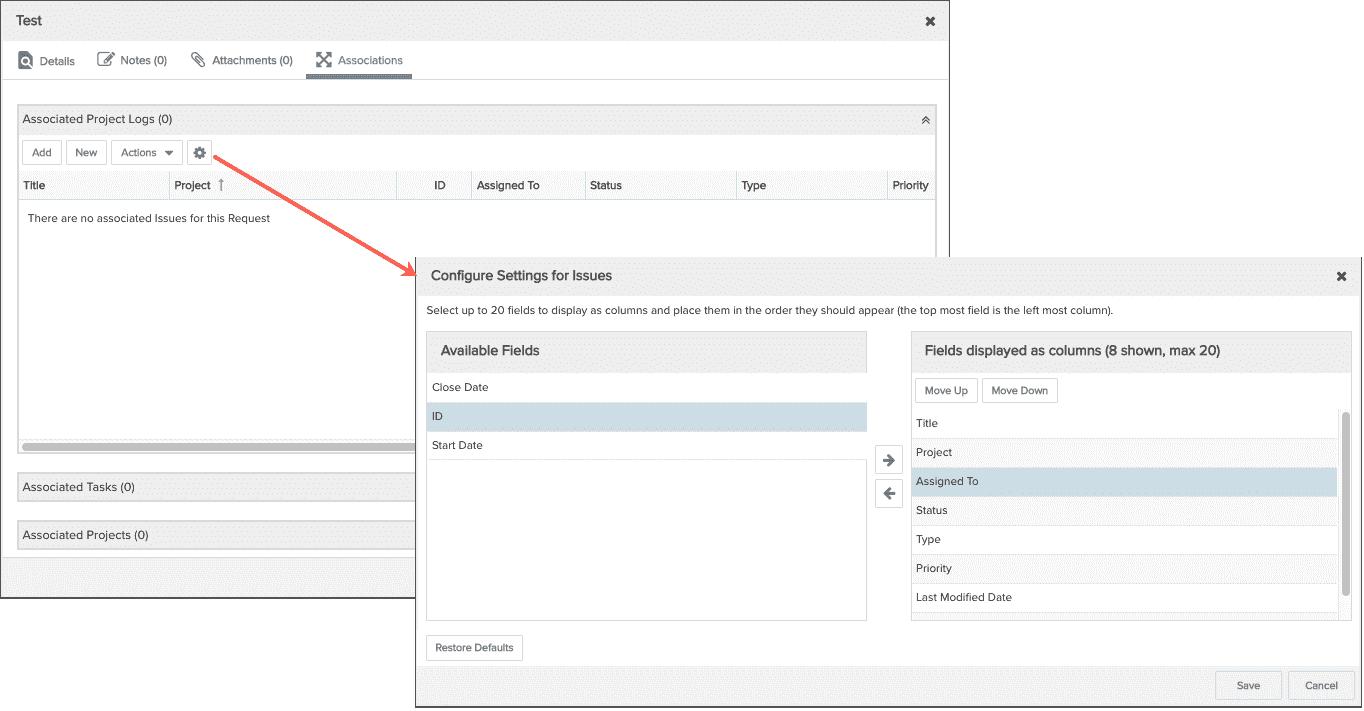
You can determine the columns that appear in the Associations grid using the Configure Settings dialog. Click the Configure Settings gear ![]() icon to display the dialog. You configure the grids for each association type (project, project log, task) separately.
icon to display the dialog. You configure the grids for each association type (project, project log, task) separately.
Add/Remove Columns
To add columns to the grid, open the Configure Settings dialog and select the fields in the Available Fields pane and then click the right-arrow. To remove columns, select them in the right-hand panel and click the left-arrow. You can display 20 columns max. The list of fields available in this dialog is determined by the request category, which is configured by an PPM Pro Admin.
Lock Columns
You can select one or more columns to remain "locked" to the left of the screen in the non-scrolling region, preventing them from scrolling out of view. The Title field for an entity is locked by default. To lock an additional column, select the field and click the Lock button. To move a column into the scrolling section of the grid, select it and click the Unlock button (appears once you select a locked column other than Title).
Move Columns
You can move columns to any position in the grid by simply dragging the column header in the grid. Or, you can change their position by clicking the Configure Settings icon and using the Move Up/Move Down buttons to reorder the columns.
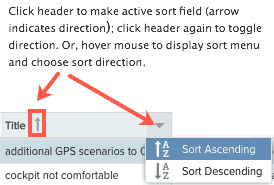
Sorting
To sort a list, simply click on a header. An arrow pointing up indicates ascending sorting; down indicates descending. Alternatively, click your cursor in the header to display the sort menu and choose the sort order - ascending or descending.