
Adding Threaded Notes to an Entity
![]()
Note: All entity types can have notes. This topic uses screenshots from the portfolio entity as an example. Also remember that for projects, you won't see the tabs like the screenshot above, but rather will click the Notes section link.
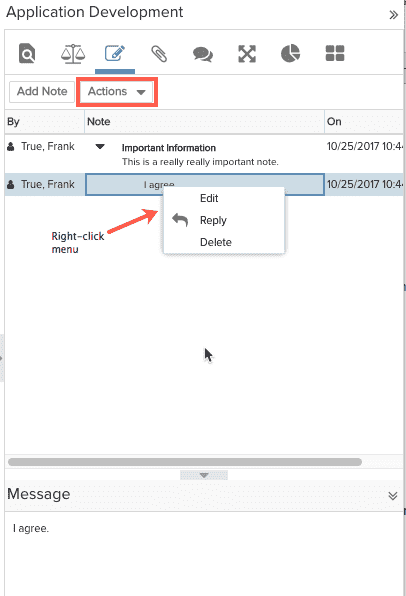
You can add or reply to notes, provided you have edit permission on the entity. For example, to add or reply to a note on a project, you must have Edit > Project permission. Only the note creator can edit existing notes or delete the note.
The Notes panel has a right-click context menu for performing actions on task notes; the same actions are available under the Actions menu. The Message pane will appear beneath the Notes list or to the right of the Notes list, depending on the width of your browser window. The note message can hold up to 1 million characters (plain text, including spaces, and mark-up).
To add a note
1. Navigate to the entity (for example, All Projects/ProjectName/Tasks/taskname or Issues/IssueName).
2. Click the Notes tab (or click the Notes link if you are in a project).
3. Click Add Note.
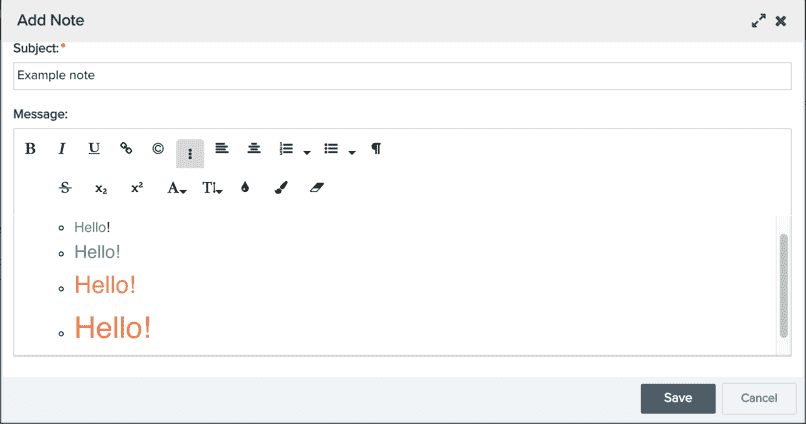
4. A rich text editor is displayed, where you can enter the appropriate text for your note and then click Save. Click here for more information about using the rich text editor.