Creating Internal Rate Tables
This video demonstrates the use of internal rates with effective dating as well as the use of tables with multiple rates. Duration: 5.5 min.
Organization/Finances/Internal Rates is where you create rate tables that can be assigned to roles and/or resources. Rates tables support the use of effective dates - that is, you can specify a series of dates that go into effect on a specific date. See Effective Dates for more information.
PPM Pro provides an out-of-the-box set of tables - you can use them or delete them and create your own from scratch.
If you want to create a one-off, or special rate that is assigned to one resource or role, you can create a custom rate.
Notes about updating rates:
- Updates to internal rates are applied to projects automatically and immediately.
- If you update a rate that is in use with a large number of resources/roles that are associated with projects, the update is batched and run at 8pm in the customer's timezone.
- Updates to internal rates do not get applied to hours that have already been entered on timesheets. Members of the Time Manager and Internal Costs groups (must be in both) group can manually update the rates for existing hours by navigating to Organization/Manage Time/Resource Time, selecting the timesheets to update, and choosing selecting Actions > Adjust Internal Rates. See Managing Resource Time - Time Admin.
Default Rate Table
You must have a default rate table, which is used as the default internal rate value when creating a new resource. You can designate a rate table as the default when you initially create the table, or you can edit the table later and check the Default checkbox. To make a table the default, simply edit the table you want to make the default and click the Default checkbox and save - this establishes the newly selected table as the default, and unselects the Default setting on the previous default table.
Rate Table Status
Every rate table is assigned a status (Active, Inactive, Retired) when it is created; Active is the default status.
-
Active - Rate table can be assigned to resources/roles.
-
Inactive - Rate table cannot be assigned to resources/roles.
-
Retired - Existing roles/resources can keep their assignment to a retired rate tables. When creating new resources, only active rate tables can be assigned.
You can filter the rate table list by status by checking one or more status checkboxes at the top of the screen:

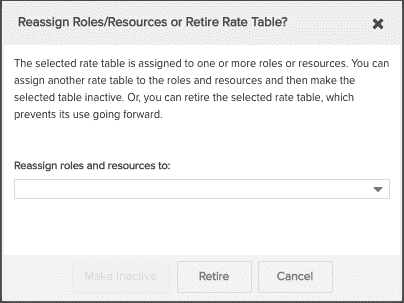
You can change the status of a rate table after it is created by editing the table (double-click the table or select the table and choose Actions > Edit) then update the Status field. If you inactivate a rate table that is in use, you will be prompted to reassign the roles/resources to another active rate table or to retire the table:
Creating a Rate Table
Click the New Rate Table button and fill out the fields in the New Rate Table modal.
A unique table title and a rate are required.

Click Save, or Save & New if you want to add another rate to the table.
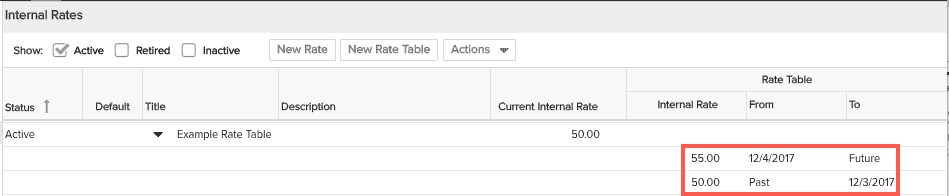
You now have a rate table called Example Rate Table, with a single rate ($50), which is effective forever (past-future).

Adding a Rate to an Existing Table and Configuring Effective Dates (New Rate)
Select a rate table (click on the row that contains the title) and click the New Rate button, or right-click and select New Rate from the context menu.
The inline editor opens, and you enter the new rate and the date you want the rate to take effect. You are only prompted to enter a "From" date, because the table will automatically determine the "To" date based on the existing rates. You can adjust as needed.
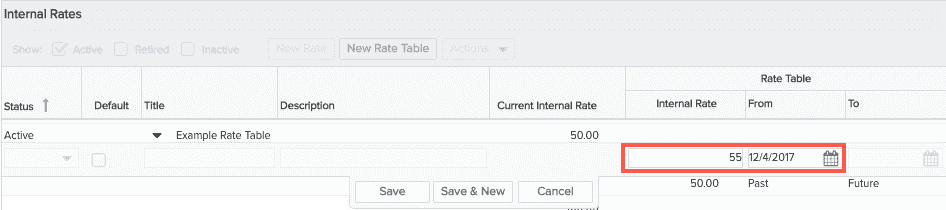
Click Save, or Save & New if you want to enter another rate.
You now have added another rate to the Example Rate Table, and made it effective on 12/4/2017.