
Creating User-Defined Groups and Adding Group Members
Note: Must be member of Admin standard group to create and populate groups. Please avoid naming your group "Full Users" or "All Users" as these are standard groups provided by PPM Pro.
See Creating Filter-Based Groups for information about creating dynamic groups that are populated using a resource filter.
Resources who are not associated with users cannot be added to groups. If a user is added to a group and then deactivated, the inactive user will still appear in the group member list, and the group will appear on the resource's Group page. This is useful if/when you reactivate the user, because all group memberships will be reinstated (this is useful for long absences, like maternity/paternity leave).
Note that groups can be members of other groups. For example, when you add group "Monkeys" to group "Mammals", the "Mammals" will be shown as an Ancestor Group (and also parent of "Monkeys"). Groups contained in other groups will inherit the Ancestor group's permissions - whether implicit permissions from a standard group like Organization, or permissions granted by a permissions profile.
To create a group
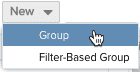
- If you are not already there, navigate to Admin/Groups and select New > Group.
- Enter a Title for the group. It is useful to use a descriptive title, such as Development_Group, Testing_Group, or Review_Group.
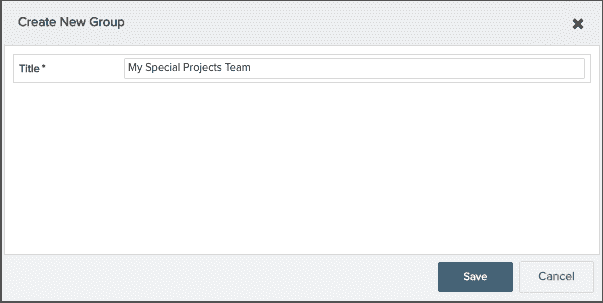
- Click Save.
To edit a group name
- Double-click anywhere in the row that contains the group to invoke the inline editor.

- Edit the name and click Save.
You can also select the row and choose Actions > Edit, or right-click in the record and choose Edit from the context menu.
To delete a group
Right-click on the row that contains the group and select Delete from the context menu.
You can also select the row and choose Actions > Delete.
Adding One or More Users to a Group
- You can add multiple users (or groups) to a group from Admin/Groups. You can add a single user to multiple groups from Resources/resourceName/Groups (see below).
- If you are not already there, navigate to Admin/Groups and select the group you want to add user to.
- In the right-hand pane click the Members tab, and then click the Add button.
- In the dialog that appears, select the user/group/unit to add to the group. Ctrl-click or Shift-click to multi-select. Use the filter field to narrow your list to a particular type of user, or role, for example.
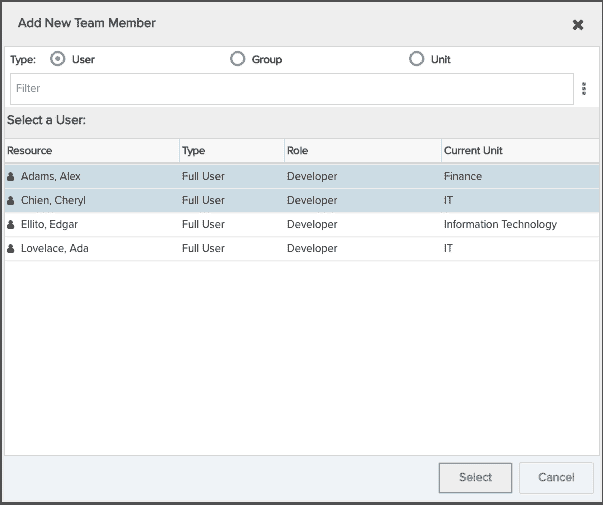
- Click Select.
Adding a User to One or More Groups
- Navigate to the Resources list and double-click the resource you want to add to one or more groups.
- Click the Groups link, then click the Add button.
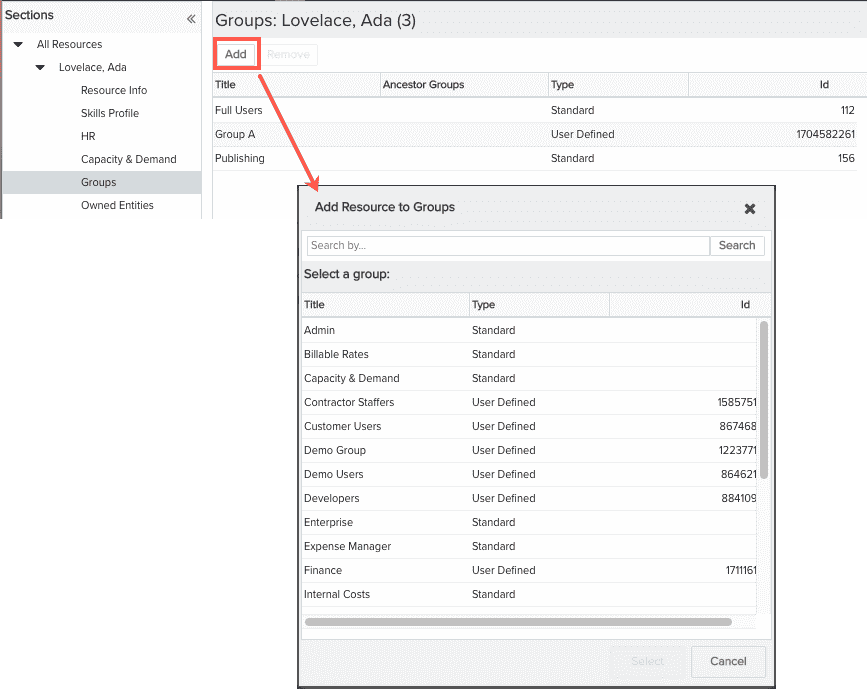
- Select the group(s) you want to add the user to and click Select.