General Data Protection Regulation (GDPR)
The European Community adopted GDPR in May 2018. The gist of this regulation is to be more transparent with individuals about their personal information and give them more control over how and when it's used.
The following are the primary tenets of this regulation and how PPM Pro supports them:
| GDPR | Description | PPM Pro Support |
|---|---|---|
| Right to be forgotten | Ensure that there is no information still in a system that could be used to personally identify a person who has opted out or is no longer a user of that system. |
PPM Pro provides guidance for manually anonymizing personal information reflected in user interface elements. In addition, PPM Pro provides a product feature that programmatically anonymizes not only UI artifacts that present personal information, but also artifacts at deeper levels of the application, such as resource history tables and logs |
| Right to opt in | Do not collect data on a person until that person grants permission/that person opts in. | Given that the primary capabilities and purposes of the PPM Pro product are for performing portfolio, project, and resource management, and by virtue of representing resources within and granting users access to PPM Pro so that they can be assigned to and perform such work, Planview assumes that there is no need to collect explicit opt in agreements from these resources and users. If a customer believes such agreements are needed, it is the customer's responsibility to obtain these agreements before adding resources and granting users access to PPM Pro. |
| Right to receipt of data | Respond to a former user's request for what information about them may still be in the system ("what info do you have on me?"). | The customer is responsible for responding to this request and extracting any remaining information through reports or other means; there is no additional support from PPM Pro. |
What Information Needs to Conform?
In PPM Pro, personal information is generally stored in what is referred to as the "resource record" and the "user record". A user record is based on an existing resource record; user records have logins, resource records do not. Once a user record has been created, the resource record it is based on cannot be deleted from the system, even after the user record has been de-activated. Because we cannot delete certain entities or required fields, the approach PPM Pro has taken is to anonymize data where deletion is not possible. Where deletion is possible, the approach is to blank out the field values.
A resource/user record minimally contains the user's name and login - both of these fields are required. PPM Pro provides a way to remove optional information, and anonymize required information, when the GDPR feature is enabled (is activated for the customer's environment, which can be done by contacting Customer Care to ask that it be turned on). The resource name will be obfuscated with the text "Anonymized <resource ID>", and the user login will be obfuscated with "Anonymized <customer ID>.<resource ID>". For example, "Anonymized 123456789" and "Anonymized 9999999.123456789".
Note that the information contained in the resource record surfaces in other areas of the product; any obfuscation done to the resource record will propagate to certain other user-visible areas in the product accordingly. For example, entity owner fields (task owner, project owner, for example), and any lists that contain resource names. Remember that our solution will remove references to "who" performed an action, but the action itself will not be removed. For example, the project history table will still reflect a change of owner, but the owner name will be anonymized.
The following standard (out of the box) fields are addressed:
- Resource Name - Resource - ID
- Login (user)
- Phone (work) - blank
- Phone (mobile) - blank
- Email - blank
- Home Address - blank
In addition, all string UDFs on the resource record are also blanked out.
Note: If you have a sandbox environment you need to also anonymize the resources in that environment.
Out of Scope
The following elements are not addressed by the manual steps or the GDPR feature.
- UDFs in areas other than the resource record
- Number UDFs on the resource record
- Attachments
- Billing Rates (if enabled) - Resources staffed to projects are automatically added to the Billing Rates section. The value in the Billing Rates/Name column defaults to the resource name and must be anonymized manually; the Role/Resource value is anonymized by the GDPR feature.
- Notes
- Status Comments
- Baselines
- Skills Profile
- Saved reports
- History tables and activity logs with resource string data
- Non-standard features (examples: Project dedicated to active directory, Portfolio concerned with resource turnover)
Customers are responsible for physically scanning elements such as notes, user-defined fields, lookup lists and attachments for personal information, regardless of whether they used the GDPR feature or manual solution. See Cleanup/Verification below.
How to Anonymize
In order to anonymize a resource, the resource must have a termination date that is prior to the current date. After you anonymize any resource(s) by any method, you'll need to do cleanup/verification (see Cleanup/Verification).
- Automatic Activation - If you have the GDPR feature enabled, any time you set a resource's termination date prior to the current date, you will be asked if you want to anonymize the resource.
- Ad Hoc Activation - If you have the GDPR feature enabled but set the termination date in the future (common practice as employees come and go), then once the termination date passes you will need to select the resource(s) and choose Actions > Anonymize Terminated Resource Data (described below)
- Manual or No GDPR feature - Set the termination date for one or more resources to a date in the future. After that date passes, you will need to go to those resource records and manually obfuscate the data (see steps below).
Note: If you have a sandbox environment you need to also anonymize the resources in that environment.
Manual Steps
This technique is for use when the GDPR feature is not enabled, and involves manually adjusting field values to wipe out personal date.
- Open Help menu > About PPM Pro and copy the customer number into a text editor.
- Navigate to the All Resources view.
- Double-click on the resource to open the Resource Info page.
- Locate the ID field (first field listed in main grid) and copy it into your clipboard.
- Choose Menu > Edit.
- Set the termination date, if not already entered.
- Replace the First Name and Last Name values with: "Anonymized <the resource ID from your clipboard>".
- Delete the Middle Name value, if using.
- Delete the values in the following fields:
- Phone (work)
- Phone (mobile)
- Skype ID
- Home Address
- Home City
- Home State, Zip
- Phone (home)
- Any user-defined fields that contain personal information
- Click Save.
- Choose Menu > Edit User Info.
- Replace the Login value with: Anonymized <customer ID>.<resource ID> (customer ID from your text editor, resource ID from your clipboard, or however you want to manage these numbers).
- Set the user to Inactive.
- Click Save.
- Perform the cleanup described in Cleanup, below.
Any obfuscation done to the resource record will propagate to certain other user-visible areas in the product accordingly (project Owner, issue Assigned To resource, for example). Areas deep within the system, such as history tables and logs, cannot be addressed manually.
For example:
| Do This | Results |
|---|---|
|
Edit resource and anonymize 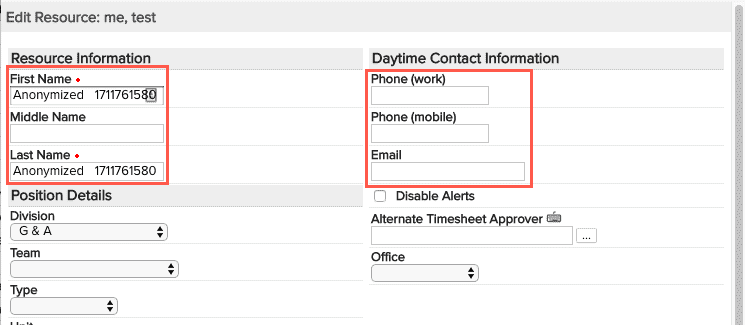 |
Anonymized resource record
|
|
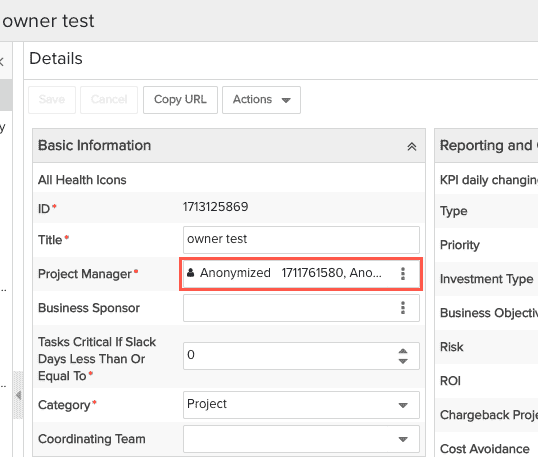
Values propagate to other areas in the UI that reference the resource - this example shows a project Details section, where Project Manager (owner) field shows anonymized valued.
|
|
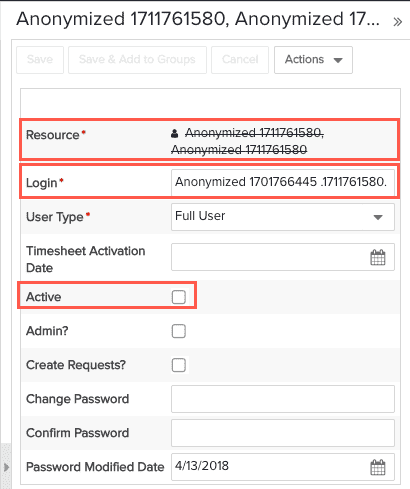
| Edit user record, anonymize login and deactivate |
Anonymized, inactive user record
|

GDPR Feature - Automatic Activation (when enabled)
The GDPR anonymization feature is automatically kicked off when you enter and save a termination date prior to today's date. After confirming that you do want to anonymize the resource, it will perform the manual steps described above as possible. Note that you can bulk edit multiple resources, set the termination to a date prior to today, and this will kick off the automatic process as well.
- Enter a support ticket requesting to enable the GDPR feature (if you have not already done so).
- Navigate to the All Resources view.
- Edit a resource and set the termination date to a date prior to the current date (or bulk edit multiple resources) and Save.
- The following dialog appears:
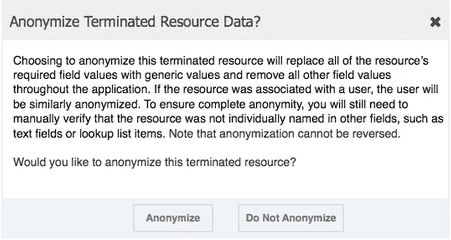
- Click Anonymize to anonymize the selected resource's data. Click Do Not Anonymize to cancel.
- Perform the cleanup described in Cleanup/Verification, below.
Any obfuscation done to the resource record will propagate to certain other user-visible areas in the product accordingly, as well as to areas deep within the system, such as history tables and logs.
GDPR Feature - Ad Hoc Activation (when enabled)
For scenarios where you have set termination dates to future dates that have passed, you can kick-off the automatic anonymization as needed.
- Enter a support ticket requesting to enable the GDPR feature (if you have not already done so).
- Navigate to the All Resources view.
- Locate the resources you wish to anonymize (they will have termination dates prior to the current date, but that were set at an earlier date).
- Select the resource(s) and choose Actions > Anonymize Terminated Resource Data.

- The following dialog appears:
- Click Anonymize to anonymize the selected resource's data. Click Do Not Anonymize to cancel.
- Perform the cleanup described in Cleanup/Verification, below.
Cleanup/Verification
Because changing or deleting values in the resource/user record will not propagate to the following areas, you will need to physically scan to verify that no personal references exist.
- User-defined fields in areas other than the Resource record
- User-defined number fields on the Resource record
- Attachments
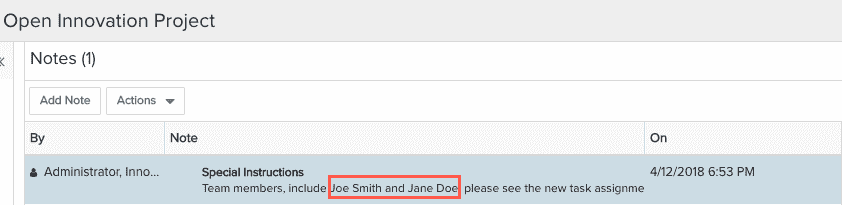
- Notes - Traverse each entity and check Notes text
- Status Comments - Traverse each project and check Status Comment text
- Fields defined as multi-select lists that point to a resource
- Lookup list values - Go to Admin/Setup/Lookup Lists and check the values for all custom lists
For example, the screenshots below shows a timesheet note and a project note that reference a resource - these will need to be cleaned up by hand:
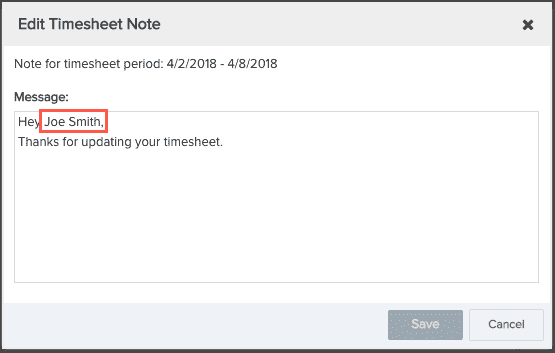 .
.