Using the Inline (Quick) Scheduler
The inline Schedule Resource to Task feature allows you to quickly schedule resources to tasks while you're in the flow of setting up your work breakdown structure. You double-click on the Resources field in the task grid to invoke a dialog that allows you to directly schedule a resource in one step. In addition, you can search for additional resources directly from the scheduling dialog.
Using the Scheduling Tool
The basic flow is invoke the tool, choose a resource, choose a role, specify hours. Add another schedule if necessary. The schedules are saved when you save the row.
Invoke
You invoke the inline scheduling tool by double-clicking on the Resources field and then clicking the down arrow:
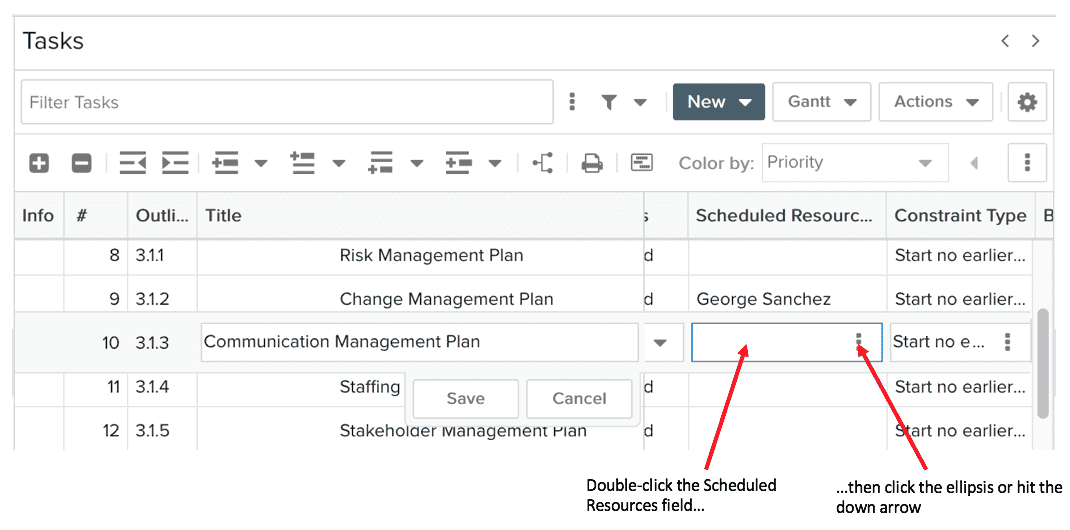
The Schedule Resources tool appears with a new record in edit mode.
Choose Resource
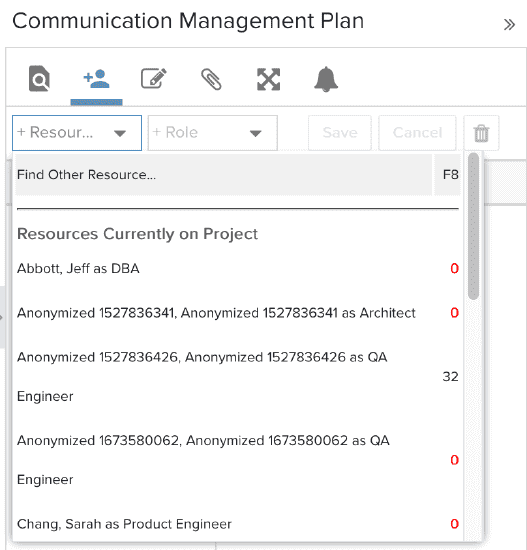
If your project is in project resource planning mode, then the Resource droplist contains resources that have allocations on the project. You can use Find Other... to search for a resource that is not already allocated to the project. If you use Find Other... , an allocation will be created as long as you have permission to create allocations.
Choose Role
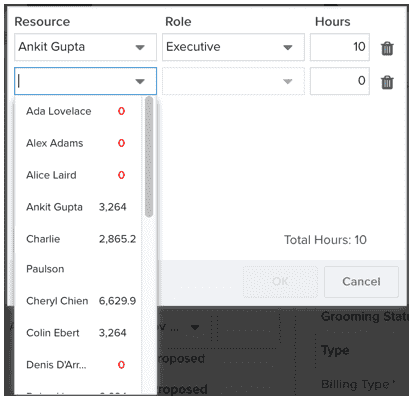
After you select the resource, tab over to the Role field and open the droplist.
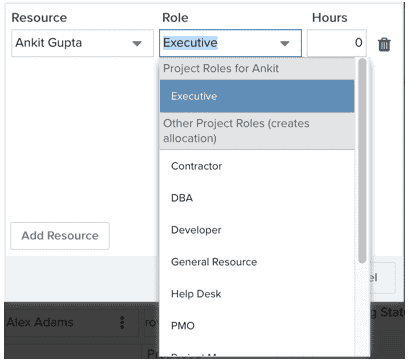
The following categories of roles will be displayed for the resource you selected.
-
Project Roles for resource - The role(s) specified in an existing allocation for the resource (project mode only). Since in Task mode there typically aren't any allocations, the Roles list would commonly contain just the Primary/Secondary roles for the resource, plus the Other... option.
-
Other Project Roles - Any other roles allocated to any resources on the same project (project mode only)
-
Other Roles for resource - The resource's primary and secondary organization roles, if any (if they don't appear in other groups).
-
Other... - Opens a dialog displaying all Organization roles. The user creating the schedules must have permission to create allocations in order for these additional roles to appear.
Enter Suggested Hours
Once you have the resource and role configured, tab over the Hours field. A hint that contains suggested hours is displayed.
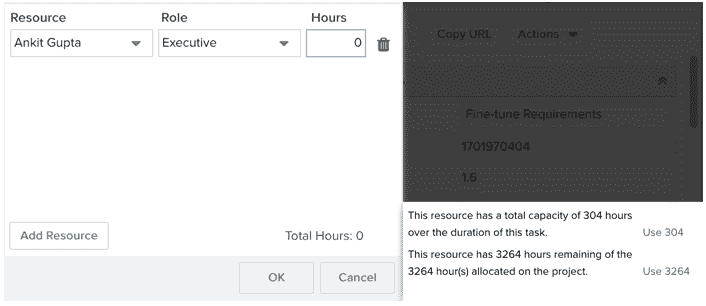
You can click the suggested hours hyperlink to automatically fill the Hours field. Or you can manually enter any integer - you are not constrained by the suggestion.
Adding and Deleting Schedules
To add another schedule, click the Add Resource button. A new row is created and the Resource droplist is displayed.
To delete a schedule, click the ![]() to the right of the schedule you wish to delete.
to the right of the schedule you wish to delete.
Save and Edit Existing Schedules
To save a schedule it must be complete, that is, it must have values for resource, role, and hours. You can save a schedule with zero (0) hours.
After you save a schedule, or group of schedules, the resource's name appears in Resource field. If you have multiple schedules for one task, floatover text will display all the resource names.
To edit existing schedules, simply invoke the schedule tool again. You can only edit the hours of saved schedules, or delete the schedule entirely. You can add additional schedules at any time.
Finding Resources Outside of the Project (Find Others...)
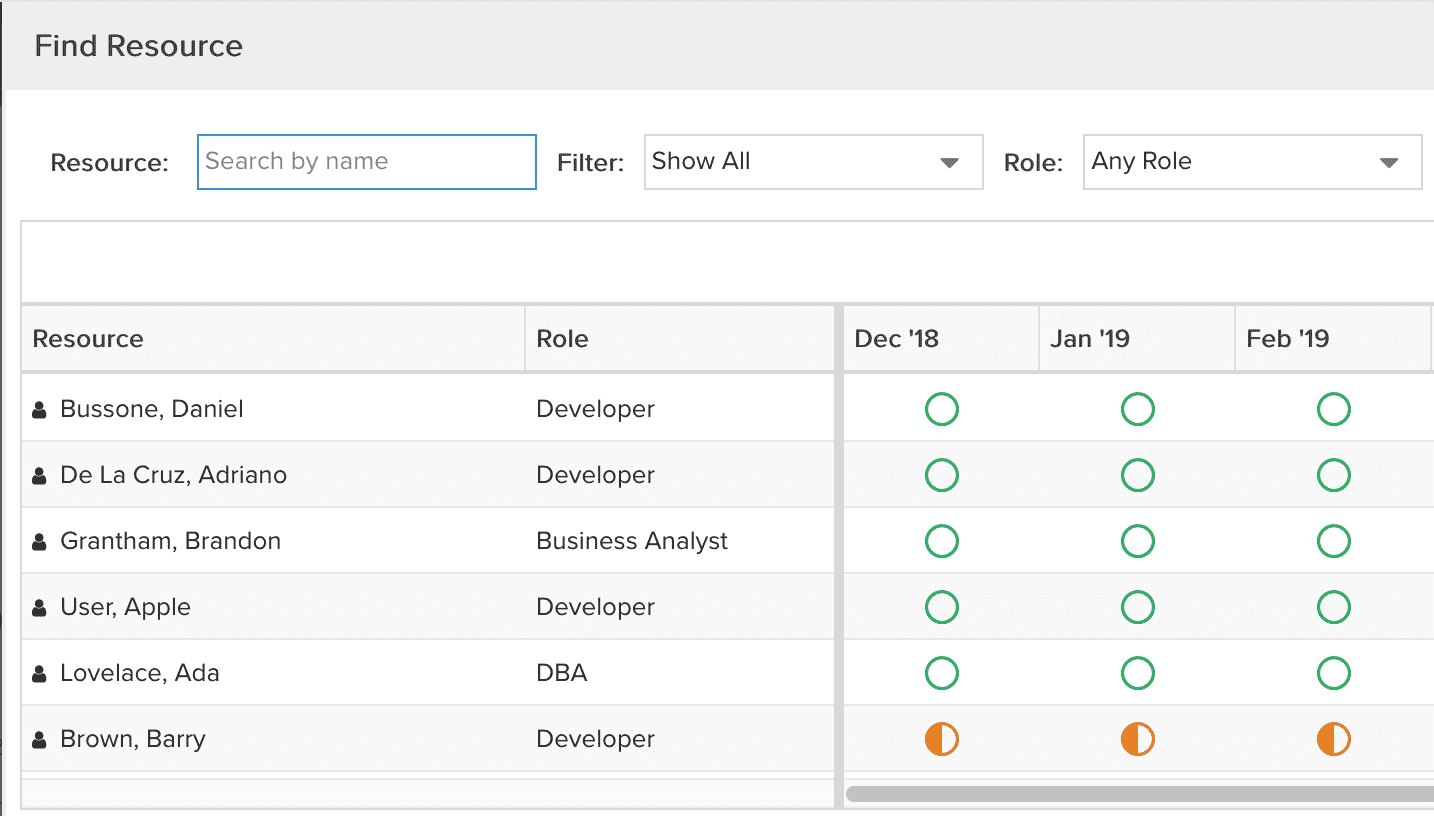
The right hand side Task Scheduling tab also allows for resources to be scheduled similar to the above, but using Resource and Role droplists and editing within the Scheduling grid for Estimated Hours, Scheduled Hours, and Hours to Complete (HTC). The Resource droplist also offers a Find Others... option to users with permission to create allocations. You use this feature when you want to schedule resources that have not been allocated. Select Find Others... to bring up the Find Resource dialog. From here you can evaluate resource availability and make your selection. Allocations are created for these resources.