Creating Task Schedules

NOTE
You must have Project > View > Task Schedules for the project to which the task belongs in order to see the Scheduling tab. Non-permitted users will not see the Scheduling tab in the UI.
You must have Project > Edit > Tasks permission for the project to which the task belongs in order to schedule a resource to a task. The scheduled resource will to automatically added to the project team, if not already there.
The Scheduling tab not available for Iterative Work tasks. See Using Tasks for Iterative Work.
"Scheduling" a resource to a task makes that task available for entering time estimates and/or actual hours. The task Scheduling tab lets you pick from a set of resources and roles that are gathered from your project and presented in valid combinations (for example, only valid resources are suggested, in concert with valid associated roles). The suggested roles/resources are determined by whether your project is in project or task resource planning mode. You pick the resource and role and then set the hours for each schedule.
The basic flow is to first create your task list. Then, either schedule specific resources to a task, or if you don't know specific resources you can assign roles and go back and assign resources to those roles later. If your organization includes task estimates in its planning process, then you can enter task time estimates for the roles. You record scheduled hours to resources.
This topic covers:
Unplanned Hours (logged timesheet hours with no schedule)
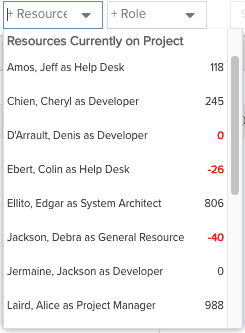
Adding Resources and Roles
If your project is in Project resource planning mode, then the Add Resource and Add Role droplists contain resources and roles that have allocations on the project.
Whether scheduling a resource or a role:
- Navigate to the project and click the Tasks left nav link.
- Select the task to schedule and then click the Scheduling tab.
Adding a Resource
The red numbers reflect the resource's available hours over the course of that task, minus any hours where they've been scheduled on another task at the same time.
The total number of hours originates from the Staffing screen. For example, let's say you allocate a resource for 100 hours over the course of a month (10/01 to 10/31). If you then go to schedule that resource to a task with the same duration, the number will show as 100 for available hours. If, however, the task has a different duration than the allocation, the system will do the math for you on how many hours that resource has available over the duration of that task.
So, to continue the example, if my Staffing screen allocation is 100 hours for all of October, and I have a task for this week (10/10 to 10/14), the system does the following evaluation: There are 100 hours total for 21 working days in August. This task is for five working days, so 100/21 = 4.76 hours multiplied by 5 for the 5 days of the task, resulting in 23.8 hours available to schedule this resource."
As you schedule the resource, the number will decrement. Continuing the example, if you had two tasks both for this week, and you scheduled a resource to 10 hours for the first task, their red number (hours available) would show as 13.8 on the second task.
Negative values indicate you scheduled a resource for more hours than their original allocation.
 .
. 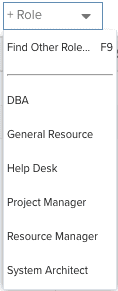
Adding a Role
If you add a role, when you're ready to assign a resource to the role simply select the role and then click the Add Resource droplist and select a resource to assign to the project for that role. If your project is in Task resource planning mode, scheduling resources will result in allocations on the Staffing screen, in read-only mode.
Find Other Resource
You can use Find Other... to search for resources/roles that are not already allocated to the project. Using Find Other... will result in the creation of an allocation (as long as you have permission to create allocations).
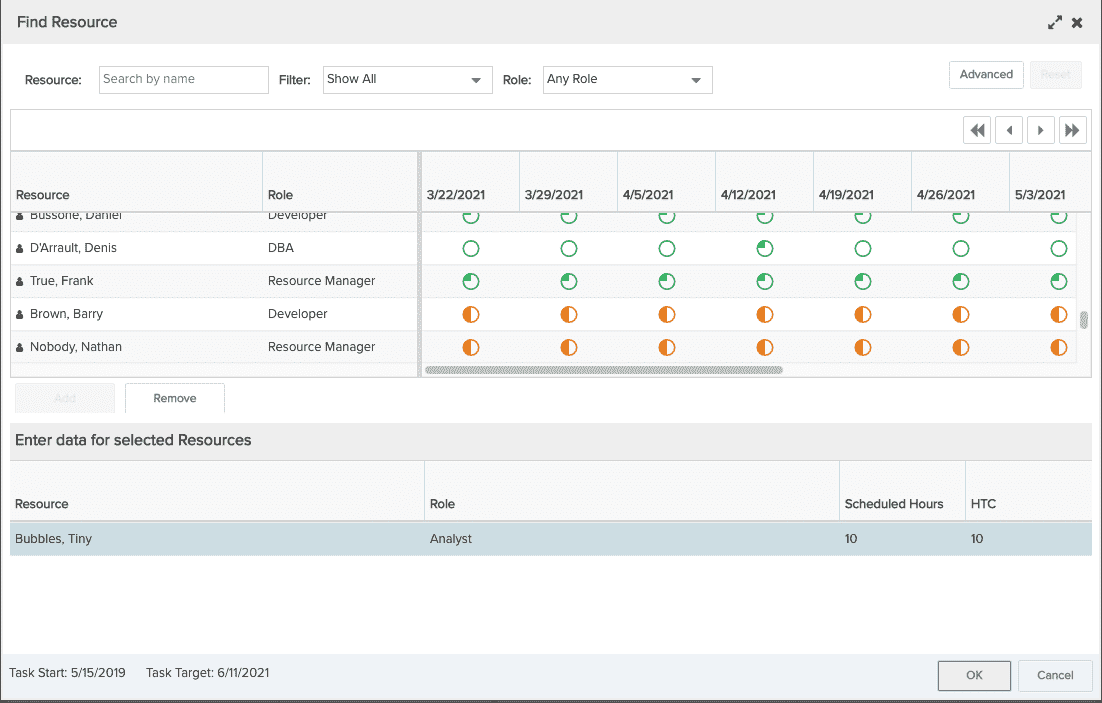
Note: If you select a Resource/Role combination from Add Resource > Find Other... that is already scheduled to the task with different Sch Hr/HTC values, the existing task schedule will be updated with the sum of the original scheduled hours and the new scheduled hours, and the sum of the original HTC and the new HTC. If necessary, you can edit the new values.
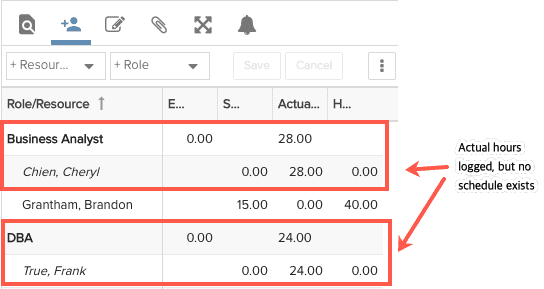
Unplanned actual hours
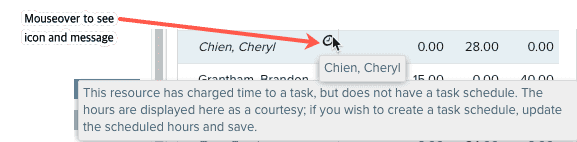
Depending on an organization's timesheet rules, a resource might be able to log time to a task even if there is no task schedule. This time will be displayed in the scheduling view as a courtesy, to give you accurate time-tracking information. The unplanned hours and are displayed in italics. When you mouseover the resource name, you will see the Timesheet icon as well as text explaining that these are unplanned hours. (Note that italics is used to indicate other states in the view, so the Timesheet icon means that these are unplanned hours.) If you wish to convert the record into a schedule, simply edit the scheduled hours or the HTC and hit Save.