
Configuring Available Fields for Requests
The Admin/Setup/All Entities/<entity>/Available Fields screen provides a list of PPM Pro-supplied ("standard") fields for each respective entity. In addition, you can create fields to add to this list (referred to as user-defined fields, or "UDFs"), or hide fields that your organization doesn't need. Once you have your list of fields, you can modify their properties. For example, you can change a field title, determine whether to make the field available for use in reports or filters, and make the field required. Note that customization of standard fields is limited in Available Fields (for example, you cannot mark a standard field as Required) - most behavioral customizations are made at the category Details level.
Note that some of the Available Fields settings apply across categories (such as the list to use for a picklist) and some settings can vary by category (such as field Title or the Filter to use with the field).
Variable Settings (Category-Specific)
These are configuration options, such as Filter, that you can also specify at the category level, allowing certain field properties to vary by category. For example, you might have a list field at the Available Fields level titled Office that is associated with the All Offices list. You can place the Office field on the Details for the West Coast category and change the associated list to West Coast Offices; then put the Office field on the Details for the East Coast category and change the list to East Coast Offices. Finally, you can put the Office field on the Details of the Combined category, and leave the list of All Offices. Finally, you can subsequently change the list associated with the field in Available Fields, and it will update the list on all categories/Details to use the list configured at the Available Fields level.
Note for Requests only: For the settings that you can configure at the category level ("variable properties"), any changes you make the the field definition at the Available fields level will not affect the field once it is on the Details panel. Once the fields are applied, the admin can go back and tweak settings where necessary on specific category Details. If you want to align a field on a Details screen with the Available Fields value (say you made a change there after you put the field onto a Details panel, you can remove the field from a category's Details and then put it back on (we sometimes call this "toggling a field on and off").
For example, if during setup you configure a filter for a UDF at the Available Fields level, place the UDF on a request category's Details and subsequently change the filter at the Available Fields level, that new filter will not be used at the request category level unless you take the field off of Details and then put it back on (of course you can also manually change the filter on the Details).
Non-Variable Settings (Common)
Fields that you can configure only at the Available Fields level, such as the picklist configured for use with a user-defined select list, must be consistent across categories and as such will always reflect the setting on Available Fields. So for example, imagine you create a list that uses Picklist: Active Resources and add that list to one or more category's Details. Then, you return to Available Fields and change the list to use Picklist: All Resources - the list field will reflect the updated picklist on every category where the field is used.
Restricted and Unrestricted Fields
Standard out-of-the-box fields and UDFs are initially "unrestricted," which means that any user type or member of any team can view and edit the field. Most entity fields are unrestricted.
If you want to limit field access to a certain user type or group, you create a restriction. A restriction gives privileges to a user type/group, and as a result, everyone else (other user types or group members not included in the restriction) no longer have access to the field (unless another restriction is created for those users). The field is now referred to as a "restricted" field. See Creating Restrictions for more information.
Note that field restrictions do not vary by category. Restrictions configured on Available Fields will apply to all categories that use the field.
Required vs Mandatory Fields
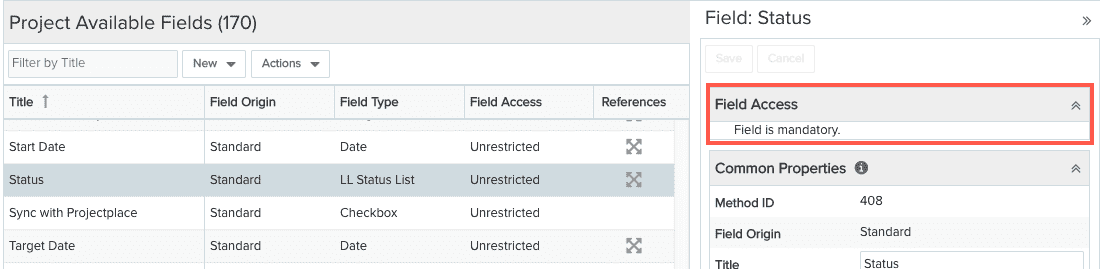
For each entity there are a handful of fields that are mandatory (system-required), which means they will appear on the Details of each category and cannot be removed. Mandatory fields show the text "(mandatory)" next to the field label. If you click on a mandatory field on the Available Fields page, the Field Access section with show "Field is mandatory". Mandatory fields will also always have the Required property enabled, and it cannot be overridden on the Details.
Required fields are configured in SSA by the admin and can be set on Available Fields by clicking the Required? property. Note that out-of-the-box (standard) fields can be se as required at the Details level only - they cannot be set to Required at the Available Fields level.
Remember that, as described above, UDFs that are set as required at the Available Fields level can be made optional on a category-by-category basis (the reverse is true as well).
Hiding Fields
If there are standard fields that you know your organization does not need, you can hide them by selecting the field and clicking the Hidden radio button on the Properties panel. If you have created UDFs that you don't want, simply delete them by selecting the UDF and choosing Actions > Delete (provided they are not referenced elsewhere in the product). If you hide a field, it will not be available for use in Reports or Filters.
As mentioned earlier, you can create restrictions by "hiding" fields for certain users/groups by using the Able to View on Details = No property, while making the same field available for reports or filters; see Creating Restrictions.
Setting Field Properties
The screenshot below shows the Available Fields for requests:
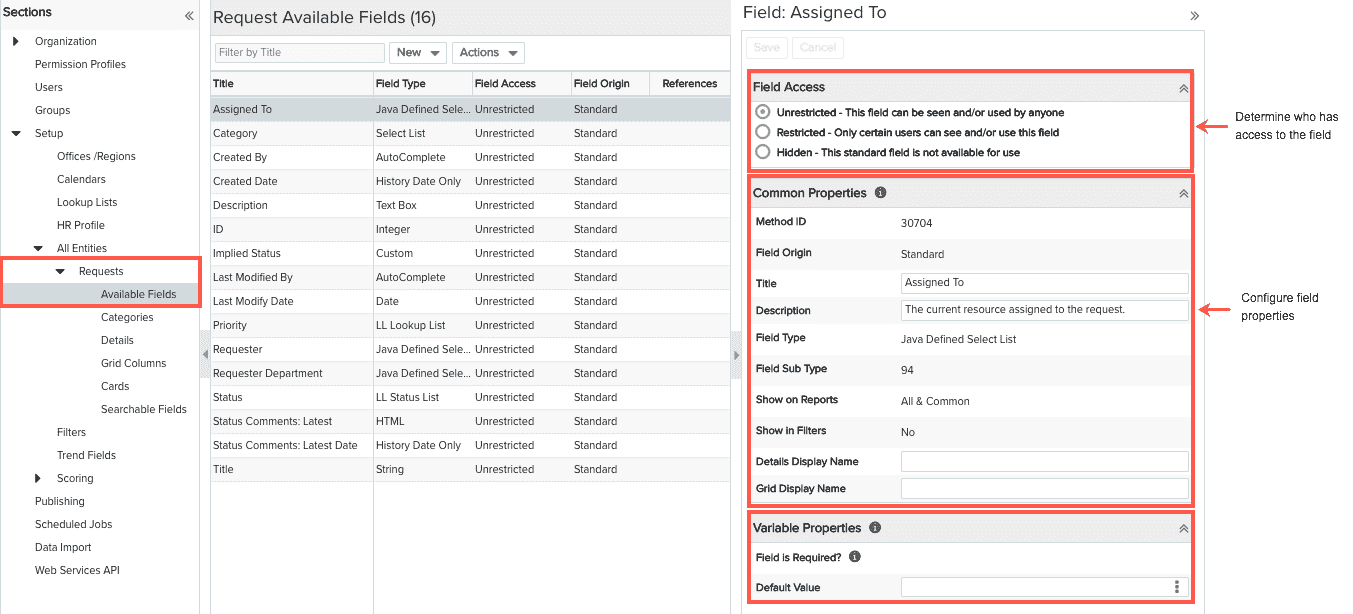
To view/edit a field's properties, select the field from the Available Fields list; the Properties panel (right-hand side of the page) will display the properties.
- The Field Access section is where you create field restrictions (limitations on field visibility/editability) for particular groups or types of users.
- The Common Properties section is where you configure general, static properties of a field.
- The Variable Properties section is where you can indicate whether a field should be required and/or have a default value (note this is an initial setting and can be overridden per gate and category), and, if you have created field restrictions you can configure them here. Each restriction can be configured differently (variable).
Note about default values for gated requests: The default value is only the initial value if none is provided. So once you provide a default at one gate, it will carry forward to future gates. If a user were to remove a value at one gate and there was a default set at the next gate, then the default be applied. But any time a field has a value (whether the original default or some other a user changed to), defaults going forward do not apply.
The list of all field properties and their definitions can be found here.
If you are not creating categories or restrictions, all properties are the same to you.
Field Access - Creating Field Restrictions
Instructions for creating field restrictions can be found here. If you add a restriction (or multiple restrictions) to a field, the following additional Variable Properties appear:
- Able to View on Grid - Yes/No - Determines if this field be visible on the request grid
- Able to View on New Details - No, Yes - Editable, Yes - View Only - Is this field on the form (visible) when creating a request
- Able to View on Details - No, Yes, Yes - View Only, Yes - Editable - Is this field visible/editable on the form after request is saved
You can configure this set of properties differently for each restriction - click each restriction in the Field Access section and configure the View settings in the Variable Properties section. See the screenshot below.
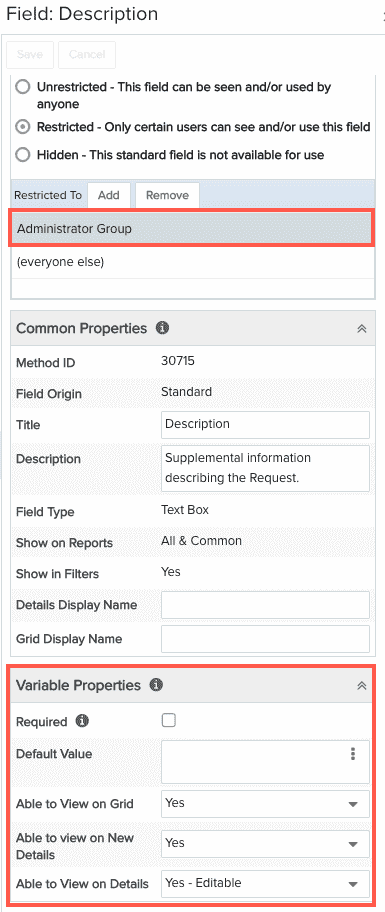
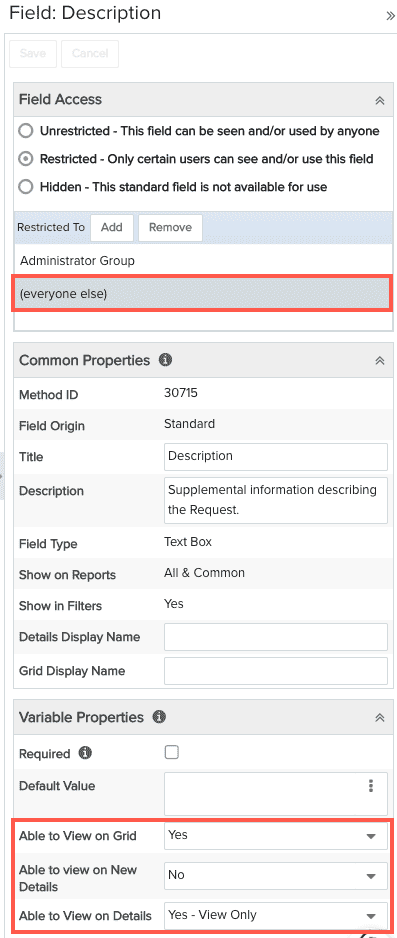
For example, there are restrictions for members of the Administrator group and then "everyone else". You can make the field able to view on new and editable for members of the Administrator group, but not visible on New and then read-only for for everyone else by setting Able to View on Details = Yes - Editable and Able to View on New Details = Yes - Editable for Administrator, and setting Able to View on Details = Yes - View only and Able to View on New Details = No for the everyone else. When you place the Description field on the Details panel, those properties will control the users' ability to view/edit. See Creating Restrictions for more information.
|
Example: Restricted Field Properties - Administrator Group
|
Example: Restricted Field Properties - everyone else
|
Common Properties
Properties whose values will be the same across categories and restrictions. Configure these properties regardless of whether you have or plan to have restrictions on the field, or whether you plan to create categories. If you do create restrictions or categories, these values will apply to the field if it's restricted or unrestricted, or whether it is used in one or multiple categories.
For example, if you create restrictions for members of two groups (Administrator group and Resource group), the field Title value will be the same for each group, as well as the ability to use or not use the field in Filters and Reports, and the labels for the Detail and Grid display names.
Variable Properties
Without Restrictions
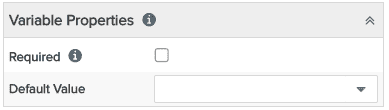
If you have not created any restrictions, then the only property you can adjust is whether a field is required. This property can vary across categories and is provided here to use as a "template" when first placing a field on the Details of a category. If a user-defined field is configured as Required (or not required) at the Available Fields level (standard fields cannot be made required at the Available Fields level), this serves as a template for when the field is first placed on a Details panel for a category. After you place the field on Details, any change you make back at the Available Fields level (such as making a required field NOT required), will NOT be reflected by the field on Details. If you remove the field from Detail and place it back again, the current Available Fields properties will apply.
Default Value - if you make a field required, you can optionally give it a default value.
Tip: If you make a field required but configure it to NOT show on New (configure this on the Details/Variable Properties), then be sure to supply a default value.
With Restrictions
(Note that Variable Properties in this area is a bit of a misnomer: you cannot vary restrictions by category. As mentioned below, restricted fields are not configurable on a category's Details.)
If you have created restrictions, in addition to the Required property, you'll be able to configure the visibility/editability of the restricted fields. For example, in the screenshot below, the user has selected the Administrator Group restriction. The Variable Properties section looks like this:
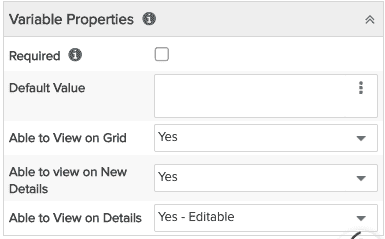
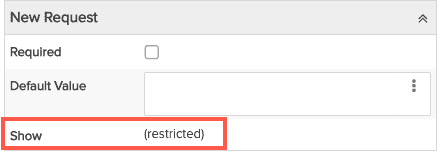
You can configure if the field is visible on the grid, if it is visible when creating a new request, and if it's visible/editable to this group after the request is created. Note that when you define your request gates on the Details page, the "Show" properties (visibility/editability) will be replaced with the text "restricted" and will use the settings from the Available Fields page.
Creating a new/custom field (UDF)
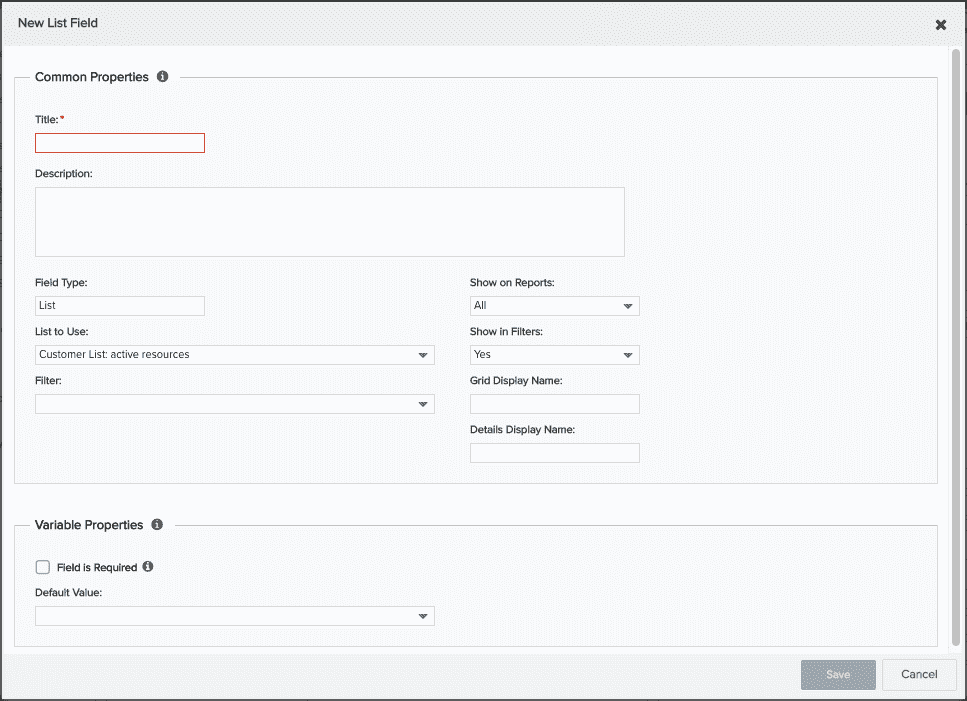
- From Admin/Setup/All Entities/Requests/Available Fields, choose New > fieldType. (Note that fieldType represents the field type you pick from the menu.)
The New fieldType dialog appears. Note that when you create a UDF you will be presented with the many of the same properties that you saw for standard fields. You can accept the default values and tweak them later in the Properties panel. Refer to the table below for property definitions.
- Click Save.
Any values you chose or entered will be displayed in the properties panel on the right-hand side. You can edit the properties inline at any time. If you make any changes, don't forget to click Save.
Field Property Definitions
The following table contains a superset of all the properties you might see for a field.
|
Common Properties |
Description |
|---|---|
|
Title |
The name of the field. This value will be used for the Detail Display name and the Grid Display Name, unless you override in each field, respectively. If you are editing a standard field, you can change the title. |
|
Description |
Optional text describing the field. Whatever value is entered in this field will appear in a tooltip when the user hovers over the field Title in Details or grid columns. Note that if you see a $token in this field it means that your organization has used the data dictionary to change the out-of-the-box name of this entity. The end user will see the result of the substitution. |
|
Field Type |
A read-only field that displays the field type of either the UDF you are creating, or the field you are creating a restriction for. You selected the field type from the New menu. Custom (UDF) string fields have a limit of 4000 bytes for English-language content. Double-byte languages will have a lower limit, possibly as low as 1,000 bytes (for 4-byte languages, for example). Custom (UDF) text box fields have a limit of 10,000 bytes. |
|
List to Use |
(List fields only) Contains all the existing lists you can associate with the list field. Before you create a list field, you need to make sure you have created an appropriate lookup/status list. See Creating a Lookup List. For Standard list fields, "Field Sub Type" is used instead of "List to Use," and is read-only. |
| Filter |
(List fields only) For any list based on a filterable entity, this field displays any existing filters based on the entity. Does not apply to status, lookup, or custom lists. |
|
Display Option |
(Boolean, Number, String fields) Settings that control the display of the data in the field. Boolean: Checkbox, Yes/No, True/False Number: Integer, Money, Percent, Native Percent, Float, Non-Negative Float String: Telephone, Email Address, Group Header, HTML Display, String |
|
Field Length |
(String fields only) Determines the default width of the field. |
|
Show on Reports |
Controls whether the field is available for use in reports.
|
|
Show in Filters |
Yes - The field is available for use in filters No - The field is not available for use in filters |
|
Detail Display Name |
By default, the Title of the field is used as the field label in the Details panel. If you want the field name in the Details panel to be different than the Title value, enter it here. |
|
Grid Display Name |
By default, the Title of the field is used as the column title in the Grid. If you want the column title to be different than the Title value, enter it here. |
|
Calculation Class |
Note: For numeric fields, you must specify a calculation class in order for the field to be available as a data series field in reports. Please note the following recommendations:
|
|
Variable Properties |
Description |
|
Field is Required |
Enable this property if you want the field to be required when creating the entity. If PPM Pro has marked a standard field Required at Available Fields, you cannot override it on Details. Other standard fields (that are not marked Required), can be marked Required only at the Details level. Note: System-maintained fields and read-only fields such as Customer, Department, Source Request and Last Modified Date cannot be marked required or have default values. |
|
Default Value |
The Default Value only applies when creating new entities; it does not apply to existing entities. You can specify a default value on the Available Fields page and/or on the Details page. The value of the Default Value field in the Available Fields page is used when you add the field to the Details page for an entity Category. You can then override the default value (perhaps you want a specific value for a specific category) or leave the value carried over from the Available Fields page. Note that changing the Default Value for a field in the Available Fields will not change the Default Value on the Details page for the same field - it simply acts as a template when first placing the field on Details. After that, the two setting work independently. The Default Value on the Details page is used as the actual default value for the required field in the current category. You can specify a different default value for the field when it is used in another category. Date fields cannot have default values; the Category field cannot have a default value (the default category is configured on the Categories page for entities that allow a default). If you configure a default list value of "blank" on Available Fields or a category's Details, then the default value configured on Admin/Setup/Lookup Lists will be used because "blank" is interpreted as unpopulated. |
|
Show on Grid |
(Appears for restrictions only) Check this property if you want if you want the restricted users/teams to be able to see the field IF it is placed on the Grid; other users that do not meet the restriction will not see the field in the grid even if it is placed on it. An unrestricted field is, by default, available to use as a grid column (but you won't see the Able to View on Grid property). |
|
Show on New |
(Restrictions only) (not applicable to tasks) Yes - Editable, Yes - View Only, No. Determines whether the field can potentially be viewed/edited in the New Entity window when creating an entity. If you have multiple restrictions, you can set this property to a different value for each restriction. The setting here serves as the default to the Show on New Details property on the Details page. |
|
Show on Details |
(Restrictions only) Yes - Editable, Yes - View Only, No, Yes - Editable (PMO only). Determines whether the field can potentially be viewed/edited when editing an entity. If you have multiple restrictions, you can set this property to a different value for each restriction. The setting here serves as the default to the Show on Edit Details property on the Details page. See About_PMO_Locking for information about the Yes - Editable (PMO only) option. |
Note that there are two additional properties on the properties pane that are not shown in the New Field dialog: Method ID and Field Origin. Method ID is a unique identifier that is used by the API to differentiate multiple fields with the same name but different display types. Field origin displays either Standard (PPM Pro-supplied field) or User Defined (a user-created field).
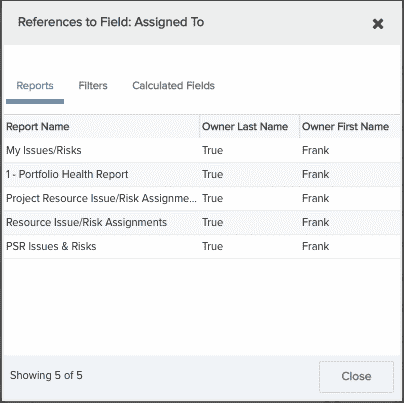
View Field References
A field reference is the presence of a field in filters, reports, and calculated fields. Mouse-over the ![]() icon to see the number of references. Click
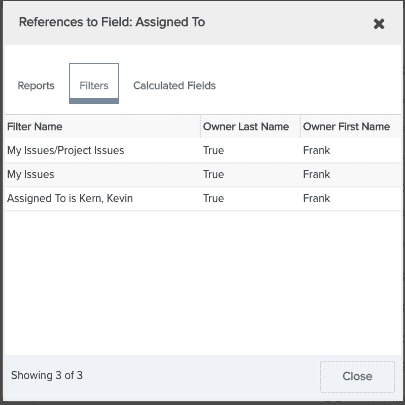
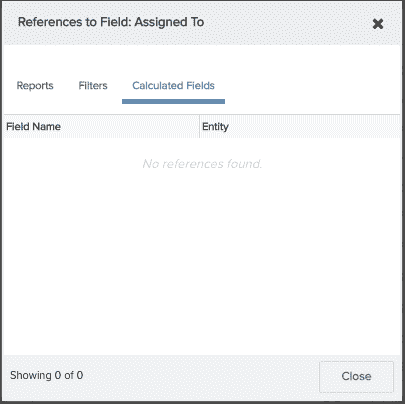
icon to see the number of references. Click ![]() to display a window that lists where the field is in use. Note that if a field is used multiple times in one filter or report, for example, that filter will appear multiple times in this list. (You can also select the field and choose Actions > View References.) For example, in the example below, the "Status" field is referenced in reports and filters, but is not used in calculated fields. Each tab displays the actual references:
to display a window that lists where the field is in use. Note that if a field is used multiple times in one filter or report, for example, that filter will appear multiple times in this list. (You can also select the field and choose Actions > View References.) For example, in the example below, the "Status" field is referenced in reports and filters, but is not used in calculated fields. Each tab displays the actual references:
 .
.  .
. 
If there is no ![]() icon, then the field is not used in those areas (it might be in use on an entity's Details or grid columns). This is useful information to determine the impact of removing/deleting a field.
icon, then the field is not used in those areas (it might be in use on an entity's Details or grid columns). This is useful information to determine the impact of removing/deleting a field.
Deleting UDFs that have References
You cannot delete a UDF if it has one or more associations (the Delete menu option will be disabled in such cases). To delete a UDF with one or more references, you will first need to go remove the UDF from those references.