
The Main Content Area (Grid)
This video provides an overview of the system navigation through the grid of an entity and the entity details. Duration: 7 min.
Each view in the PPM Pro application typically represents one entity. The Home view provides access to several entities, as well as to timesheets. There are some user interface elements that are common across most views, and are discussed below.
Note: PPM Pro is transitioning to a new user interface framework that works with the self-service administration (SSA) feature. Many of the views (projects, issues, tasks, portfolios, assets) use this new framework and will be described below. The remaining views will be updated over time.
Anatomy of an Entity View
The screenshot below reflects a typical entity view for entities using the new framework (task/issue/portfolio - projects discussed below). The screen has two main sections: the grid pane and the info pane.
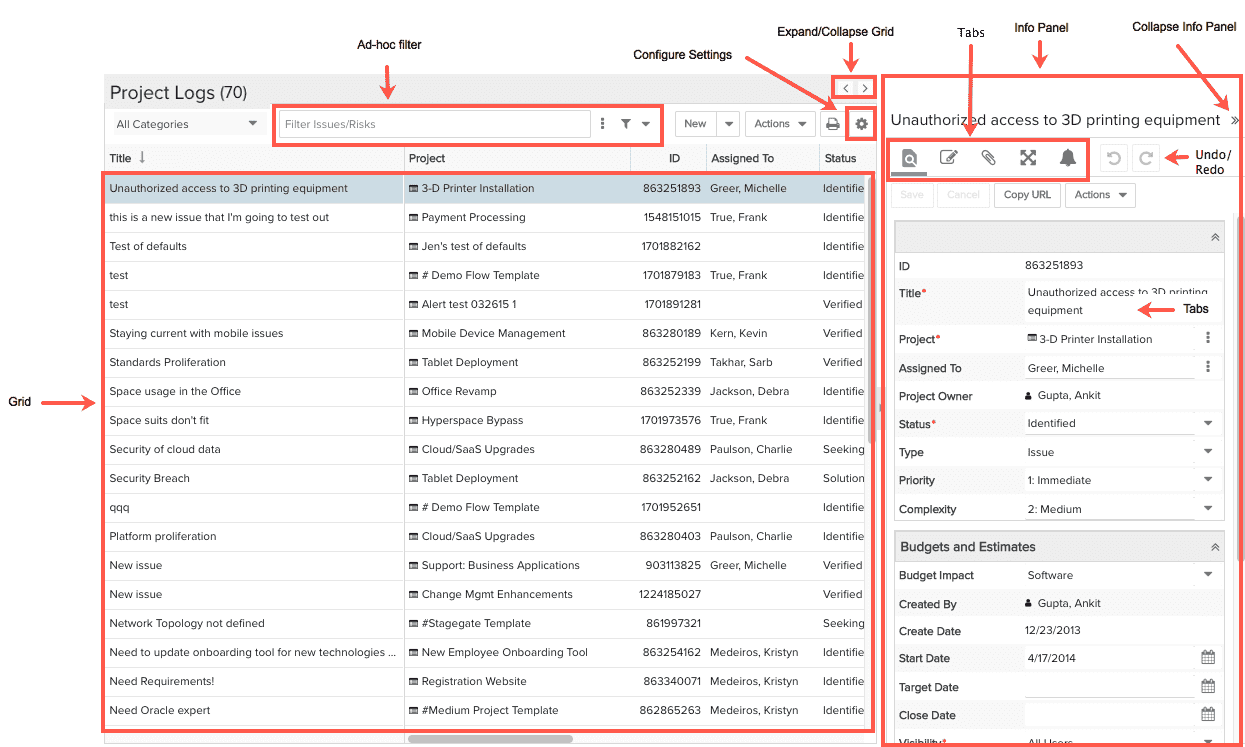
Both panes can be resized: either click and drag the control in the white gutter between the panel and the grid, or use the expand/collapse controls. This feature is available throughout the application, giving you more space for whichever pane needs it. Note that if you make your browser window narrow, one or more navigation icons will move into the overflow menu.
Editing
You typically edit fields in the Details panel be selecting a row and making edits in the Info panel. Remember to click Save or use the Ctrl-S shortcut. In addition, the Undo/Redo controls allow you to undo changes made since the last save.
Inline Editing
Some grids allow inline editing. Simply double-click a row to activate (if double-clicking opens the record in a new tab, then that grid does not use inline editing). You can use your mouse and/or keyboard navigation. Tab moves you from field to field and to the Save/Cancel Buttons. Use arrow keys to move you through drop lists and suggested matches (for picklists) and use Return/Enter to make your selections. Use Esc to undo an edit that hasn't yet been saved. The vertical ellipsis will bring up a pick-list.

Newly Created or Edited Records - Where Did They Go?
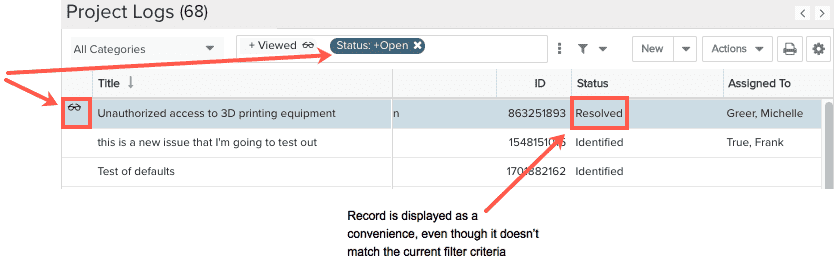
Note that you might find yourself in a situation where you have set up some filter criteria to populate the grid. Then you create a new record, or modify an existing record in such a way that it does not meet the current criteria (or might fall outside the scroll region). For example, your filter might specify "Status is Assigned," but the new entity you created has a status of "In Progress." Because we assume that you still might want to make additional edits, rather than immediately filter it out of the list, PPM Pro keeps the record in the list and labels it with a temporary "spectacles" flag ![]() . In addition, a this temporary indicator will also be placed in the ad hoc filter field to remind you that you might be displaying some records that don't meet the current criteria. Both of these flags, as well as any records that don't meet the current filter criteria, will be removed after refreshing the screen.
. In addition, a this temporary indicator will also be placed in the ad hoc filter field to remind you that you might be displaying some records that don't meet the current criteria. Both of these flags, as well as any records that don't meet the current filter criteria, will be removed after refreshing the screen.
Info Panel
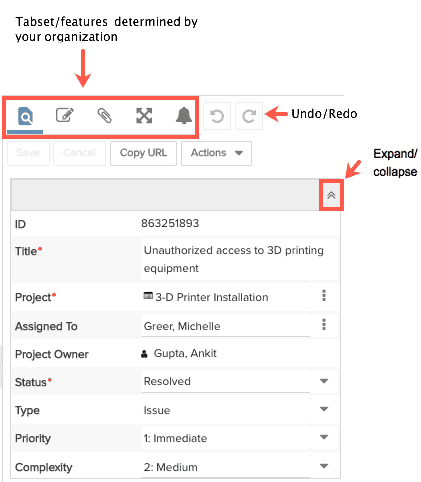
Tabs are determined by your organization - you might not see all the ones in this screenshot. The Info panel is where you configure specific aspects of the entity or related items. For example, all entities typically have a Details tab, which contains a superset of the information you see on the grid. Notes and Attachments are also commonly used, as well as Alerts and Team. Note that the sections in each tab (indicated by a wide blue bar) can be expanded/collapsed by clicking on the chevrons at the right-hand side of the bar.
Note that there are Undo/Redo controls that allow you to undo changes made to the Details tab/section since the last save.
Note: Projects do not have Info panels, but instead have links down the left side of the screen. The project grid is only shown in context of the All Project screen; once you drill into a project you use the left-nav links to navigate through the different sections (Details, Notes, Attachments, for example). You can expand/collapse the left-nav area to adjust the size of your main content panel.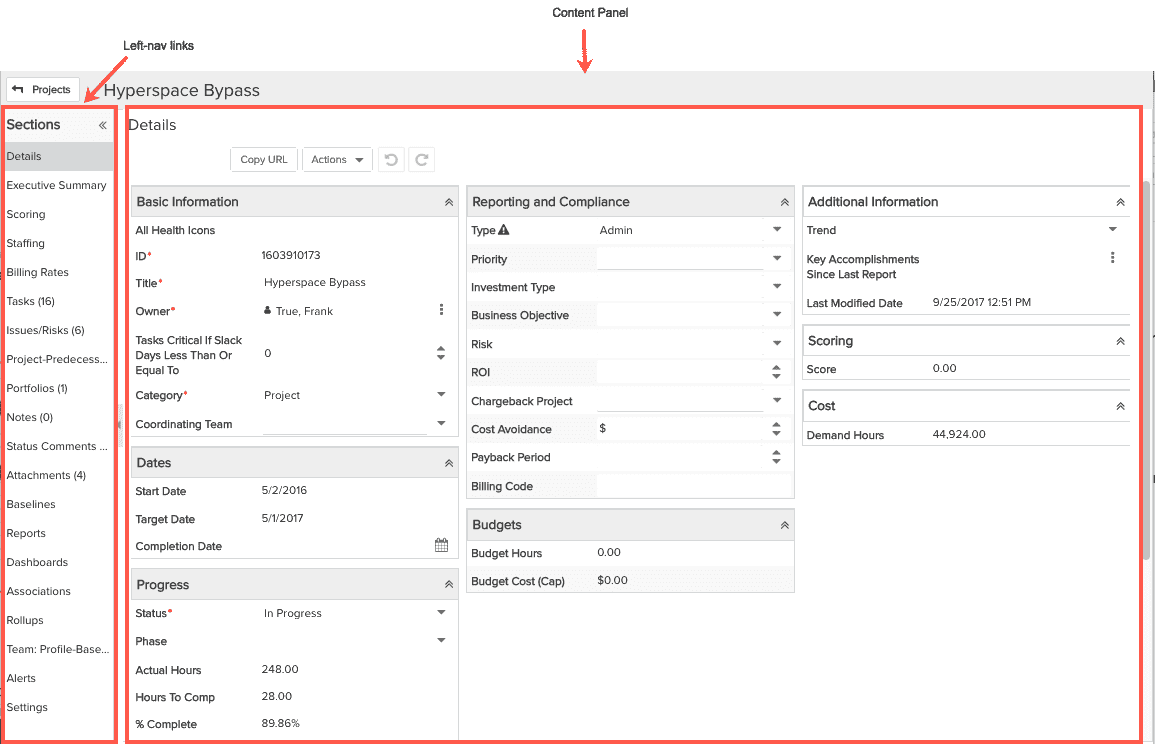
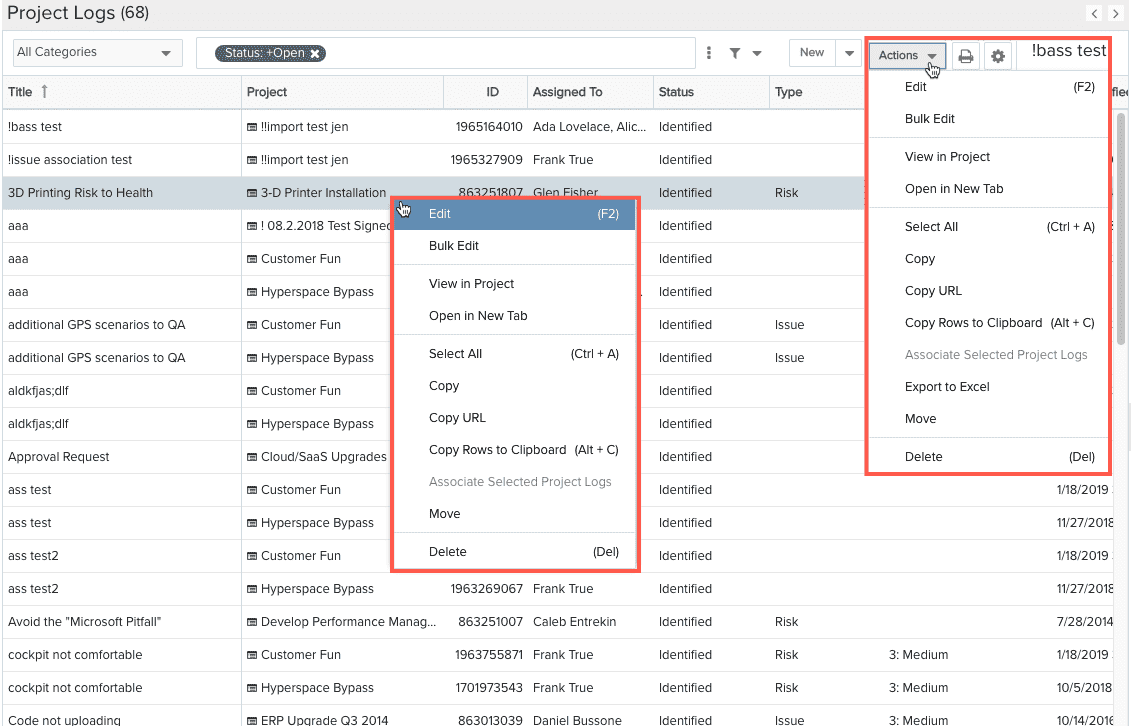
Actions menu
Every screen has an Actions menu, which contains operations performed on selected grid records. These operations are also available from the grid context (right-click) menu. The operations vary according to which entity you are looking at. The Info pane has its own Actions menu, discussed below.
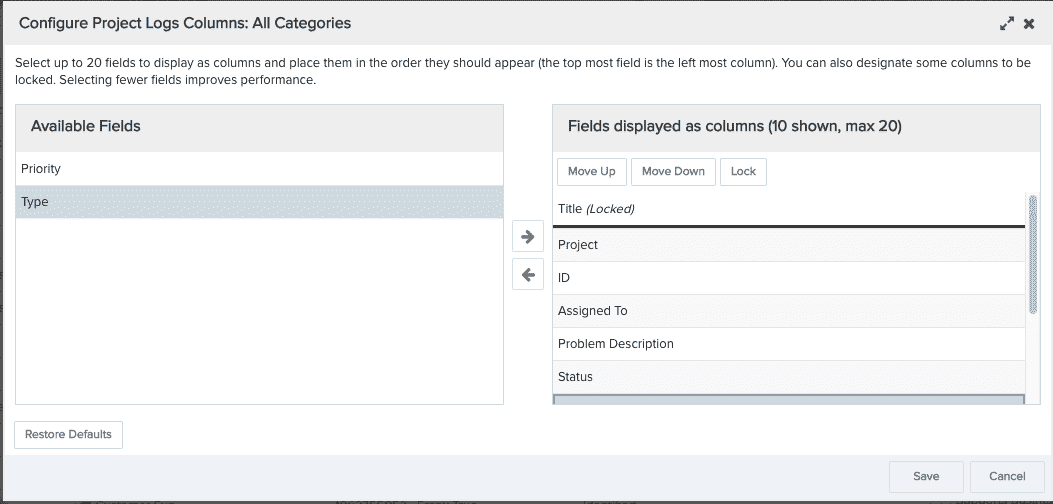
Add, remove, rearrange, lock columns
You can determine the columns that appear in a grid using the Configure Settings dialog. Click the Configure Settings gear icon ![]() to display the dialog. You can choose what column will appear, as well as reorder them. You can also reorder columns by clicking in the header and dragging to the new position.
to display the dialog. You can choose what column will appear, as well as reorder them. You can also reorder columns by clicking in the header and dragging to the new position.
Click the Lock button to move them to the no-scroll section to the left of the vertical line, or move the column to the left of the vertical line by selecting the header and dragging.
You can display a maximum of 20 columns; you can have more than 20 available fields. PPM Pro administrators can use self-service admin (SSA) to determine which fields are available and which are displayed by default.
![]()
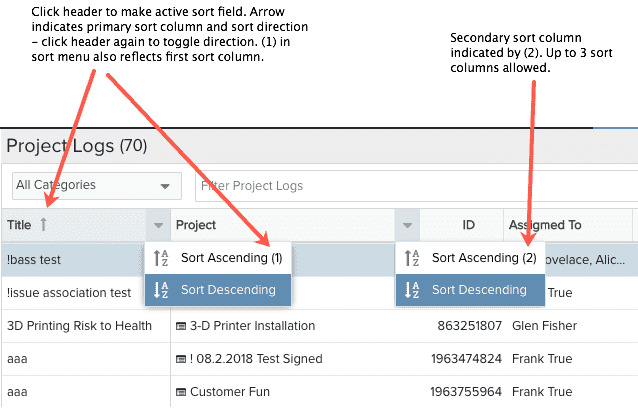
Sorting Columns
You can pick a sort column and sort direction by clicking in the header of the column. You can change direction by simply clicking in the column header, or by clicking on the right end of the column heading to display a menu from which you can choose the direction.
The current sort column is indicated by an up/down arrow next to the column label, as well as as numbered indicator - for the primary sort column you'll see (1), for secondary and tertiary you'll see (2) and (3), respectively. You can configure up to three sort columns.
Filtering Entities
Use the "ad-hoc" filter just as you would on any on page. See Ad-Hoc Filters for more information.