
Working with the Reports List page
The Reports List is the page that displays when you click the top-level Reports icon (reports for all entities) or the Reports link from an entity (reports filtered to the current target entity). The Reports List displays all the available report definitions, and allows you to create copy, edit, delete, and run reports - the exact actions you can perform depend on your permissions. See About Profile-Based Permissions.
The Reports List is the starting place for creating reports, running reports, and viewing report output.
Remember that reports use the profile permission model. So anything a user can do with a report - view, edit, share, and so on - is determined by permission profiles. The owner of a report minimally has permission to edit/view the report details; any other permissions, such as editing the team, is granted with additional permissions and/or profiles.
Anatomy of the Reports List page
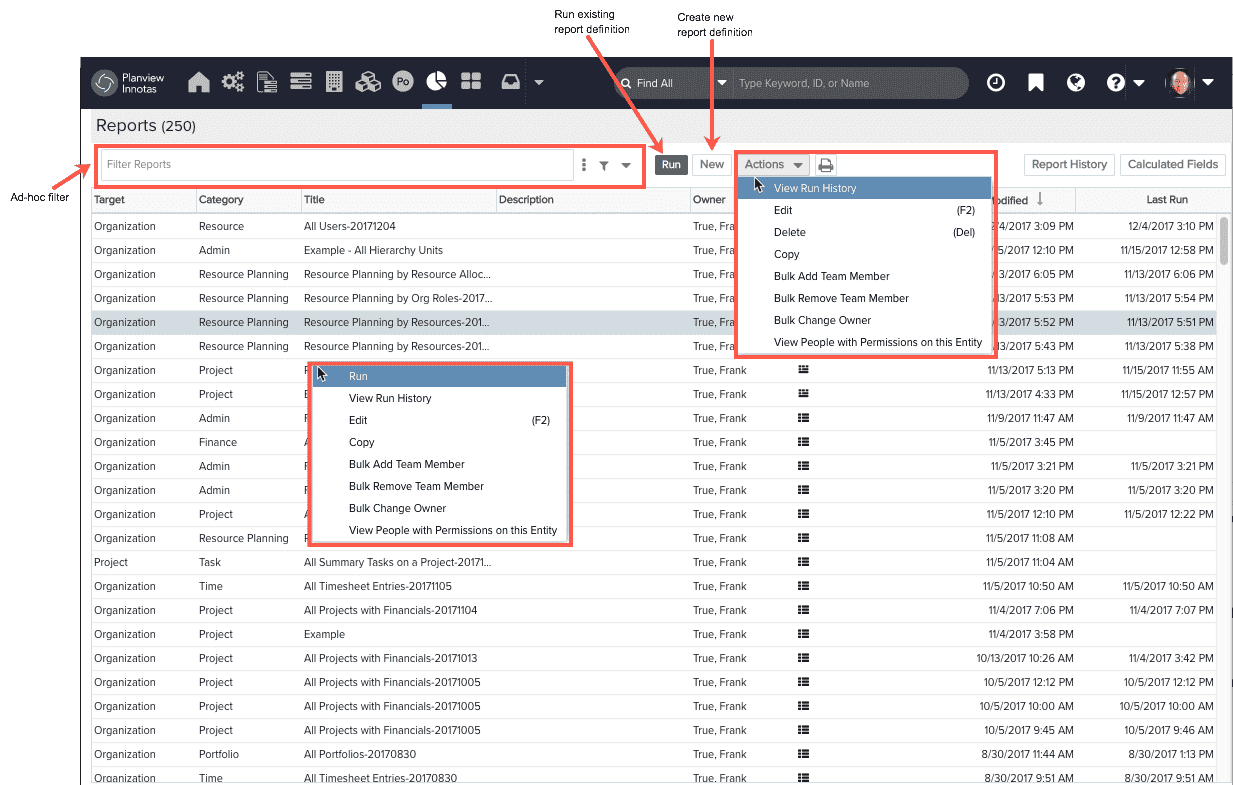
Below is a screenshot of the Reports List page, populated with a some report definitions. You run report definitions to generate report output.
The table below describes the columns in the report list:
|
Report List Column |
Description |
||||||||||||
|---|---|---|---|---|---|---|---|---|---|---|---|---|---|
|
Target |
The entity on which the report is based. For example, if the report source is Project/Tasks, the Target is Project. |
||||||||||||
|
Category |
The related entity on which the report is based. For example, if the report source is Project/Tasks, the Category is Tasks. |
||||||||||||
|
Title |
Entered by the report creator. |
||||||||||||
|
Description |
Entered by the report creator. |
||||||||||||
|
Owner |
The user who created the report. The Owner permission profiles describes the full extent of what the report owner can do in addition to view/edit report details. For example, if you expect a report owner to be able to edit the Visibility tab (share the report with other users), then he/she needs a profile that grants Edit Team permission (either in the Owner profile or some other profile assigned the user). You can change the owner by using the Actions > Bulk Change Owner command. This is useful when, for example, a resource is terminated and you want to reassign ownership of any reports owned by that user. |
||||||||||||
|
Output Types |
Displays an icon for each output type for which the report has been defined. If there are multiple output types, the first icon is the default type, which is displayed when you run the report. Output types are:
|
||||||||||||
|
Last Modified |
The date and time the report was last modified by the report owner. |
||||||||||||
|
Last Run |
Displays the last date and time the report was run by the current user. |
To run a report, select the report and click the Run button, or right-click and select Run from the context menu.
Additionally, the New button brings you to the Select Report Source screen where you can pick the source for a new report definition. See Overview of report creation.
The Report History button brings you to the Report History screen, where you can view report output. See Working with report output.
You can click the Calculated Fields button to initiate the process of creating calculated fields.
The Actions menu
The Actions menu contains a set of common actions that you can perform on report definitions. First select the Report Definition you wish to act on, and then select Actions > your action. You can also right-click on any Report Definition row and display the Actions menu.
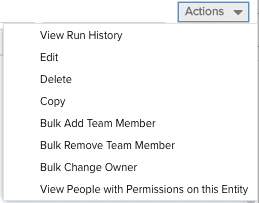
The Actions menu commands are described in the table below:
|
Action |
Description |
|---|---|
|
View Run History |
Brings up the Report History page for the selected report definition. This page contains the report output as well as additional information about the report. See Working with report output for more information. |
|
Edit |
Brings up the report definition editor for the selected report definition for users with edit report permission. If you do not have edit permissions but wish to edit the report, make a copy of the report and then edit. |
|
Delete |
Deletes the selected report definition for users with Delete permission; you will be prompted to confirm the delete. |
|
Copy |
Makes a copy of the report definition and invokes the report definition editor. By default the report definition Title is prefixed with "Copy of:" You can make a copy of any report definition visible to you. You can use Copy if you want to make changes to a report definition created by another user. |
| Bulk Add Team Member | Use to add users, groups, or units to the teams of multiple dashboards to quickly provision permissions. See Bulk Sharing Permissions. |
| Bulk Remove Team Member |
Use to remove users, groups, or units from the teams of multiple dashboards. See Bulk Sharing Permissions. Note that the Bulk Remove Members dialog displays a list of all users/groups/units in the system, and does not reflect actual team membership. |
| Bulk Change Owner | Use to assign a new owner to the selected reports. Useful if current owner has been terminated, or inactivated, and you want to reassign ownership to active user. |
|
View People with Permissions on this Entity |
Displays the Permissions Explorer with the focus on the current report. See Using the Permissions Explorer. |
Customizing the Report List page
To add/remove columns
- Hover the cursor over any existing column title to display a drop-down list arrow. Click the arrow to display the menu.
- Choose the Columns submenu.
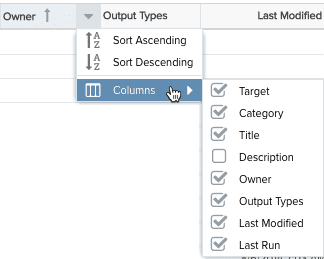
- Check or uncheck the column(s) you wish to add/remove from the page.
To rearrange columns
You can rearrange the columns on the Report List by dragging a column heading to a new position.
To sort report definitions
You can sort any column in the Report List by clicking in the column heading. You can toggle the sort order between Ascending and Descending by clicking again. The column that is driving the sort for the page will display a small up arrow or down arrow.
To filter report definitions
Use the "ad-hoc" filter just as you would on any on page. See Ad-Hoc Filters for more information