Allocating Roles to Projects
Creating project allocations is the process of assigning roles to a project, staffing those roles with resources, and estimating demand. You can assign a role and staff a resource in one step (staffed allocation), or you can assign a role and leave it unstaffed, allowing you to estimate demand without having specific resources in mind. You can staff the resource at a later time. The Staffing screen provides tools for searching for roles and resources, as well as viewing resource availability. Note that once an allocation has an associated timesheet entry (either by way of a pinned timesheet, or even an entry with no hours), the allocated role cannot be changed.
You can multi-select a range of resources/roles by using Shift-click. Deselect items with Ctrl-click.
Any user who has Project > Edit > Staffing permission can create staffing assignments for the project.
Note: Avoid creating "overlapping" allocations - that is, the same role/resource scheduled for part or all of a date range. While PPM Pro allows you to overlap allocations, they may result in inaccurate or ambiguous time tracking and reporting. You can fix an overlapping allocation by either changing the resource or changing the dates of one of the allocations.
To create unstaffed allocations
You use an unstaffed allocation to specify demand without having to allocate specific resources. When you do staff the allocation, if you don't use all the demand, the system subtracts the staffed demand and leaves an unstaffed allocation as a placeholder for the remainder of the demand.
- Navigate to the Staffing screen for the project you are planning.
- Click Add Role.
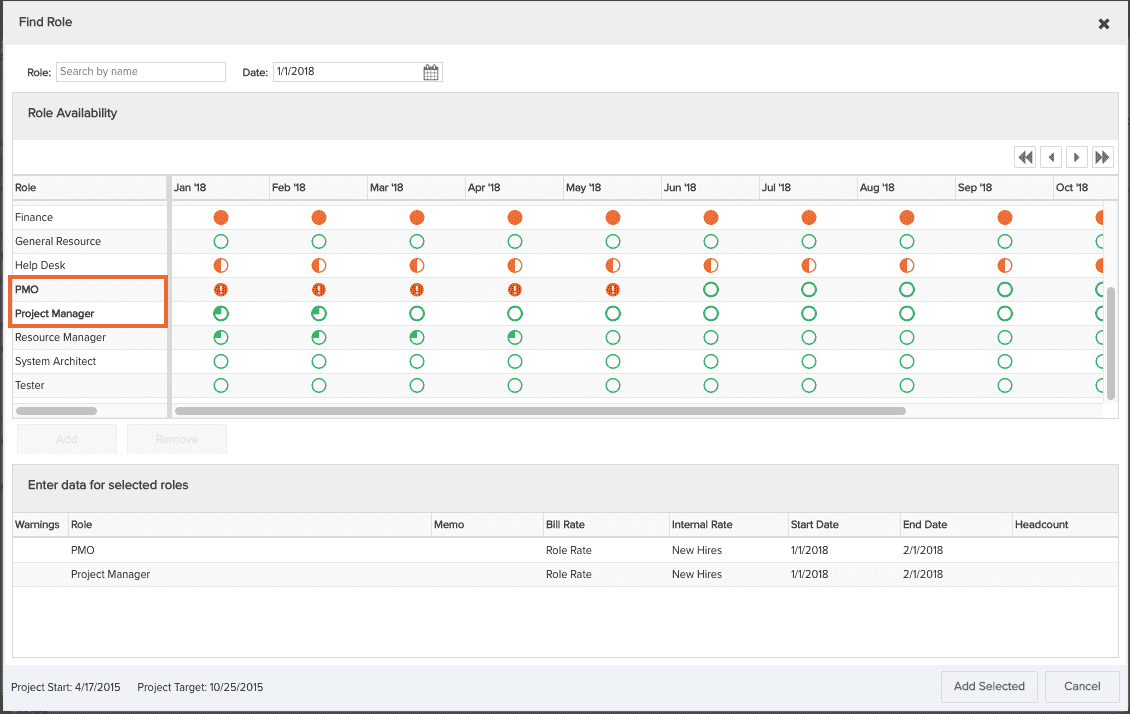
The Find Role window appears. By default, this window displays all roles in your organization and the sum of the availability of all resources in those roles for the next 24 months. Use the filters to narrow the list of roles.
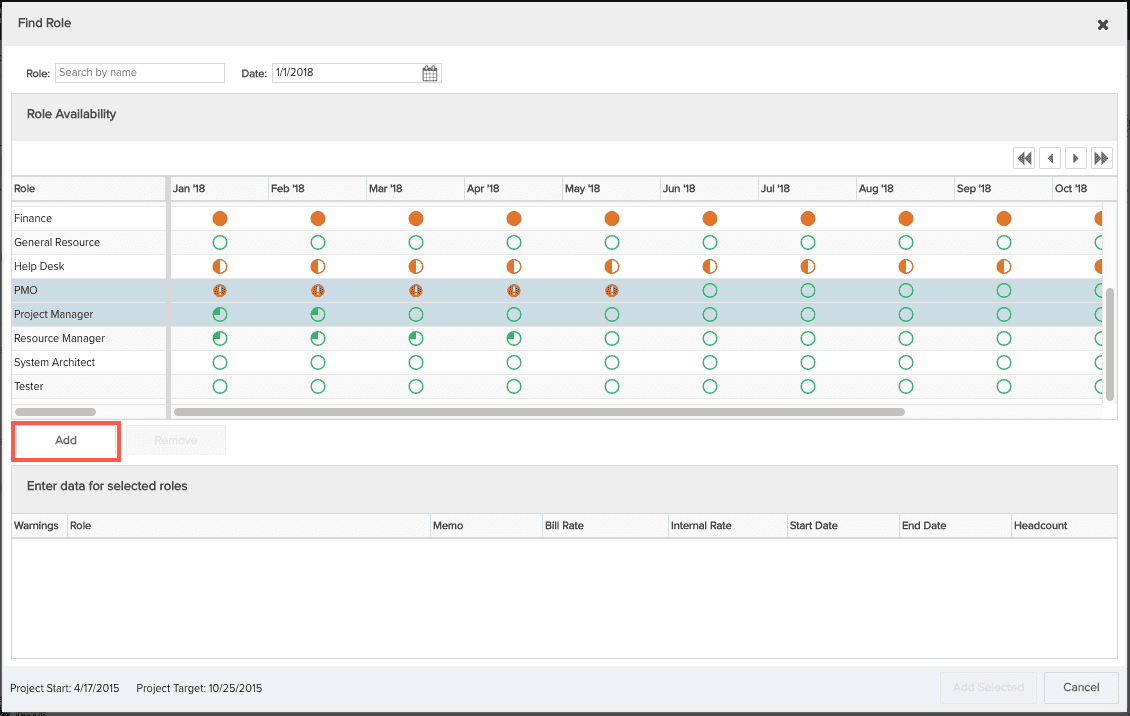
- Add to add the allocations to the lower pane.
- You can click Add Selected to add using default values, or modify the values inline and then click Add Selected.
When you create allocations from the Find Role window, unstaffed allocations are created and associated with the allocated roles.
To staff a resource
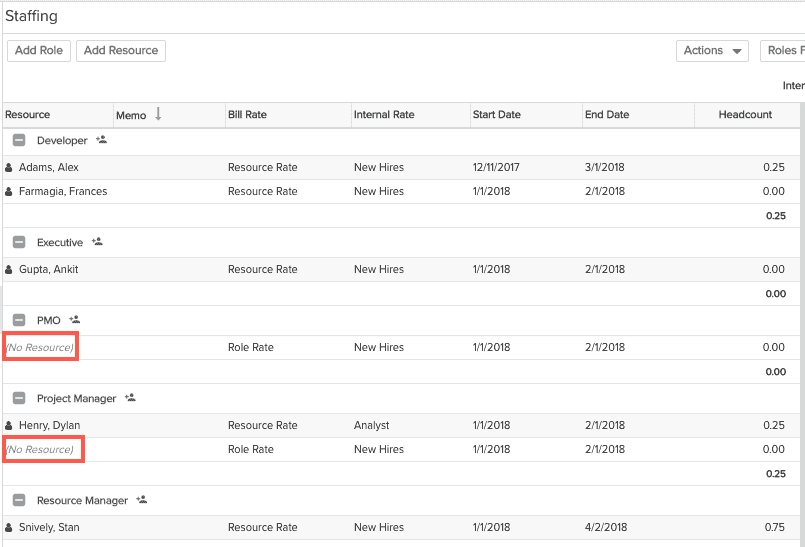
- Right-click on (No Resource) and then choose Staff Resource from the menu.
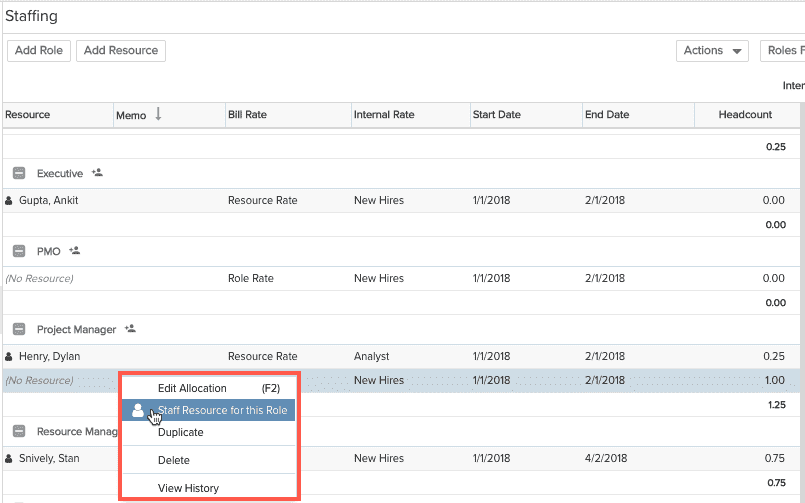
The dialog will be populated with resources who have the same Primary Role as the unstaffed resource. Adjust the Role filter to see resources with different/secondary roles.
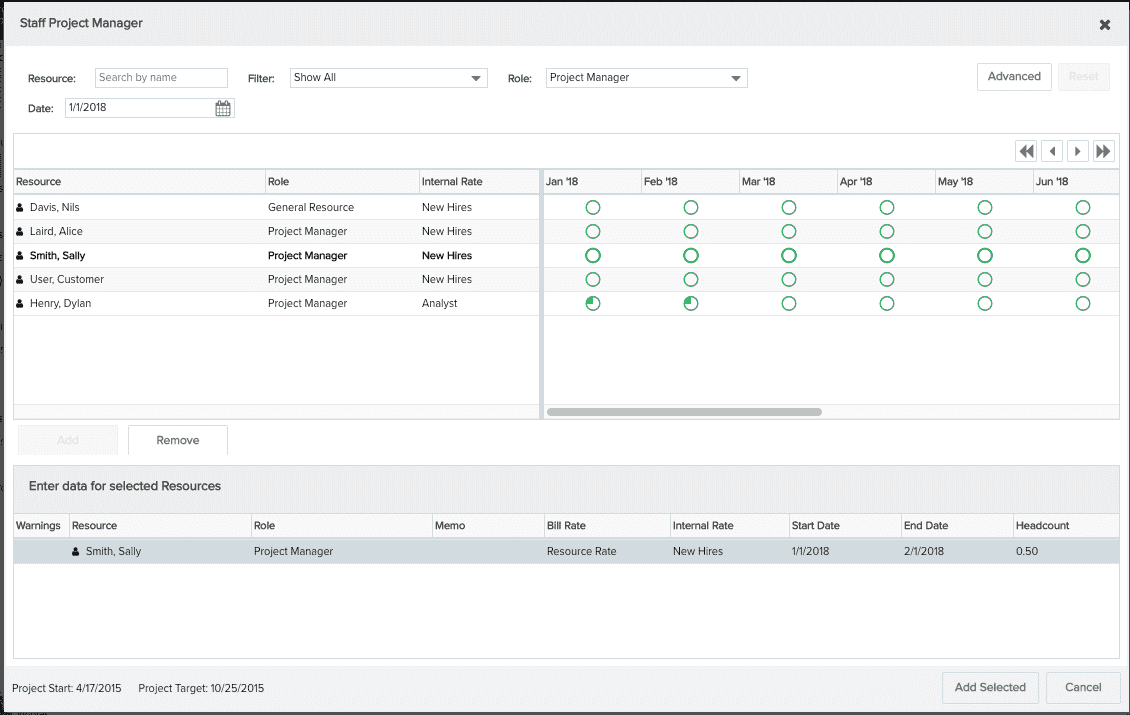
- Select a resource to allocate to the unstaffed allocation and click Add.
- Click Add Selected to staff the allocation using default values, or click modify the values first.
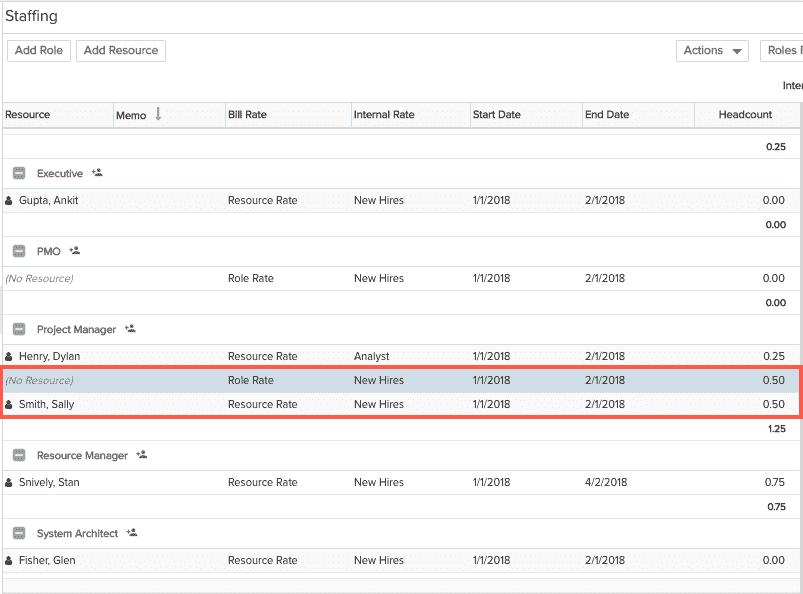
If you do not enter demand (hours/headcount), the resource will assume the full demand of the unstaffed resource, if any. If you enter demand less than the unstaffed resource, an additional unstaffed resource will be created to represent the unstaffed demand, as shown below.