
Creating Dependencies
This video demonstrates the use of intra-project and cross-project task dependencies. Duration: 7 min.
You can create dependent task relationships by directly editing the Predecessor or Successor fields in the task grid or the task's Details panel, invoking the Manage Dependencies dialog, or using a combination of both techniques. You invoke the Manage Dependencies dialog by clicking the ellipsis button in the Predecessor or Successor fields, or by clicking the Manage Dependencies toolbar icon ![]() . You can create intra- or inter-project dependencies. Intra-project dependencies are covered in this topic; see Creating Cross-Project Dependencies.
. You can create intra- or inter-project dependencies. Intra-project dependencies are covered in this topic; see Creating Cross-Project Dependencies.
Creating a predecessor dependency inline in the task grid
Note: You can only create intra-project dependencies by manually editing the field inline. Use the Manage Dependencies dialog to create cross-project relationships, as described below.
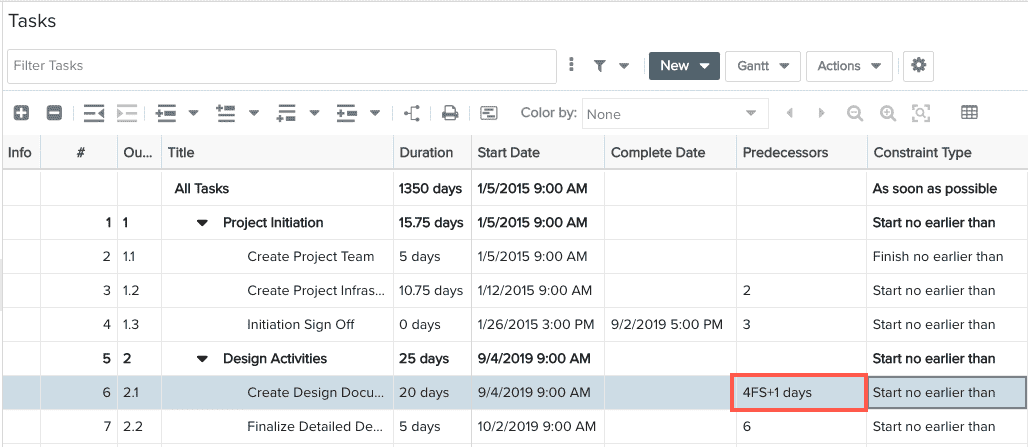
1. Navigate to MyProject/Tasks.
2. Edit the task for which you want to create a dependent relationship and click the Predecessor field.
3. Enter the task # of the predecessor. The dependency will default to Finish-to-Start (FS).
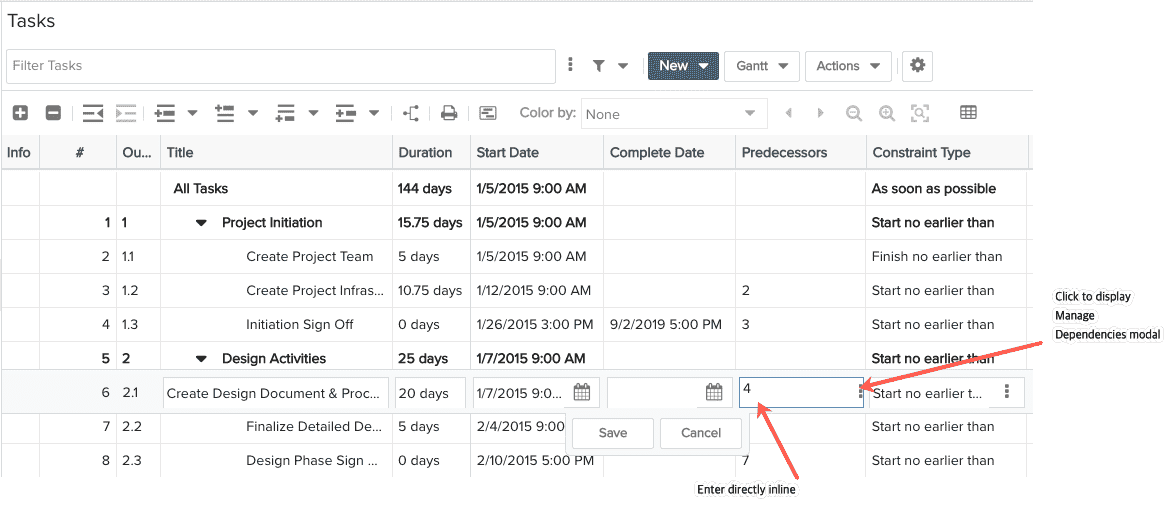
4. To enter different type of dependency, enter SS (Start-to-Start), FF (Finish-to-Finish) or SF (Start-to-Finish). For example, enter 2FF to create a Finish-to-Finish dependency.Youcan also enter multiple dependencies, separated by a ‘,’ (comma). For example, you can enter 2FF, 3.
5. To enter lag or lead to a dependency, type the predecessor task number, enter “+” or “–“, and then enter the lag or lead Duration and Duration type. If you do not specify a Duration type, the default is days.
Creating intra-project dependencies using the Manage Dependencies dialog
1. Navigate to MyProject/Tasks.
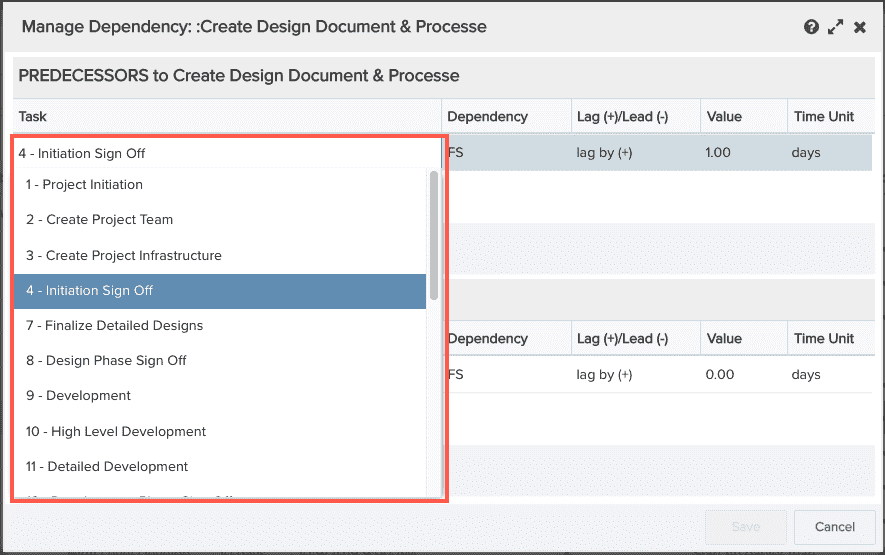
2. Select the task to include in a dependent relationship and click the Manage Dependencies toolbar icon![]() (or click the ellipsis in the Predecessors field).
(or click the ellipsis in the Predecessors field).
3. In the Manage Dependency dialog, the New Predecessor split menu and choose In Current Project.
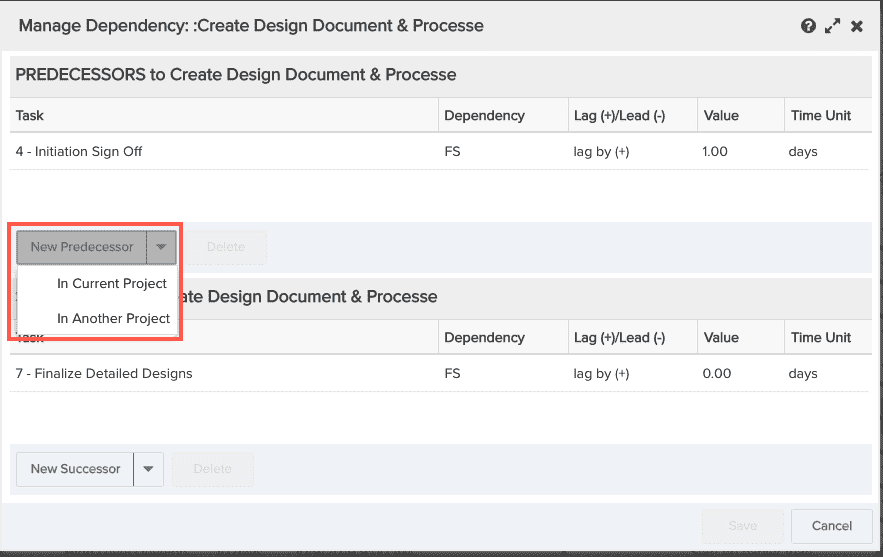
In the Task field, type-ahead or select the task which will precede the task you highlighted in the task grid.
4. Enter a Dependency type and a lead/lag time if desired. You can also adjust the time units.
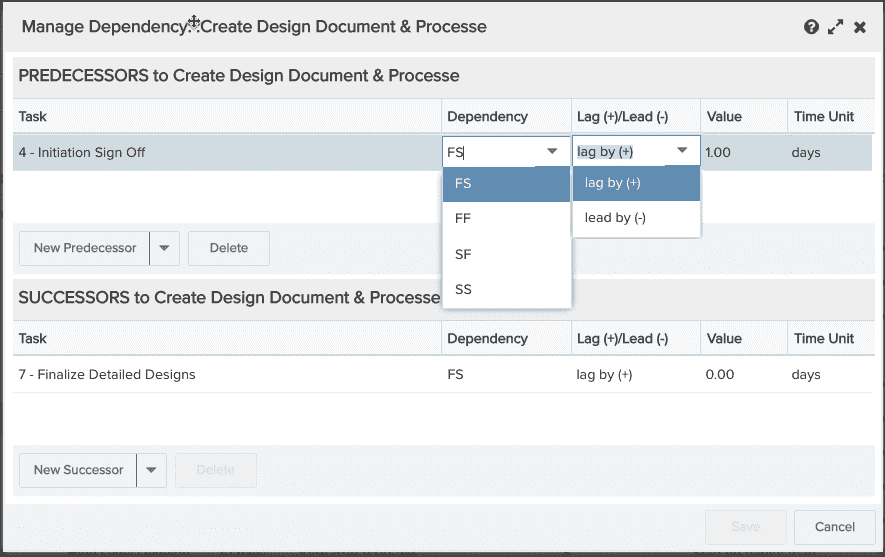
5. Repeat for additional dependencies, or create Successor dependencies in the lower half of the dialog.
6. Click Save.
Deleting Dependencies
There are several ways to delete a dependency:
-
Delete the dependency by clearing the Predecessor or Successor field.
-
Invoke the Manage Dependencies dialog by clicking the ellipsis button on the Predecessor or Successor field. Select the dependency in the dialog and then click the Delete button. Close the dialog and then click Save in the inline editor.
-
Select the task on which the dependency is defined and then click its Details tab. Clear the Predecessor or Successor field, then click Save.