
Creating, Editing, and Deleting Requests
Users with Request > Create permission can create requests in the main Requests grid or from Home/Requests. Note that you can also create requests from the Card view, which is discussed here.
Once you create the initial request, you can open it and add notes, attachments, score, and create associations and requested entities - provided your request is configured to support those features. If you do not see Notes, Attachments, Associations, or Scoring tabs and want to, please contact your PPM Pro administrator to check your permissions and/or the configuration of the request category.
Once created, requests are displayed in the grid (and the card view), where they can be filtered, sorted, bulk edited, and deleted (permissions allowing).
Save vs Submit
When working with requests, it is often useful to be able to save the request without having to move it on to the next gate. You can save a request that you are working on provided that the system-required standard fields Title and Requestor (marked with a red asterisk *) contain valid values. Once the values are there, the Save button will be active. You can continue to work on the request until you are ready to submit it.
In order to submit a request, required user-defined fields (marked with a two red asterisks **) must contain valid values. Once the values are there, the Submit button will be active.
Gated vs. Gateless Requests
Your PPM Pro administrator had a lot of flexibility in how the New Request modal looks and behaves, and we won't attempt to describe all variations here. There is one thing to note, which is when/how certain tabs appear and when a request can be saved vs submitted:
When you first create a request (click New request), all tabs (Notes, Attachments, and so on) on the request will be inactive.
- If the request is gateless, any fields marked with a red asterisk (*) need to contain valid values before you can save. Once you save the request the tabs should become active. If they do not, you'll need to change the Status field to a value other than Implied Status (typically something other than New or Proposed). If you really want to understand this, ask your PPM Pro administrator. We hope that this is an edge case.
- If the request is gated, any fields marked with a red asterisk (*) need to contain valid values before you can save. Once you save, any tabs configured to be visible prior to submission will become active. Any fields marked with two red asterisks (**) need to have valid values (as well as the fields required for save) prior to submitting the request. Once submitted, the tabs configured for the next gate will be active - those tabs may be a different set than the ones available prior to submitting.
Changing Categories
Note that if you change the category of a request (assuming the Category field is available in the request Details tab), the form will not change (add/remove fields) until after saving the request. As a result, some required fields might not initially display data because they were not part of form displayed by the initial category. For example, if you select the IT Request category and then change the category to Innovation Idea Request and save, any required fields unique to the Innovation Idea Requests category will be empty because they did not appear on the IT Request form. Typically you cannot get into a state where required fields are empty once a form is saved (saving is prevented until required values are entered). The next time you edit the form you will be required to enter values for the required fields before you can save.
Creating a Request
- Navigate to the Requests view, or Home/Requests.
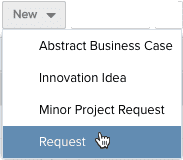
- Choose New > requestCategory. If your organization has configured one request category only, then simply click the New button that is presented instead of a menu.
The request modal appears with the name of the request category in the modal title.
![]()
- Enter values for required fields. Note that request titles do not need to be unique.
In the example above, the fields required prior to saving are denoted by the asterisk (*): Title, Requester, and Category (which has a default and is read only). Once you save, any tabbed sections configured for the request will be active. The fields required before submitting are Business Objective and Potential Business Value - the two red asterisks (**) denotes fields that must have valid values prior to submitting the request (in fact, the Submit button will not be available until there are valid values in those fields). This allows you to save the request and come back to it later. - Click Save.
- (Optional) Click available tabs (if any) and fill out fields.
After closing the dialog, the request will appear in the Request List and in the Card view. Note that the card representation of the request displays up to 6 Detail fields only. From either view you can double-click the request to display the request modal, where you can view/edit the Details and access Note/Attachment/Associations tabs (if any are configured). See Request Notes and Attachments and Associating Requests and Creating Requested Entities.
Creating Requests from the Card View
You can create requests from the Card view exactly how you would from the Requests List. However, once the request is created, the card representation will display only up to 6 fields configured for the card. If you double-click the card, the request modal will display the all the Details fields and component tabs (Notes/Attachments/Associations - if any are configured).
- Navigate to the Requests view, or Home/Requests and click the Card View icon
 .
. - Click New and choose a request type. If your organization has configured on request type only, then simply click New.
The request modal appears with the name of the request category in the modal title.
![]()
- Enter values for required fields. Note that request titles do not need to be unique.
In the example above, the fields required prior to saving are denoted by the asterisk (*): Title, Requester, and Category (which has a default and is read only). Once you save, any tabbed sections configured for the request will be active. The fields required before submitting are Business Objective and Potential Business Value - two red asterisks (**) denotes fields that must have valid values prior to submitting the request (in fact, the Submit button will not be available until there are valid values in those fields). This allows you to save the request and come back to it later. - Click Save.
The request will appear in the Card view and the List view. Note that the card representation displays only up to 6 Detail fields. From either view you can double-click the request to display the request modal, where you can view/edit the Details and access Note/Attachment/Associations tabs (if any are configured). See Request Notes and Attachments and Associating Requests and Creating Requested Entities.
Editing Requests
To edit a request (prior to submission if gated), double-click on a request in either the List or Card view. The request modal appears, where you can make changes to the Details or other components that are part of the request (provided you have the appropriate permissions). See Request Notes and Attachments and Associating Requests and Creating Requested Entities.
If a gated request has been submitted, it can be edited while the Gate Status is In Progress or On Hold (provided you have the appropriate permissions).
Bulk Editing Requests
You can bulk edit requests in both the List and Card views.
- Navigate to either view.
- Select multiple requests - use Shift-click to select a range, or Ctrl-click to select non-adjacent rows/cards.
- Choose Actions > Bulk Edit, or right-click on a request Bulk Edit from the right-click context menu.
By default, the editor displays the same columns that are displayed in the Requests List. Please see Bulk Editing for more information.
Deleting Requests
Provided you have permission to delete requests and the request has not been submitted, you can select a request and choose Actions > Delete, or right-click a request and choose Delete from the context menu. If the request has notes or attachments, you will be prompted to acknowledge that they will be removed, as will be associations to other entities (the other entities themselves will not be deleted).
Submitted requests cannot be deleted unless they have a status of Approved or Rejected.