
Configuring Preferences
You can configure the following features:
-
Mobile Layout - By default, the mobile application renders for a mobile phone. Choose Tablet/Non-phone for a different device.
-
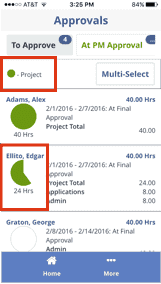
Approvals Pie Graphic - You can configure a pie graphic to represent a specific type of time and to appear at the top of the Approvals screen as well as next to each timesheet in your To Approve list. Types of time are: Billable Time, Administrative Time, Portfolio Time, Project Time, Capitalized, or (no graphic). The top-level graphic is a legend displaying the type of time. At the individual timesheet level, the graphic represents the percent of time represented by that time type on that timesheet.
-
Show Approvals on Home Screen - Enable to show the Approvals icon on the home screen.
-
Show Tasks on Home Screen - Enable to show the Tasks icon on the home screen.
-
Show these days of the week in timesheet - Enable each day that you want to appear in your timesheet grid. By default, Mon-Fri are enabled, with Sat-Sun not appearing on the timesheet.
-
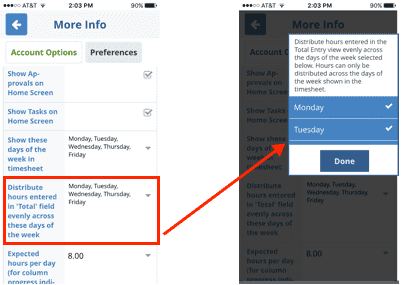
Distribute hours entered in 'Total' field evenly across these days of the week - Select the days you want to automatically distribute hours to if you are using the "Total" time feature. For example, you might want to display Mon-Sun on your mobile timesheet, but only want to distribute hours automatically to Mon-Fri.
-
Expected hours per day (for column progress indicators) - Enter the number of expected work hours/day to calibrate the system to measure progress against your company's expected workday hours. This setting has no effect on company time calculations, but is used only for the progress indicators described here.
To supply Guidelines content (must be a user with Admin privileges)
- Log in to the PPM Pro web application.
- Navigate to Admin / Organization Info.
- In the Organization Guidelines section, click the [Edit] link to the right of Timesheet Guideline. Copy your content into the Content field.
- Click Save.