
Multi-column List Reports
By default, List reports are configured with the column heading running across the page. If you have more than about 8 fields, these reports get too wide, especially when placed on a dashboard.
You can use the Multi-column option to create a report where you control the number of columns to place across the page. (A column is actually a pair of columns: one for the label and one for the value.) Once that limit is reached, the next fields are placed on the next row. For example, if you specify 3 columns, then the first three fields are placed left to right across the page; the column heading is placed to the left of the column value. Then fields 4-6 are placed on the second row, and so on.
Note that the order you place the Selected Fields in the Output Options tab of the report wizard determines the order. If you are building a 3 column report, you can predict which 3 fields appear in which rows by starting at the top of the list and grouping by 3.
Note: Maximum number of column is 4. Aggregation and Group By are ignored; multi-column hierarchy reports not supported.
The examples below illustrate a regular list report, and the same report in a multi-column format (3 columns):
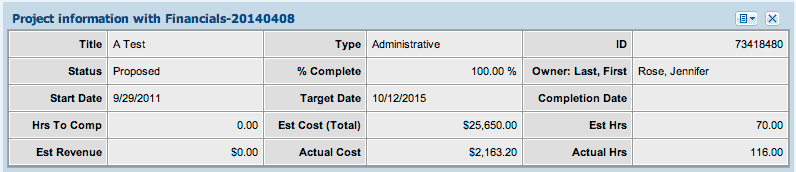
Default list report

Multi-column list report
To create a multi-column list report
1. Set up your list report as described in Configuring List Reports.
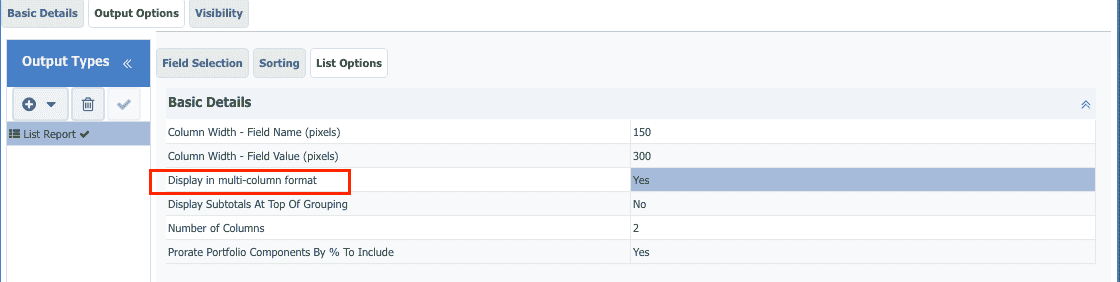
2. After you've got the data set up, click the List Options tab.
3. Enable the Display in Multi-Column Format option (choose Yes). Three additional options will now display:
a) Specify the number of columns you want (Number of Columns). Default is 2.
b) Specify the width of the column that displays the label (Column Width - Field Name). Default is 150 pixels.
c) Specify the width of the column that displays the field value (Column Width - Field Value). Default is 300 pixels.
4. Click Save or Save and Run.