Allocating Resources to Projects
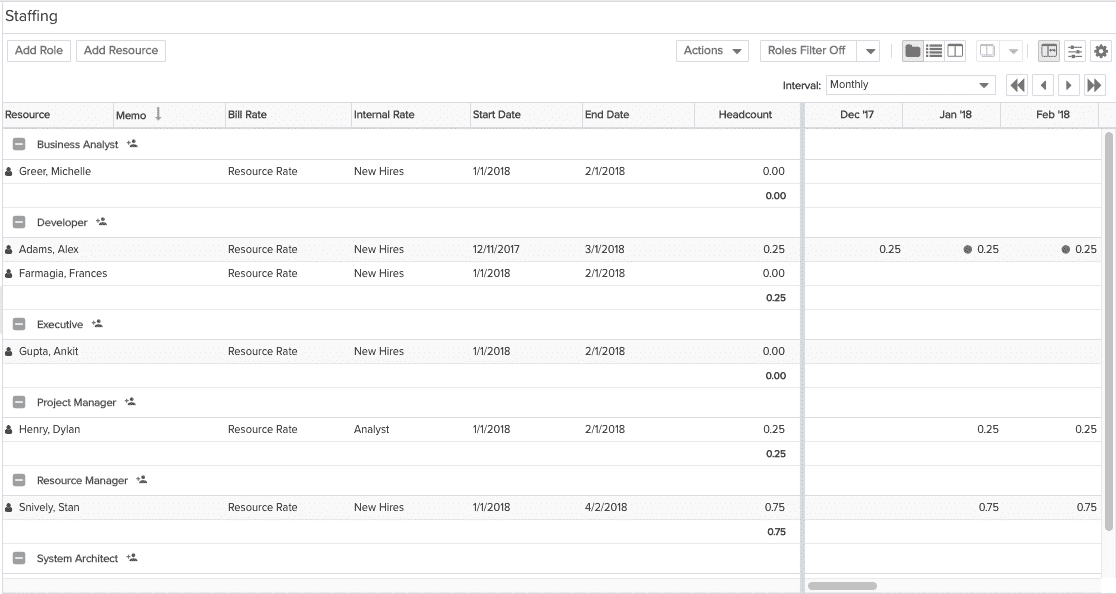
If you assigned a role and left it unstaffed, you can now staff the resource. The Staffing screen provides tools for searching for roles and resources, as well as viewing resource availability.
Or, you can assign a role and staff a resource in one step (staffed allocation). Note that once an allocation has an associated timesheet entry (either by way of a pinned timesheet, or even an entry with no hours), the allocated role cannot be changed.
You can multi-select a range of resources/roles by using Shift-click. Deselect items with Ctrl-click.
Any user who has Project > Edit > Staffing permissions can create staffing assignments for the project.
Note: Avoid creating "overlapping" allocations - that is, the same role/resource scheduled for part or all of a date range. While PPM Pro allows you to overlap allocations, they may result in inaccurate or ambiguous time tracking and reporting. You can fix an overlapping allocation by either changing the resource or changing the dates of one of the allocations.
How Total Headcount is Calculated
You have the option of reflecting allocations in hours or headcount. Depending on your time horizon (length of allocation), when using headcount you might get some situations where it looks like basic math is off! This is because the earliest Start Date and the latest Target Date of the Role have to match the earliest Start Date and the Latest Target date of all allocations for that role. As a result, sometimes 1+1 does not equal 2, because the headcount spans 2 different time horizons. The following example illustrates:
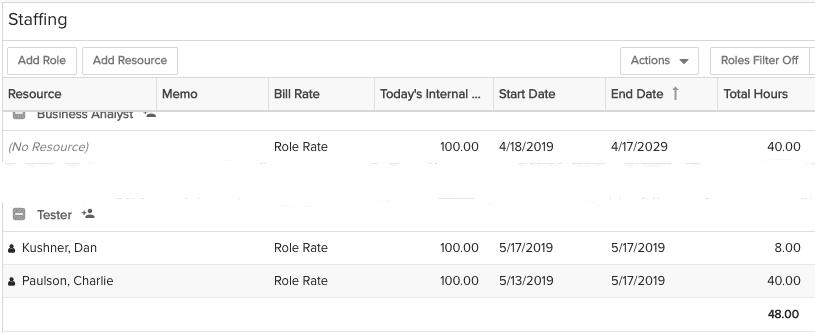
We have created 2 role allocations for Tester, and then assigned resources to the allocations. Dan is allocated for 1 day, and Charlie is allocated for 1 week - the project calendar is set to a 40 hour work week, 8 hours per day. In the screenshot below, the allocations are represented in hours: 8 (one day) for Dan and 40 (one week) for Charlie, for a total of 48 hours. Math is your friend.
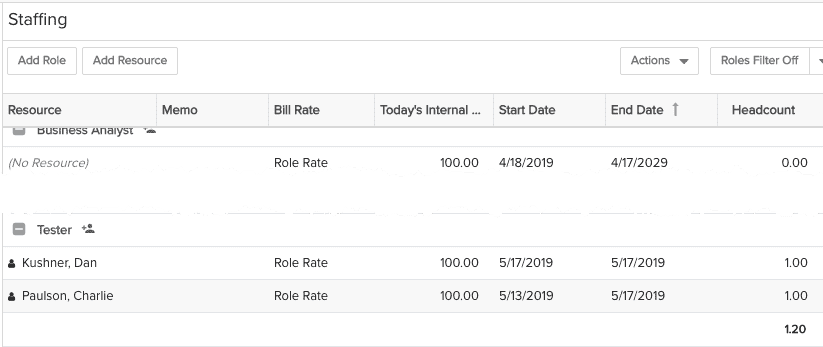
Now, let's switch the Staffing screen to represent the allocations in Headcount (you can do this in the gear icon in the top right corner of the screen). Now, Dan is allocated full-time (headcount = 1) for 1 day (8 hours, .2 of the week), and Charlie is allocated full-time (headcount = 1) for 1 week (40 hours). Since allocations are calculated in hours, 48 hours = 1.2 headcount for 1 week (the longest time horizon for Tester). (6 person days over a 5 day span or (6/5) = 1.2)
To staff a resource from an allocated role
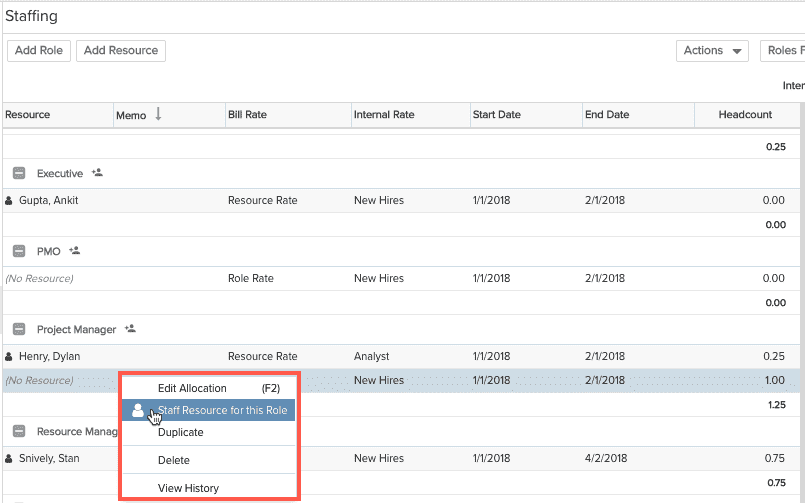
- Right-click on (No Resource) and then choose Staff Resource from the menu.
The dialog will be populated with resources who have the same Primary Role as the unstaffed resource. Adjust the Role filter to see resources with different/secondary roles.
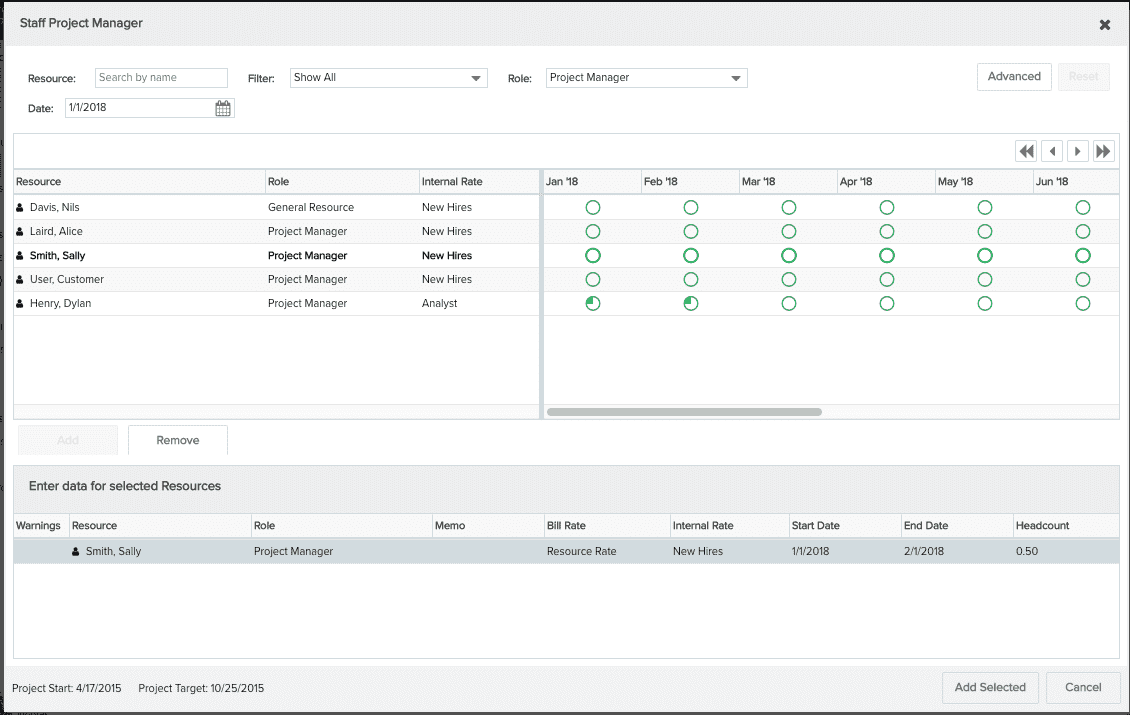
- Select a resource to allocate to the unstaffed allocation and click Add.
- Click Add Selected to staff the allocation using default values, or click modify the values first.
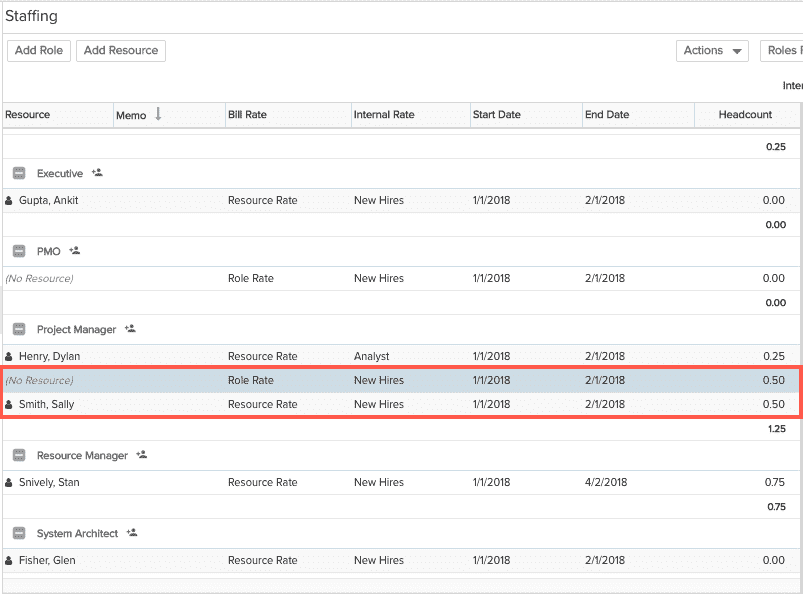
If you do not enter demand (hours/headcount), the resource will assume the full demand of the unstaffed resource, if any. If you enter demand less than the unstaffed resource, an additional unstaffed resource will be created to represent the unstaffed demand, as shown below.
To create staffed allocations
- Navigate to the Staffing screen for the project you are planning.
- Click Add Resource.
The Find Resource window appears. By default, this window displays all resources in your organization and their availability for the next 24 months (sorted most to least available, then sub-sorted by last name/first name). Use the filters to narrow the list of resources. If you wish to execute an advanced search, click Search with Advanced Options and specify the appropriate details. See Advanced Search Options for more information.
For information about interpreting the availability indicators, see Availability - Prior to Allocation
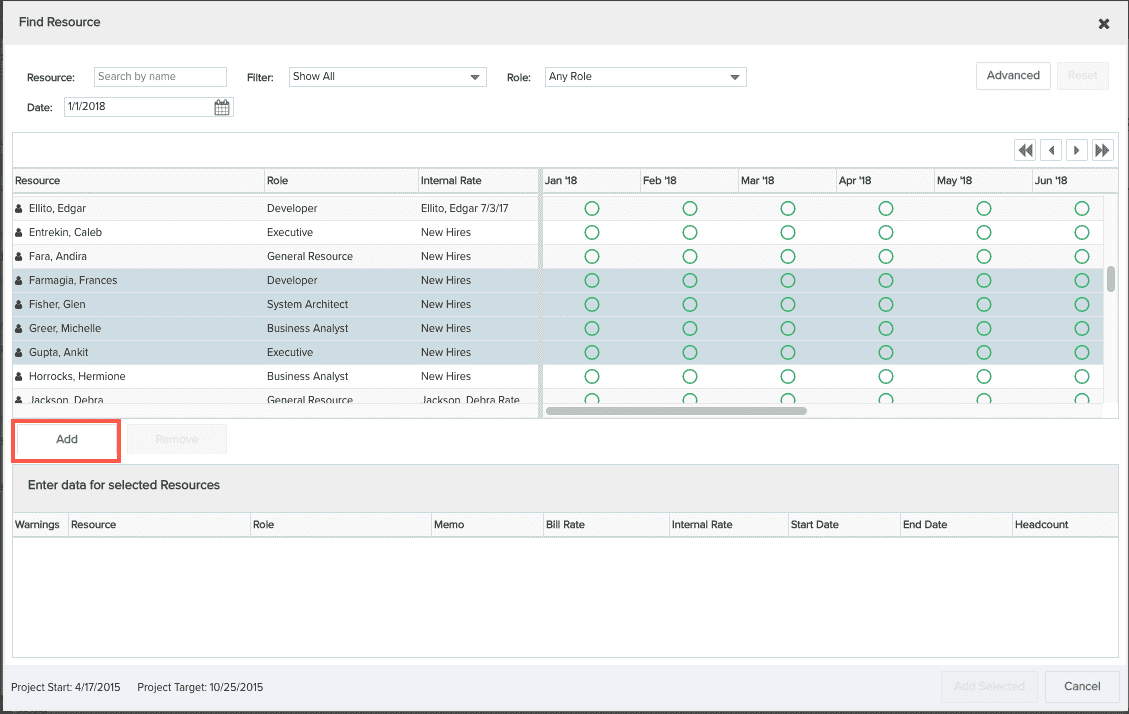
- Select the resources you want to allocate to the project and click Add to move them to the lower pane. Note that the resources you moved are now shown in bold-italic text in the upper pane.
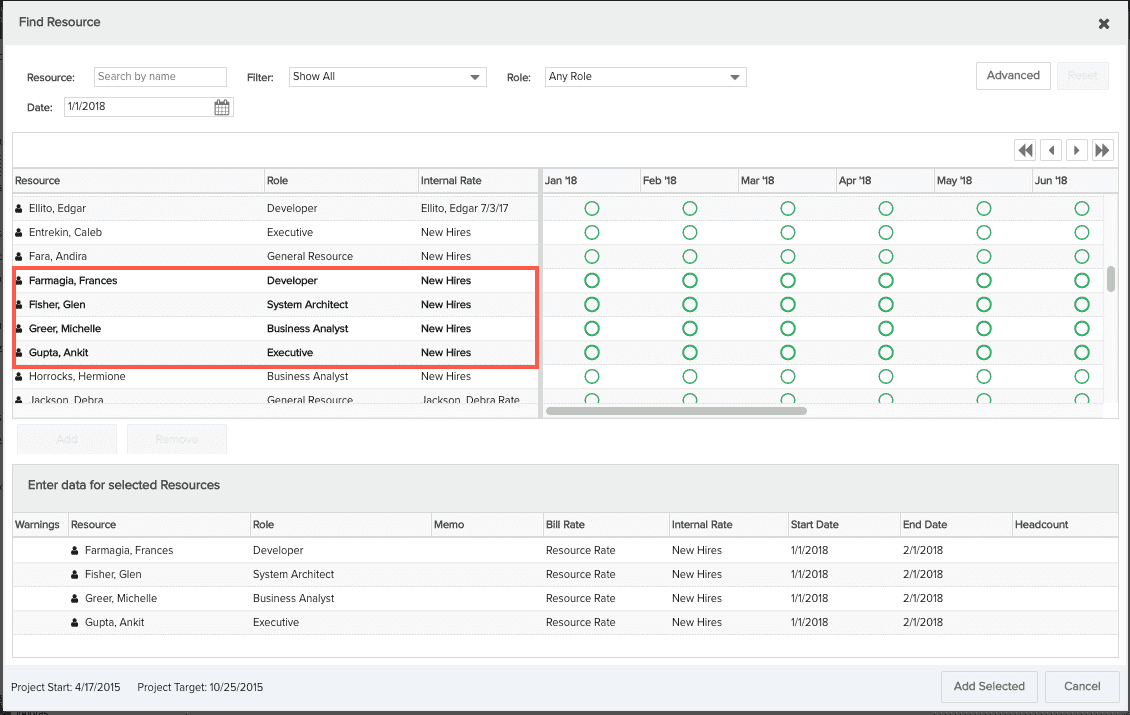
- You can click Add Selected to add the resources with the default values, or you can modify the default Start/End Dates, enter a demand value (Total Headcount/Hours), or select a Billing Rate (if you have the billing rate feature enabled; click here for more information). Click Add Selected when you are finished.
By default, Demand=0, Start Date=Project Start Date, or today's date if Project Start is in past or empty. End Date=Project Target Date; if no Target Date exists, End Date is Start Date + one month.
When you create allocations from the Add Resource window, the resource is allocated to his or her Primary Organization Role. The screenshot below is shown in Grouped View.