
Resource Workbench Tips
The following is information we think is particularly helpful when using the Resource Workbench:
- If you plan on making any edits to a project (adding/deleting/editing allocations), the project must be in project-level resource planning mode.
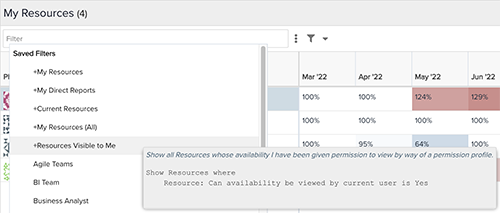
- Use the Filter control at the top to focus on specific resources. The out-of-the box filters (those beginning with "+") may be particularly useful and you can also create or use other filters based on role, hierarchy, and so on. Note that a maximum of 250 resources are visible at one time for performance reasons.
- Utilization color gradients are configured by a user with administrative privileges. The same colors are used any place in PPM Pro where resource utilization is visualized. If you want to adjust the colors, contact an Admin. If you do not want to use the colors, you can turn them off in the Settings dialog in the Resource Workbench.
- The columns available for display in the top of the Resource Workbench are the same columns that are available in the All Resources list page under the Resources tab (except the Photo column, which is only available on the Resource Workbench). You can hide/show these columns using the Setting dialog.
- In the Allocation Details pane, use the column header menus to configure the columns to display.
- You can change the number of resource utilization months to display, the allocation intervals, and the allocation units (headcount or hours) in the Settings dialog.
- You can resize bottom and top panes (by dragging the slider), or even collapse the lower pane when you don’t want to see specific allocations.
- You can select multiple resources to view their allocations together in the Allocation Detail pane.
- Use the “Show Today” button to reorient the allocation details to today’s date

- You can delete an allocation by right-clicking and selecting Delete (or selecting allocation and choosing Actions > Delete). This also removes the allocation from the project Staffing.
- You can create a staffing entry for the selected resource by right-clicking and choosing Add Staffing Entry (or selecting resource and choosing Actions > Add Staffing Entry). This also creates an entry on the project Staffing screen, and it will also appear in the Details pane below. (You must have appropriate permissions - project team member or Staff Directly permission if using centralized staffing.)
- To extend allocation dates, enter additional capacity in the cell of a future month for the selected allocation in the Allocation Details pane (lower).
- If viewing an entry that was created as the result of a staffing request, it will be read only.
- If you see a resource with capacity, use Find Demand.
- Find Demand is not supported for weekly intervals - if you have the Allocation Details set to weekly, the Find Demand window will present monthly contours.
Why Don't the Utilization Numbers Match the Allocations for a Given Month?
Allocation doesn't match utilization - check project start date.
This is a common scenario for projects that use Headcount for allocation units. If you use Hours, then you will see actual hours, not percentages, it will be more obvious how the values are derived.
For any given month, you may notice that the utilization numbers in the Resource List (top) pane don't match the allocated amounts in the Allocation Details (bottom) pane. Project start/end dates, resource and project calendars all impact the calculations. Before we dive into this there are three things to remember:
-
the Resource List bases its calculations on the Resource calendar
-
the Allocation Details pane bases its calculations on the Project calendar
-
when in doubt, switch the allocation units to hours to help provide some clarity
For example, in the screenshot below we see that the user "Resource Workbench" is at 25% utilization for December, but their allocation for December says .50. Also note that the allocation units are displayed as Headcount:
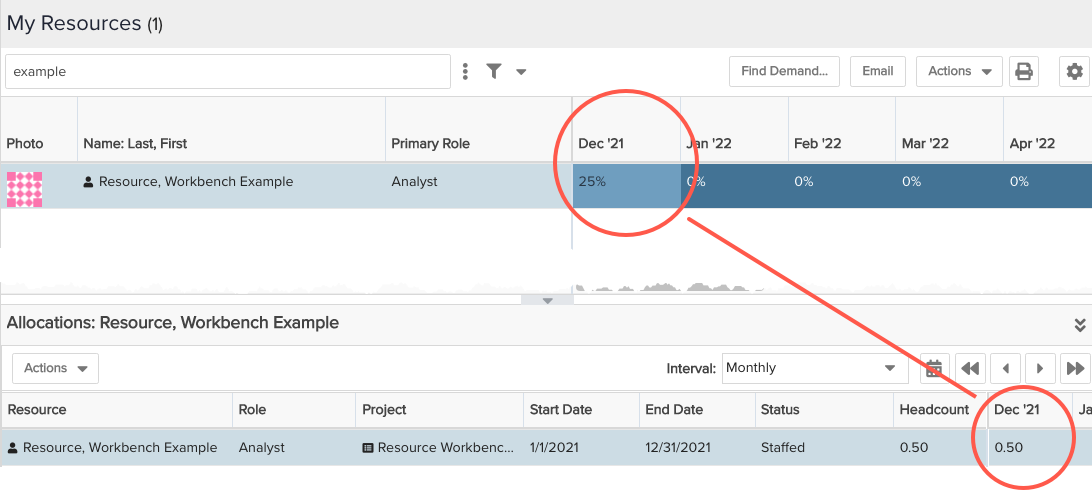
The project calendar has a 20 hours workweek, and the Resource Workbench has working hours of 40/week.
Resource calendars track non-working days and determine the working hours for a resource. Project calendars track non-working days and events for projects. It's very likely that the number of working days/hours per month for a project may differ from the number of working days/hours per month for a resource. Minor discrepancies between the calendars can result in surprising results - for example, you expect that a resource is 50% utilized but the Workbench shows 53%.
Wondering why you see a resource with 0% Utilization, even though you know that their Resource calendar has events and they do not have full capacity? Check to see if the resource has any project allocations for that time period; because Utilization is calculated as project allocated hours divided by resource Calendar capacity hours, the 0% is likely due to the 0 project allocated hours.