
Using the formula editor
The Formula Editor has an editable formula text box on the right, and a list of fields and functions on the left. Once you create a formula, you can validate and test it. You will need the ID of a target entity in order to test the formula.
Fields
The Select Fields pane contains all the fields that are available based on the entity you selected. Double-click the Fields blue titlebar, or click the to display the available fields. Fields available for selection include standard fields, user-defined fields, and previously defined calculated fields.
In addition to the entity's fields, related entities and fields are also displayed if there is a one-to-one mapping. For example, if the entity is project, you will also see related entities such as Business Unit and Program. These related entities in turn contain their own fields.
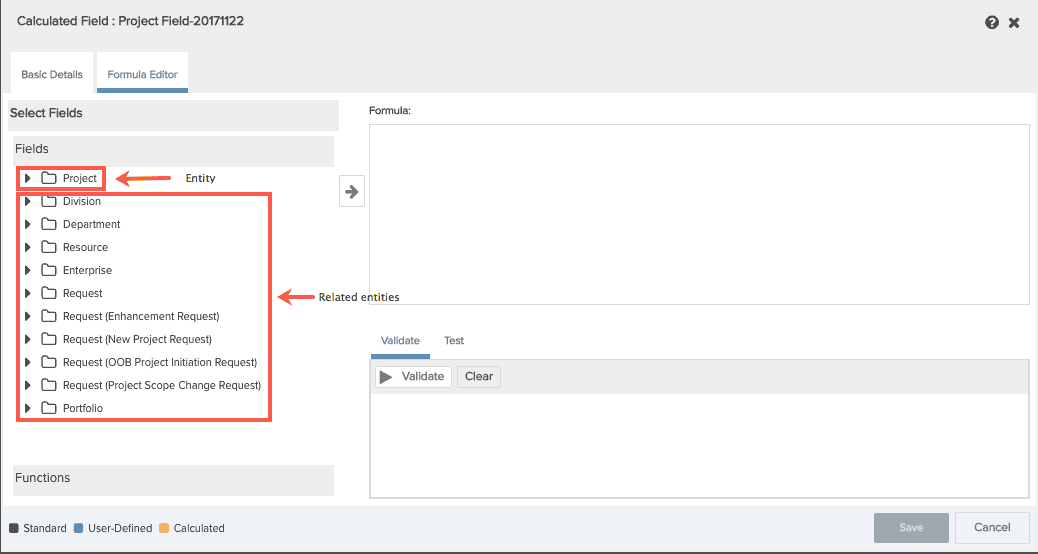
You can drag and drop the fields into the Formula editor. When you drag a field to the formula text box, the field is displayed as [entityname].[fieldname]. For example, if your entity is project and the field is Type, you will see [project].[type]. You can then create a formula around this field.
Note: You can directly type fields names into the Formula window. The Formula window is case insensitive. If you type in fields or functions that have spaces, for example Hrs To Comp, be sure to enclose the name in brackets: [Hrs To Comp]. If you drag the fields they will automatically have the correct syntax.
Functions
Double-click the Functions blue titlebar display the available Functions. You can float the cursor over any function to get a pop-up that contains the name of the function and a description of what it does, the syntax, and an example.
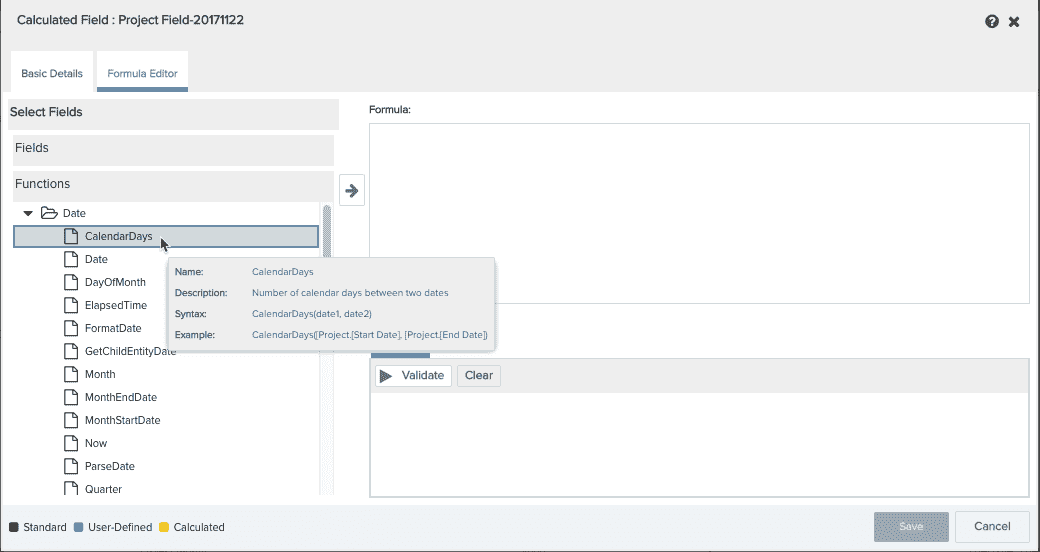
You can drag and drop the functions into the Formula window. When you drag a function to the formula text box, text in the function syntax format function(param1, param2...) is added to the formula at the cursor. There are a few special functions that do not require parameters and are provided to allow you to create formulas with relative dates and other deployment-specific constants. Examples of special functions are Today( ) and WeekStartDayText( ).
For a list of all available functions and keywords, see Functions.
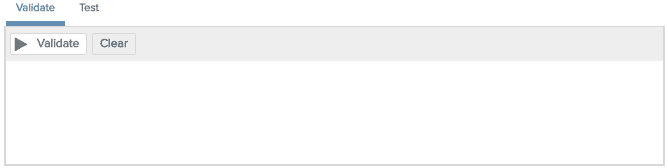
Validating the formula
Once you build your formula, click the Validate button to check that it is valid. Any syntax errors will be displayed in the Validate area. You can clear your validation results by clicking the Clear button and then re-validate your formula if you have changed it.
Testing the formula
Once you validate your formula you can test it against actual data by specifying the Target ID of an instance of the entity on which the field is based, and then clicking Test. For example, in the screen below the target is Project, so you need to enter the ID of a specific project. You can find the target ID on the Basic Information section of the Info page of the selected target. An example project ID is: 58045618.
When you test the formula, check that the data the formula returns is expected. While your formula might be technically valid, it might not be constructed accurately.
Once you are finished and have saved the formula, the calculated field is available for use in reports and filters (provided you specified that visibility on the Basic Details screen).