
Creating Categories for Requests
Categories are types, or variations, of a request. You use categories if you need to have to create different types of requests. For example, different categories can have different sets of fields displayed on the Details tab of a request, as well as different tabbed sections such as Notes, Attachments, Associations, and Scoring. And, different categories can have different workflows (gates). Note that for those using gates, checking a section at the category level makes it available to view on a gate - provided you configure the gate to show the section. You can also determine whether the section will be able to Show on New. See Creating and Deleting Gates.
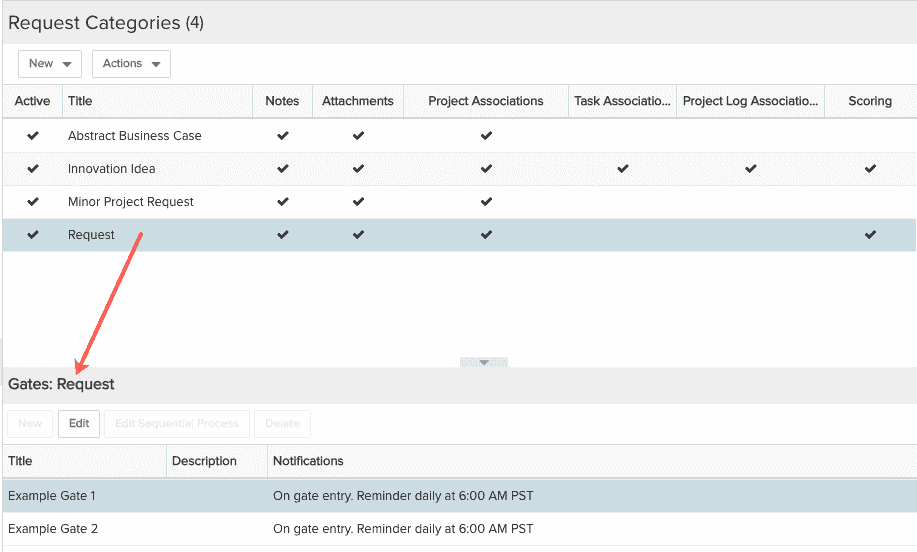
In the screenshot below, there are several request categories; the checkmarks indicate which sections are included with each category (and thus available for use on gates). The gates for the selected category are shown in the Gates list:
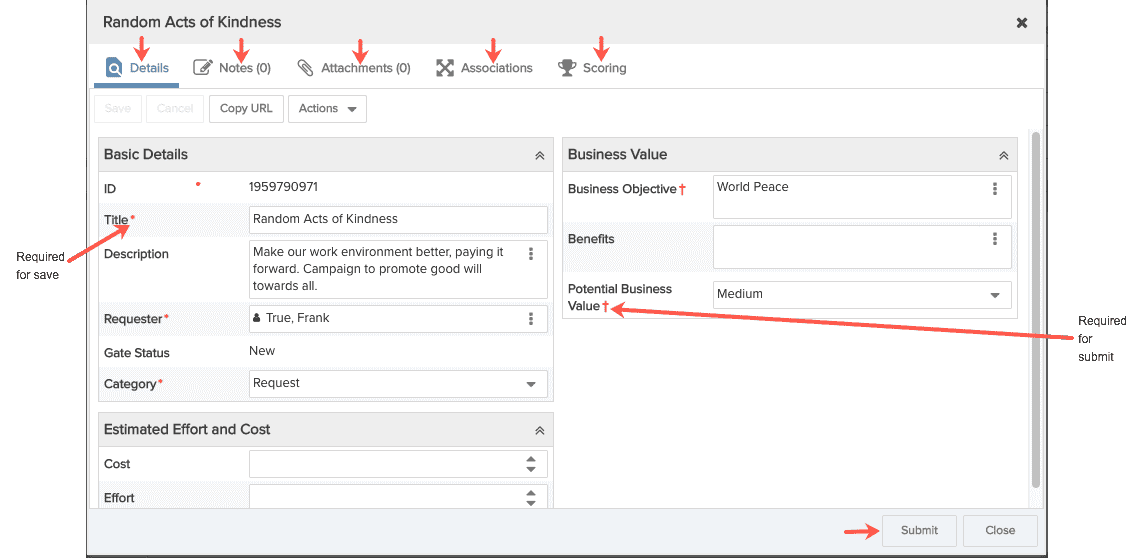
The screenshot below illustrates a new request whose category ("Request" - see screenshot above) includes the Notes, Attachments, Scoring, and Attachments section all configured to Show on New (the Association section will only show if there is at least one association). Because there are gates configured for this category and this is a new (unsubmitted) request, there is a Submit button - if no gates, then you would not see a Submit button. Finally, there are two types of "required" fields - the red asterisk denotes a field required in order to save, the red dagger denotes a field that is required before submitting. This allows you to start a request and save it before you have completed all required fields - there are only a couple of fields required to save.
Things to Know
- When you select sections to appear in a category, remember that they need to be configured to appear at any gate where you want them visible (see Show on New below). If you have configured a section to Show for New, when you put On Hold a request of that category, sections with Show On New = Yes will be visible in the request.
- A standard field called Gate Status is designed for use with requests that use gates. This field automatically updates as the request moves through the workflow. See Gate and Gate Status Fields. If you place this field on a gate-less request, it will not have any value.
- The simple Status field (lookup list) can be used for gate-less requests.
- If you configure a request category to support associations with other entities, those other entities must configure categories that support request associations. In other words, the association must be configured on both sides (for example, if a request is configured for project associations, but the project entity is not configured for request associations, there will be no projects available when attempting to Add a project to the request).
- Request fields will retain their data even if a user converts an instance of a request to a category that does not include that field. For example, if the Priority field is shown on the Details section for Category A but not for Category B, the Priority field will show data for all reports, regardless of the request's current category. Data always stays with the field.
- End users should be made aware that changing categories will not change the form until after they save. This can result in the display of some required fields that have no data, because those required fields were not part of the form displayed by the initial category. For example, if the user selects the IT Request category and then changes the category to Innovation Idea Request and saves, any required fields unique to the Innovation Idea Requests category will be empty because they did not appear on the IT Request form. Typically you cannot get into a state where required fields are empty once a form is saved (saving is prevented until required values are entered). The next time you edit the form you will be required to enter values for the required fields before you can save.
Request Gates
Gates are the building blocks of a workflow, providing opportunities for adding/reviewing information and giving intermediate and final approvals. Gates are not required for requests, but are commonly used. Each request category can have its own set of gates; at each gate the request can be configured to have sections or fields shown or not, editable or not, to have default values or not, even be required or not.
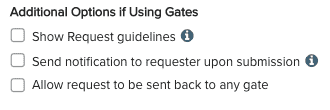
There are a few options with regard to gates that are defined on the category. These include whether to show request guidelines, whether to send a notification to the requester upon submission (if requester is not submitter), and whether the request can be sent back to any gate - you'll see these options, shown below, on the New/Edit Category modal:
Gates themselves are configured adjacent to a category, as shown below.
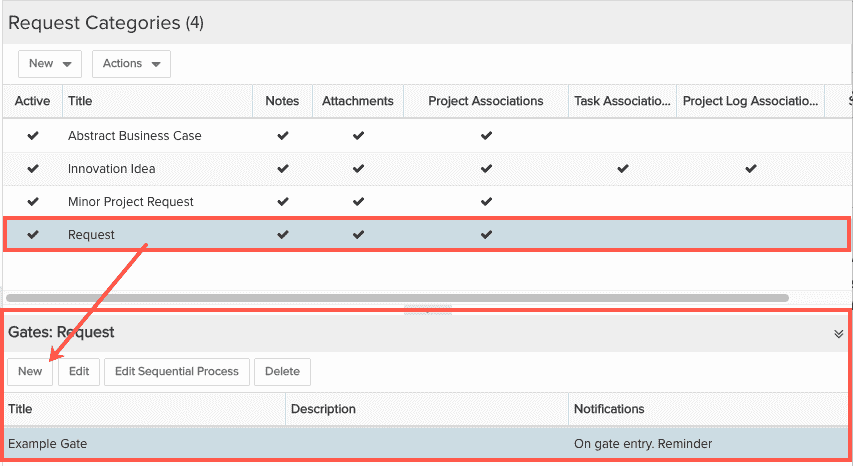
See Creating Gates for more information.
Sections to Appear in New Request Dialog (Show On New)
In addition to defining what sections (Notes, Attachments, Scoring, for example) are available for a category, you can also configure when those sections/tabs appear to the end user. You can configure sections to appear in the New Request modal when first creating a request - this is affectionately referred to as "show on new", and at specific gates.
You can specify which section(s) appear when creating a new request by choosing Show on New = Yes in the Create New Category dialog . If Show on New = Yes, then the section will appear (initially inactive) in the Create New Request dialog. Once the user saves the Details tab, these sections will become active and the request creator can access the tabs before closing the request. Remember that certain fields are required for Save vs Submit.
If you are using gates and Show on New = No for all sections, then only Details will appear in the Create New Request dialog and other sections will not appear until the request has been submitted (and Gate Status field shows a value other than New). See Configuring Gate Fields/Show on New.
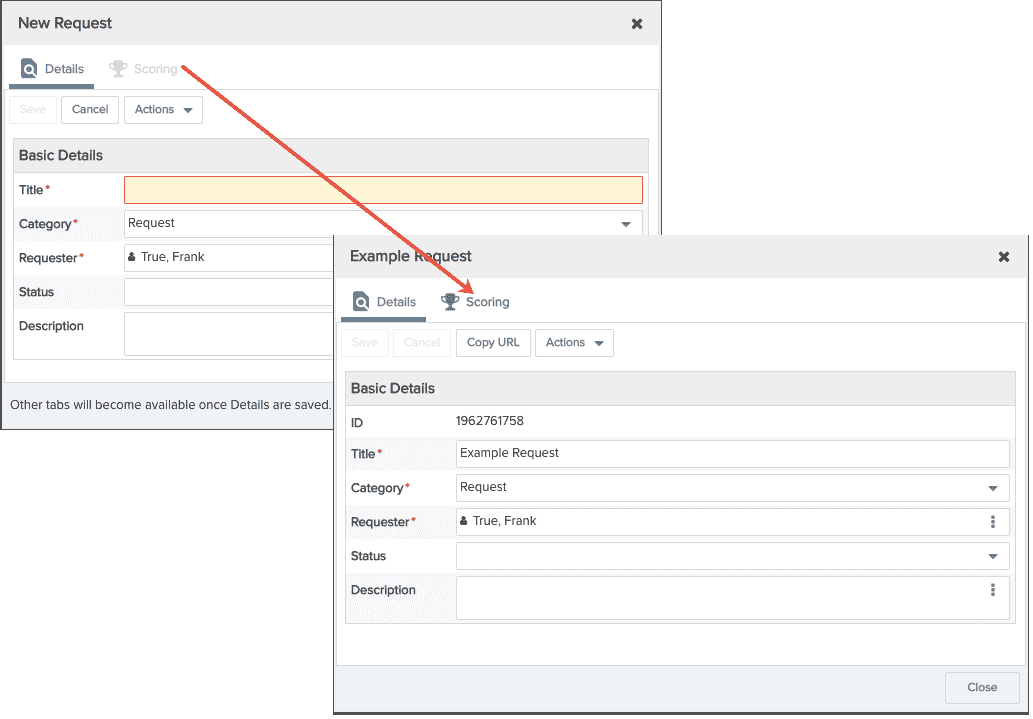
For example, the screenshots below show a new request that is configured to show the Scoring section section on new - notice that the Scoring tab is grayed out - and then the Scoring tab is active once Details is saved (no need to close request window):
Creating a request category
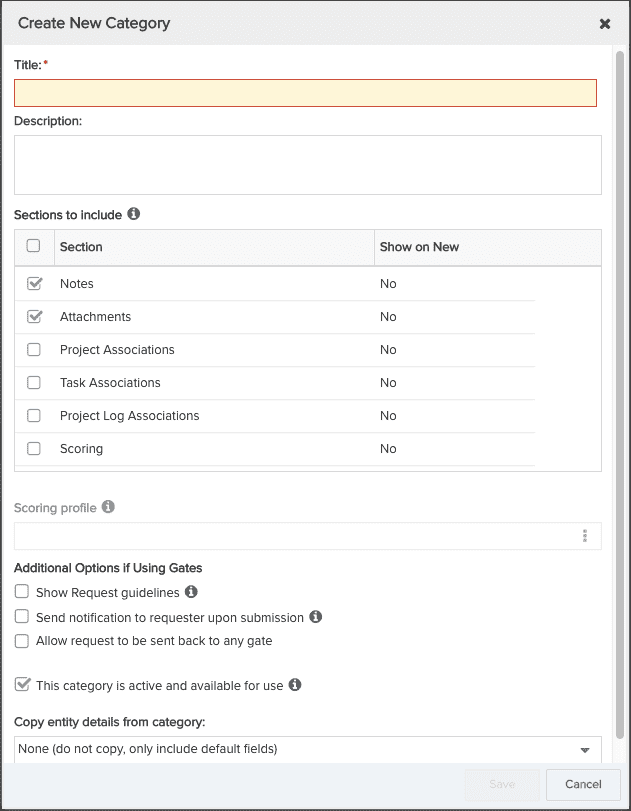
- From Admin/Setup/All Entities/Requests/Categories, choose New > New Category.
- Enter a title (required) and select the sections you want to include for this request category. The other non-required fields are described in the table below.
|
Field |
Description |
|---|---|
|
Title |
(Required) The name of the category. Appears in the Category droplist when laying out details. If you have multiple categories, you can create different Details layouts for each. |
|
Description |
Informational text that will appear in the Description property for the Category field. This text displays as a tooltip upon hovering over the category within the New request options. |
|
Sections to include/Show on New |
Select the checkbox next to the tabs you wish to be available for requests of this category type. When gates are configured, the selected sections can be configured to be shown or hidden per gate. Show on New determines if the section will appear in the New Request Dialog when users create the request (Show on New = Yes). See Show on New above for configuring the new request, and Configuring Gate Fields/Show on New for configuring whether/how to show fields at a gate. If you have configured a section to Show for New, when you put On Hold a request of that category, sections with Show On New = Yes will be visible in the request. |
| Scoring Profile |
If you include the Scoring section and have created the scoring profile for this category, select the profile from the Scoring Profile droplist. If you do not yet have a scoring profile, you can still create requests from this category, but the Scoring tab (if enabled) will not be available until you assign a scoring profile. Note the following:
|
| Additional Options if Using Gates - If you are planning to configure gates for this category, choose any of the optional settings below. | |
| Show Request Guidelines |
Enable this checkbox to display a rich text editor (shown below) where you can provide information to help the requester complete requests of this category.
This information will appear as a first step in the New Request Dialog. If you do not select this option, the requester will only see the request form and there will be no steps. |
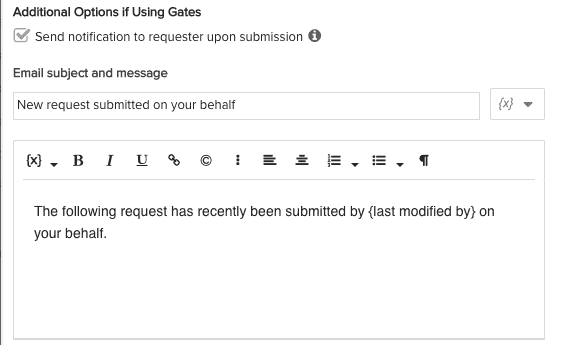
| Send notification to requester upon submission |
Enable this checkbox to display a rich text editor (shown below) where you can compose an email that will be sent automatically to the requester when the request is submitted (and the request is submitted by someone other than the requester).
|
| Allow request to be sent back to any gate |
Enable this to make the Other Actions > Send Back to Prior Gate option available, which displays a modal (shown below) allowing the approver to specify a gate to send the request back, as well as enter an optional note. Enable the "Notify request" checkbox to alert the requester that the request has been bounced back.
|
|
Active |
Select the Active checkbox to make the category appear in the Category dropdown when configuring request Details, and the corresponding request type available to the end user when creating a new request. Categories are active by default. |
|
Copy entity details from category |
Every category has a corresponding set of fields that you provide to the end user on the request's Details tab. When creating a category you can choose to copy detail fields from an existing category to use as a starting point. Select the name of the category from the droplist, or use None to indicate not to copy details. If you elect not to copy details, the new category will have just the basic default set of fields. |


- If you select one or more sections, configure whether to "Show on New", as described above.
- Click Save.
Editing a Category
You can edit a Category by double-clicking it or selecting it and choosing Actions > Edit. The resulting modal is similar to the one above, without the option to "Copy entity details from category".
You can modify a category at any time. The end user will not see the changes until they refresh their screen. For example, you can add fields to a request Details section, but the end user won't see the new fields until they refresh the browser window. If the end user is on a different page when the change happens, they will see the fields when they navigate back to the Details section.
You cannot delete a category that has been used by a request. In other words, you can only delete categories that have never been used. You can make a category inactive.
Copying a Category
You can copy a Category by selecting it and choosing New > Copy.... The resulting modal is similar to the one above, except that the "Copy entity details from category” option is set to the selected category.