Working with the Organization Hierarchy
This video provides an overview of the organization hierarchy. Duration: 7 min.
Note: You must have PPM Pro administrative privileges to view and edit this screen.
The Organization Hierarchy screen (Admin/Organization/Hierarchy) displays the units that comprise your organization. You can think of units as equivalent to "departments" in a traditional company setting.
You can create and edit units from this screen, add/transfer resources to them, as well as assign managers.
Anatomy of the Organization Hierarchy
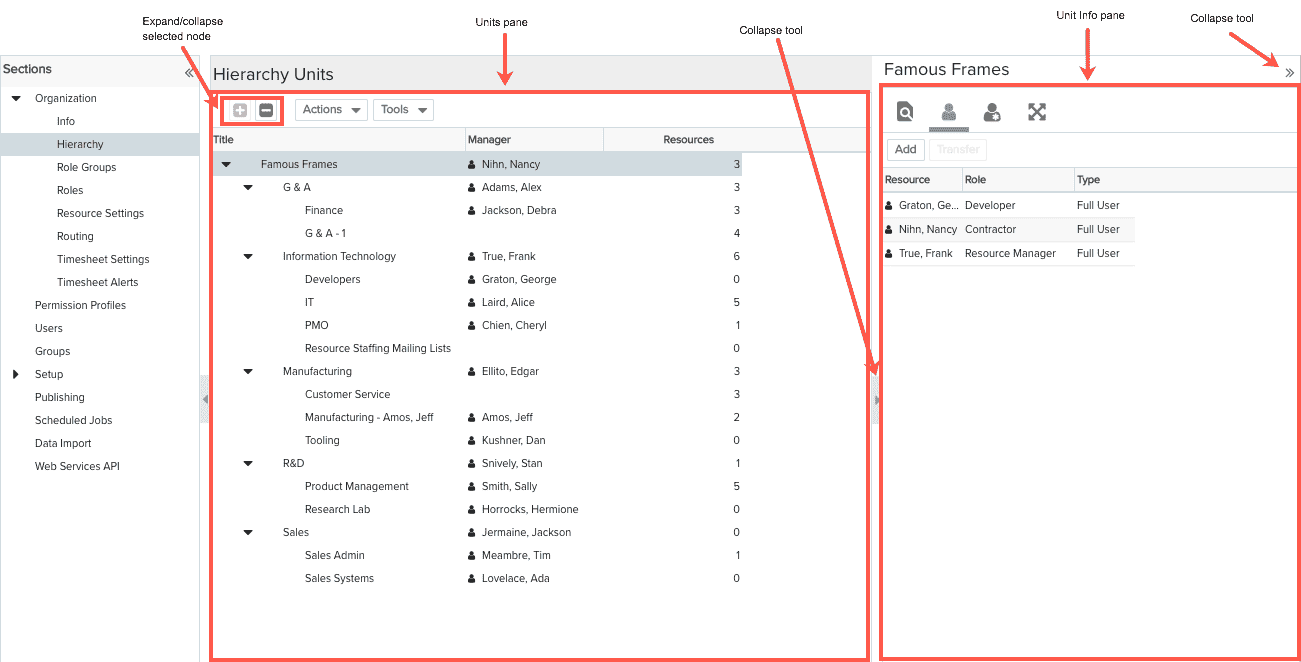
The Organization Hierarchy page displays the hierarchy of units in the Units pane on the left-hand side, and the Units Info pane on the right-hand side where you can add resources to the unit and configure other unit-specific information. When you select a unit on the Unit pane, the relevant information for that unit for whatever tab is active is displayed in the Units Info pane. You can expand/collapse the panes to display only the Units pane, or only the Info pane, by clicking any of the collapse tools (shown below). You can also use the splitter to resize the two panes. Any changes you make to the layout (resizing panes, for example) will be retained when you return to this page.
Below is a screenshot of the Organization Hierarchy page:
All of the columns are sortable; click on the column header to toggle between ascending and descending order. The currently sorted column is indicated by an up-arrow or a down-arrow to the right of the header label, as shown below.

Edit Inline
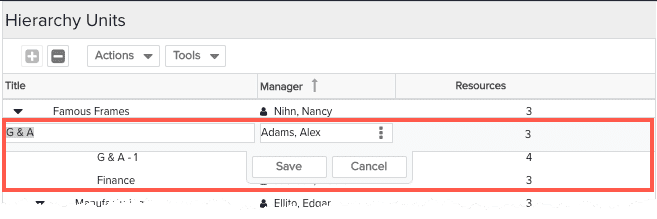
You can edit fields inline in the Units pane. Simply double-click a row to activate. You can use your mouse and/or keyboard navigation. Tab moves you from field to field and to the Save/Cancel Buttons. Use arrow keys to move you through drop lists and suggested matches (for picklists) and use Return/Enter to make your selections. You can also edit fields in the Units Details panel using the same keyboard gestures, with the addition of Ctrl-S to save. Use Esc to undo an edit that hasn't yet been saved.
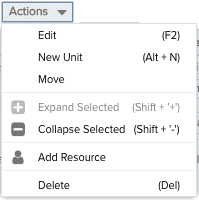
The Actions menu
The Actions menu at the top of the Units pane holds all operations that you can perform on units. You can also access this menu by right-clicking on a unit.
 |
Menu Option |
Description |
|
Edit |
Places the selected row in edit mode (invokes the inline editor). |
|
|
New Unit |
Creates a new unit; defaults to being a child of the unit that was selected when you created the new unit, unless you select a different parent in the New Unit dialog. |
|
|
Move |
Allows you to move a unit to a different parent. |
|
|
Expand Selected |
Expands the selected unit. |
|
|
Collapse Selected |
Collapses the selected unit. |
|
|
Add Resource |
Invokes the Add New Resource dialog, where resources can be selected and added to unit. You can also add resources by selecting the unit and using the Resource tab in the Unit Info pane. |
|
|
Delete |
Deletes the selected unit, You cannot delete a unit if it contains resources. Transfer the resources and then delete the unit. |
Resource Info Quick View
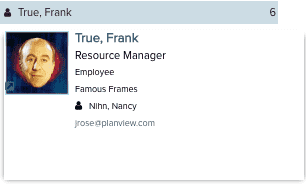
You can quickly display important resource information without having to navigate to the Resource Info screen. Click the ![]() icon next to the resource name to display a Resource Info snapshot for the selected resource, which includes name, role, unit, and manager. Click the resource name to navigate to the full Resource Info page.
icon next to the resource name to display a Resource Info snapshot for the selected resource, which includes name, role, unit, and manager. Click the resource name to navigate to the full Resource Info page.