
Specifying the basic report details
Once you have chosen your report source (see Choosing the report source), you are ready to create your report definition. The first screen of the Report wizard is called Basic Details. The Basic Details page displays the Target, Category, and Report Source on which the report is based.
To initiate report creation and specify basic report details:
Note: You can create a new report directly from an item's Reports tab. The Reports List and Report Sources pages display only definitions and sources for the current entity (project, task, account, and so on).
- Navigate to the Reports tab.
- Click New.
The Report Source page appears.
- Select a report source and click New. You can also right-click on the report source and choose New from the context menu.
The Report wizard appears.
- (Required) Enter the name of the report in the Report Title field. You must enter a title before you can move to any other screen (one is provided by default).
- (Optional) Enter additional information about the report in the Description field.
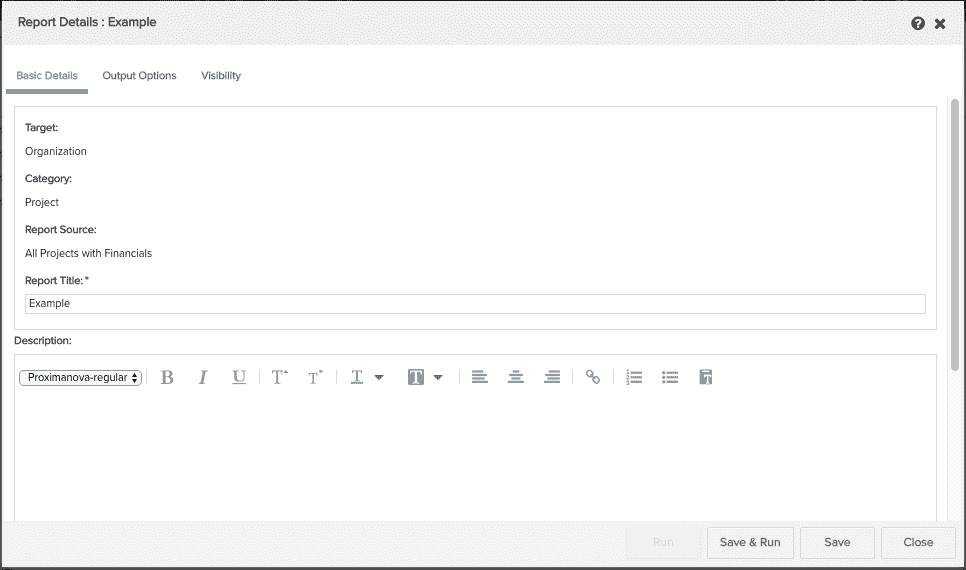
- You have to define at least one output type to run a report, so typically your next step is to go to the Output Options tab. When you are satisfied with your entries, click either the Output Options tab or the Visibility tab. You can return to the Basic Details screen at any time to make changes.
What's next?
Once you have given your report a title, you can move between all the screens in the wizard. Typically, your next step is to define the output options.