
Accessing Planview IdeaPlace Data with Tableau Using OData
NOTE:
The Tableau Web Connector is now live.
Introduction
Tableau can connect to Planview IdeaPlace data for reporting using an OData service that is provided as part of the IdeaPlace licensing package. This exciting development brings full flexibility in model and metric-building to your data insights approach, helping you to easily demonstrate value.
To accomplish this connection, the following steps are required:
Granting the External Report Author Role
In order to authenticate to the Web Data Connector, each user must be assigned the External Report Author role within their IdeaPlace instance. This role is not available by default and will require a customer care ticket to be submitted in order for it to appear in your user management section.
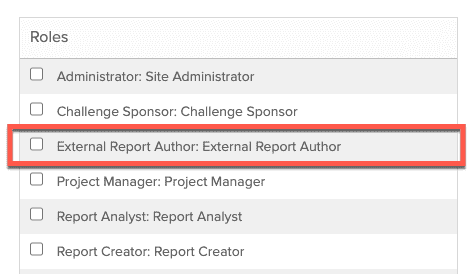
Figure 1 - External Report Author in the User Role Section
This new role, when granted, automatically registers the user for the connection and triggers an email to the nominated user, detailing their temporary authentication credentials for the connector. The credentials contain a username (IdeaPlace email address) and temporary password.
These credentials should be used for the first-time login via the web connector. You will be asked to reset your password during that first login.
NOTE
Please note that there is a limit to the number of users that can be added to the external report service each day. Therefore we ask that you only add a role to the profile of a user that will actually be creating and publishing reports using our OData connector.
Accessing the Web Connector
Once you have opened Tableau, navigate to the Connect panel. If you have not used a Wed Data Connector before, you may need to search using the More… option. Simply type in Web Data Connector to search for that type of server connection and select it.
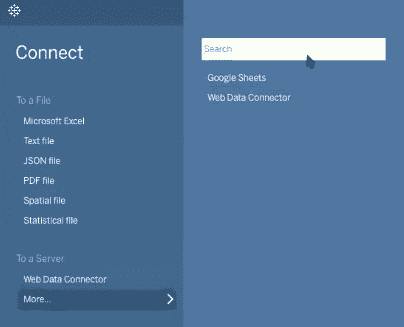
Figure 2 - Opening the search dialog in Tableau
If you have connected to the Web Data Connector before, navigate to the Connect panel and locate the connect To a Server section at the bottom and select Web Data Connector.

Figure 3 - Entering the IdeaPlace URL
Now you can enter the IdeaPlace URL for your hosting region into the URL box (or select the URL from the list of recent connections if you have connected to it recently):
US Hosting: https://odata-us.spigit-techops.com/tableau-web-data-connector/
EU Hosting: https://odata-eu.spigit-techops.com/tableau-web-data-connector/
Once the URL is entered, you will be taken through the authentication flow that will allow you to connect to the server and begin working with your data.
At this point, you should use the temporary username/email address and password that were sent to you in the invite email.
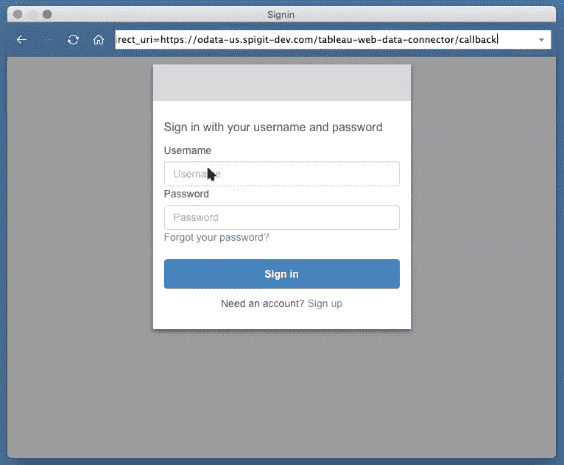
Figure 4 - Enter your credentials in Tableau
If you are logging in for the first time, there will be a prompt to set a new password to replace the temporary password that was contained in the email invite.
Please keep these credentials safe as they will be needed each time you authenticate to the Web Data Connector.
Once authenticated, your Tableau system will then connect with the IdeaPlace OData service, populating with the IdeaPlace data model. At this point, you are able to construct your personalized data model, including custom measures and metrics for idea and collaboration tracking.
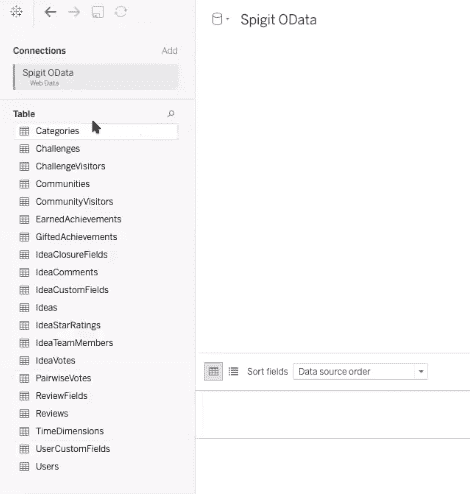
Figure 5 - IdeaPlace data available in Tableau
For more information on Tableau, see the online help on Tableau's website.