
Success Stories Page
Introduction
You might consider adding the motivational power of a Success Stories page to your Challenge or Community. We provide sample code below, which you can edit as you wish to tailor your own Success Stories page. Various instruction is included here, starting with what to do to create this page from scratch, how to modify an existing page without getting into the HTML, or an exclusively HTML approach.
How to create a Success Stories page
If your instance doesn't already have a default Success Stories page out of the box:
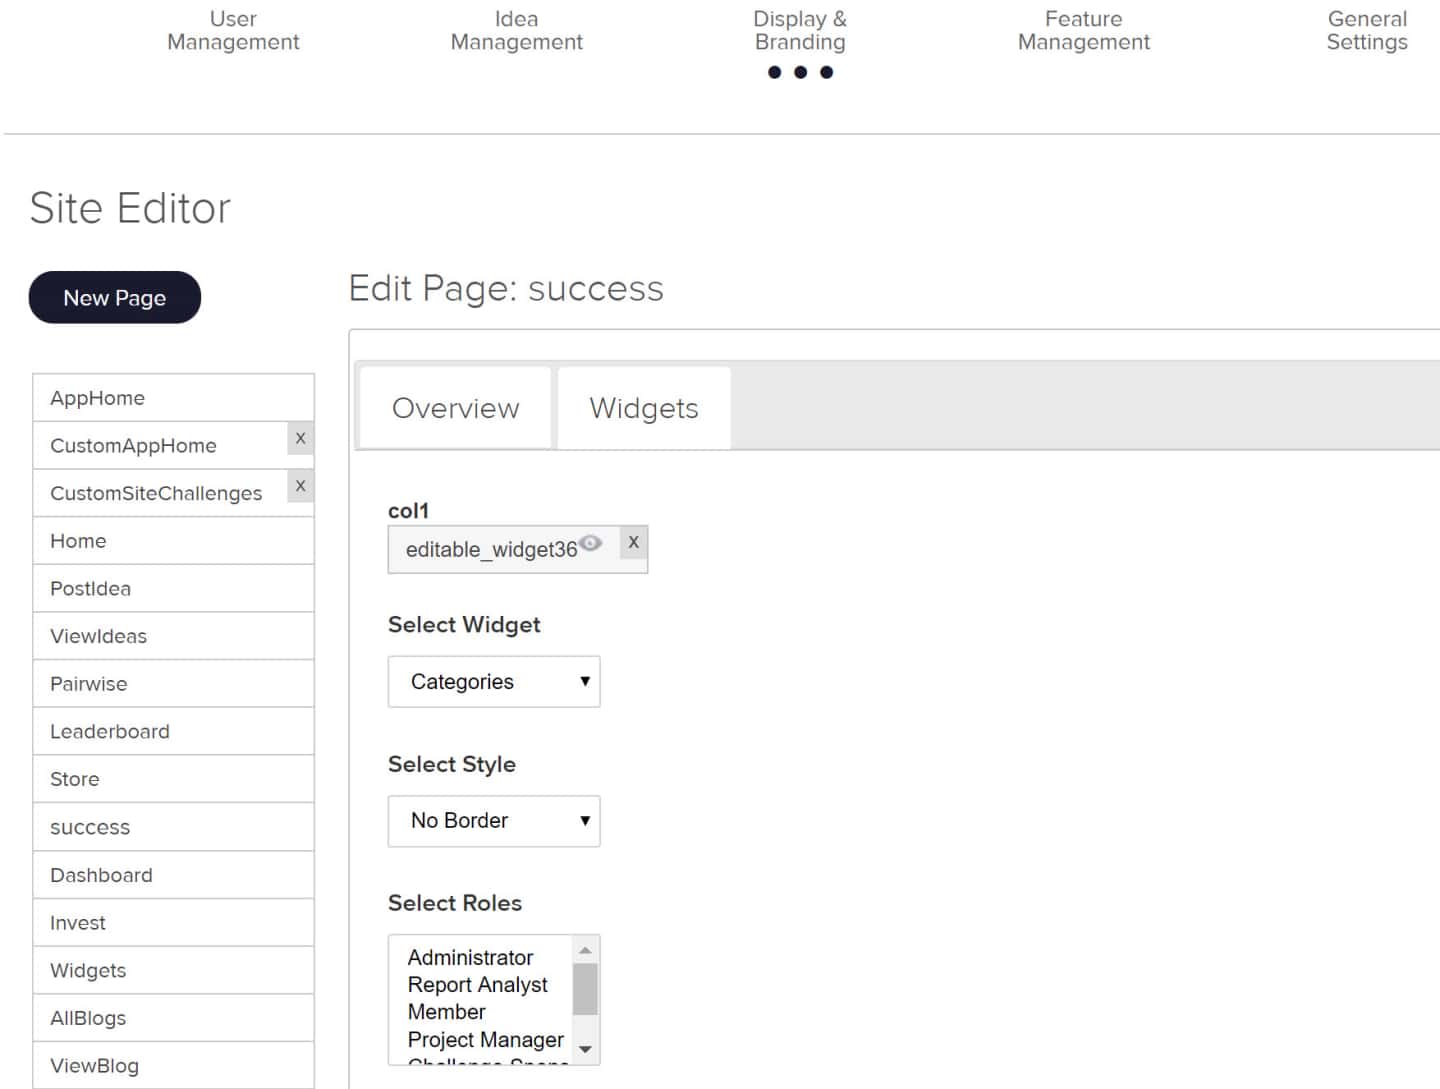
- In Administration > Display & Branding > Site Editor click New Page.
- On the Overview tab, name the page. Select Add to Navigation Bar. Click Update.
- On the Widgets tab add an Editable Widget to it. (We've used editable_widget36 here.)
- Click Add Widget.
4. Navigate to the new Success page.
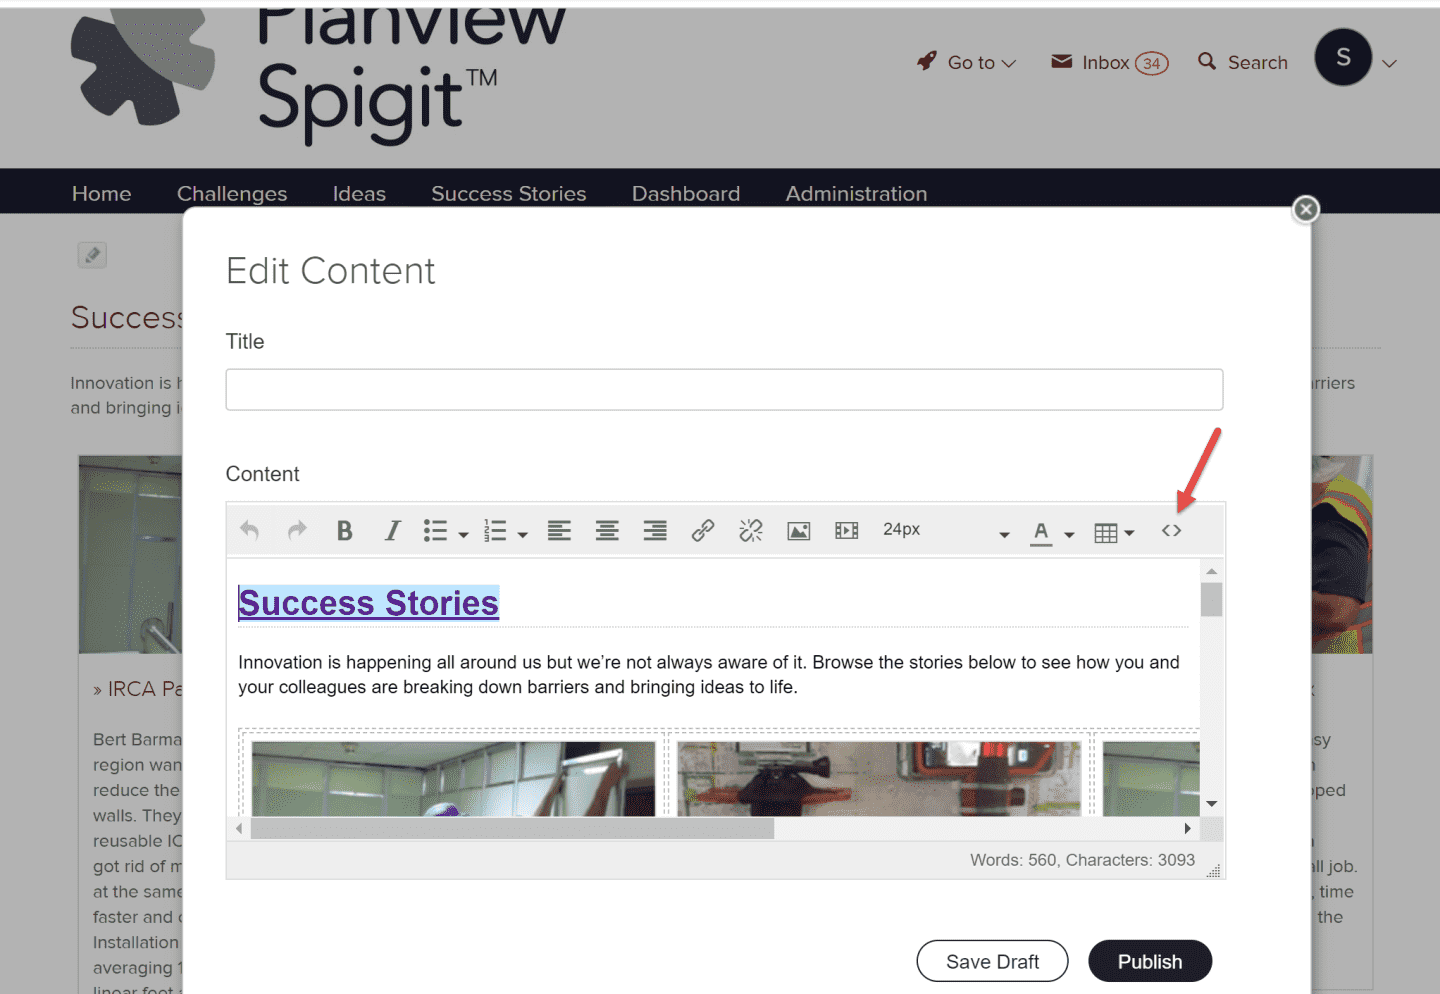
5. Click the pencil icon in the upper left corner. Content will be blank the first time.

6. On the Edit Content page, click the <> symbol on the gray menu bar below Content to go to the Source code screen.
7. On the Source code screen, you can copy the complete HTML code at the bottom of this article and paste it in, or use your own.

Idea Title (in blue)
To edit the HTML code, click where you need to make the change in the Source code box, edit and click OK:
8. Update the idea title.
a. You can either just replace the title with your Idea Name (blue highlight in image above).
b. Or you can replace the Idea Name in the code and also the idea link (blue highlight in image below) with a link to your actual Idea.
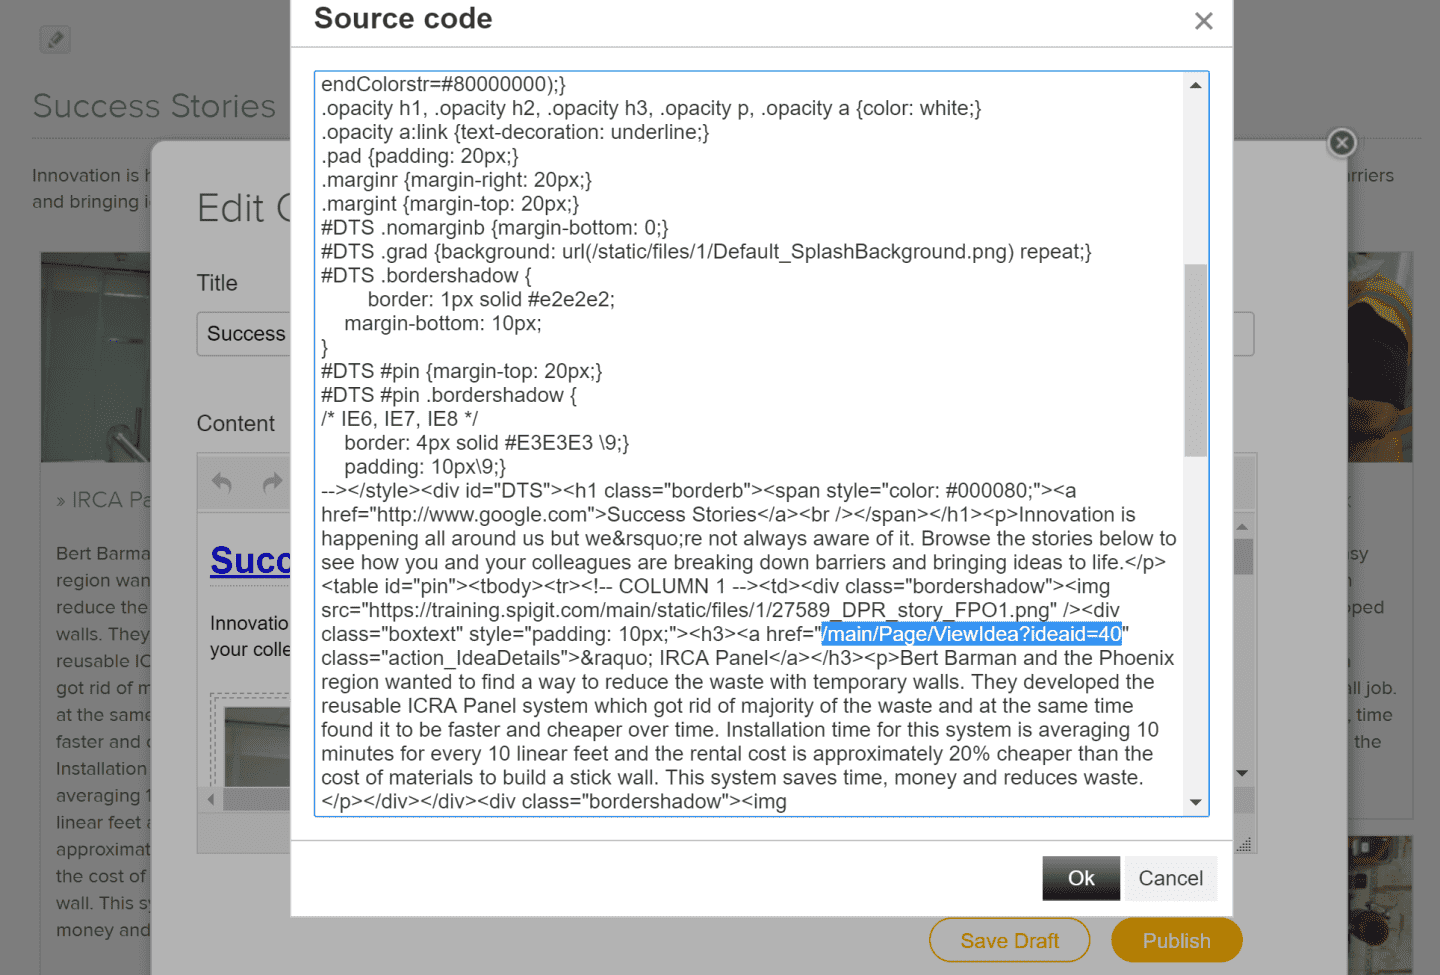
Idea Link (highlighted in blue)
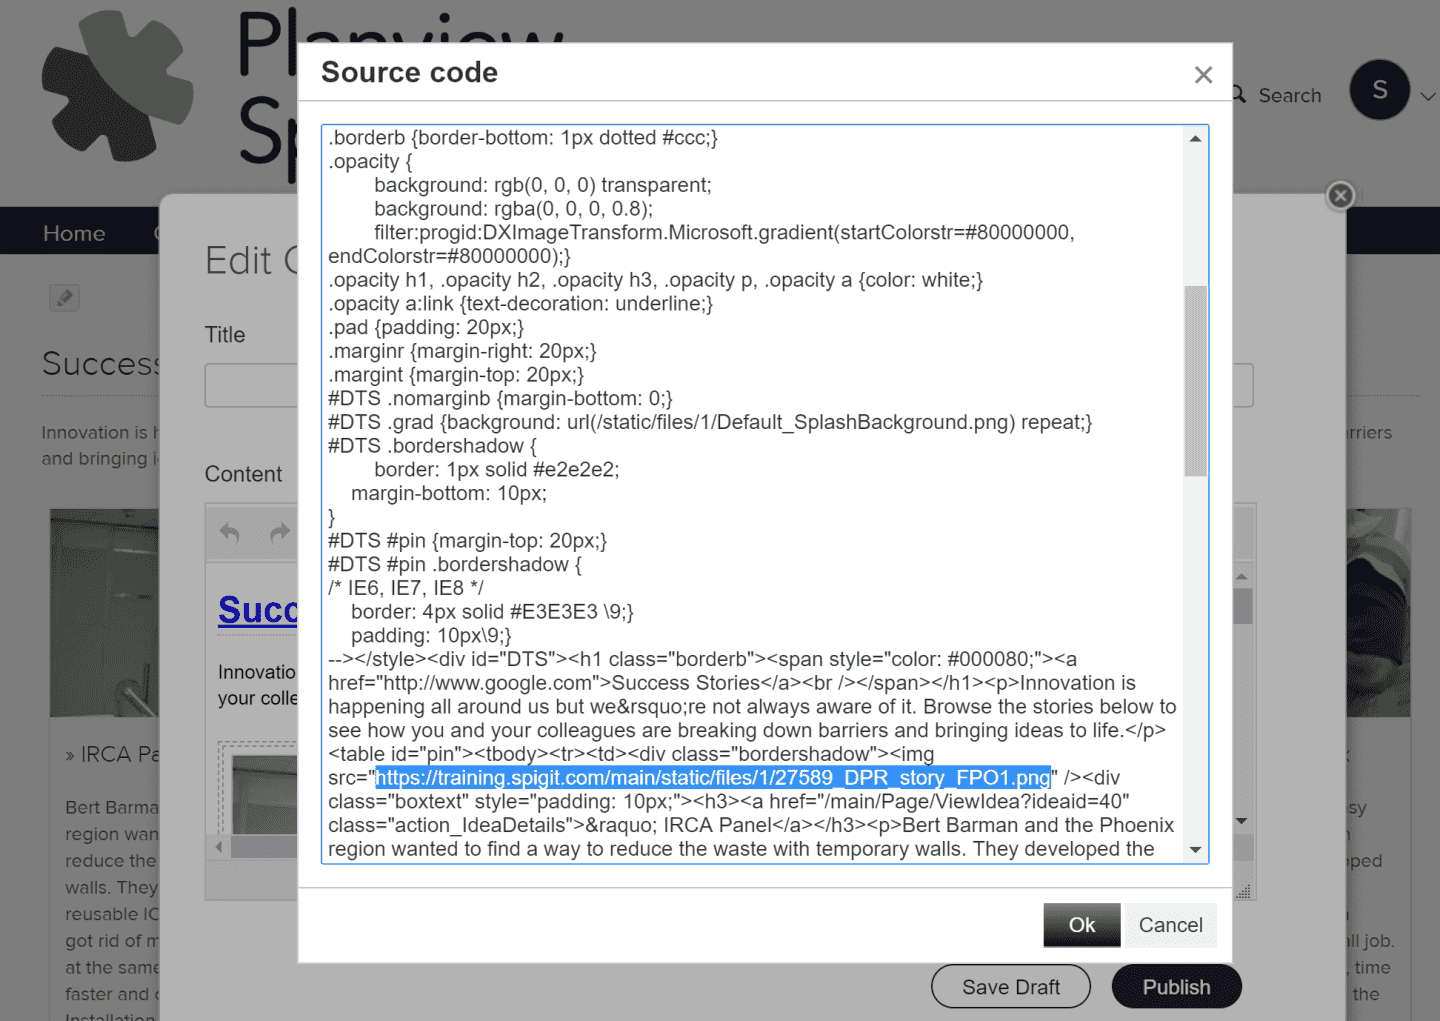
9. Upload the images to use for the ideas and update those links in the HTML too:
a. Replace highlighted blue path in image below with the path to your image.
b. Click OK.
Idea Image (in blue)
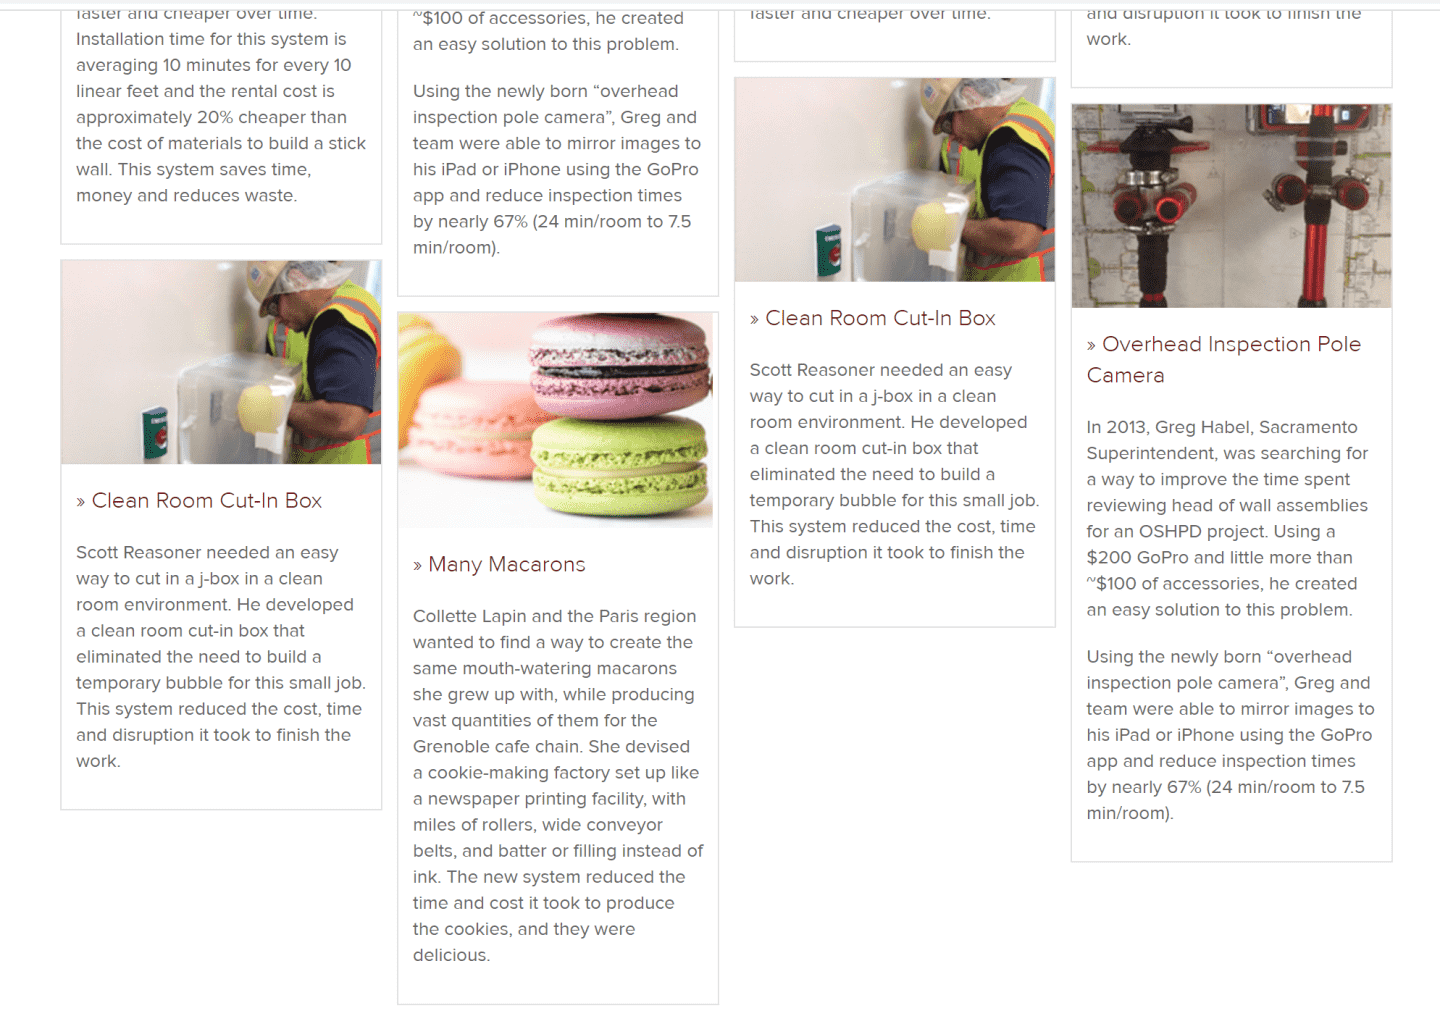
Success Story page with new image, title, and body text (Many Macarons)
Non-HTML Method of Modifying Page Content
1. On Edit Content page, delete image that you'd like to replace.
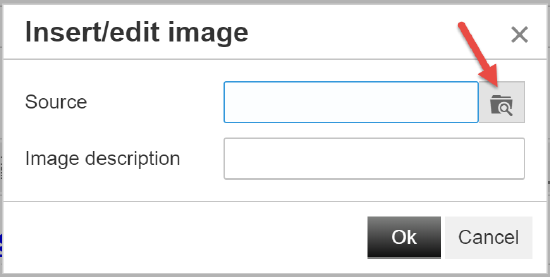
2. Click the Insert/Edit image icon on the content toolbar.

3. Click the file folder icon on the Source Text field.
4. On the Manage Uploaded Files page, click the Choose File button in the Add New File field.
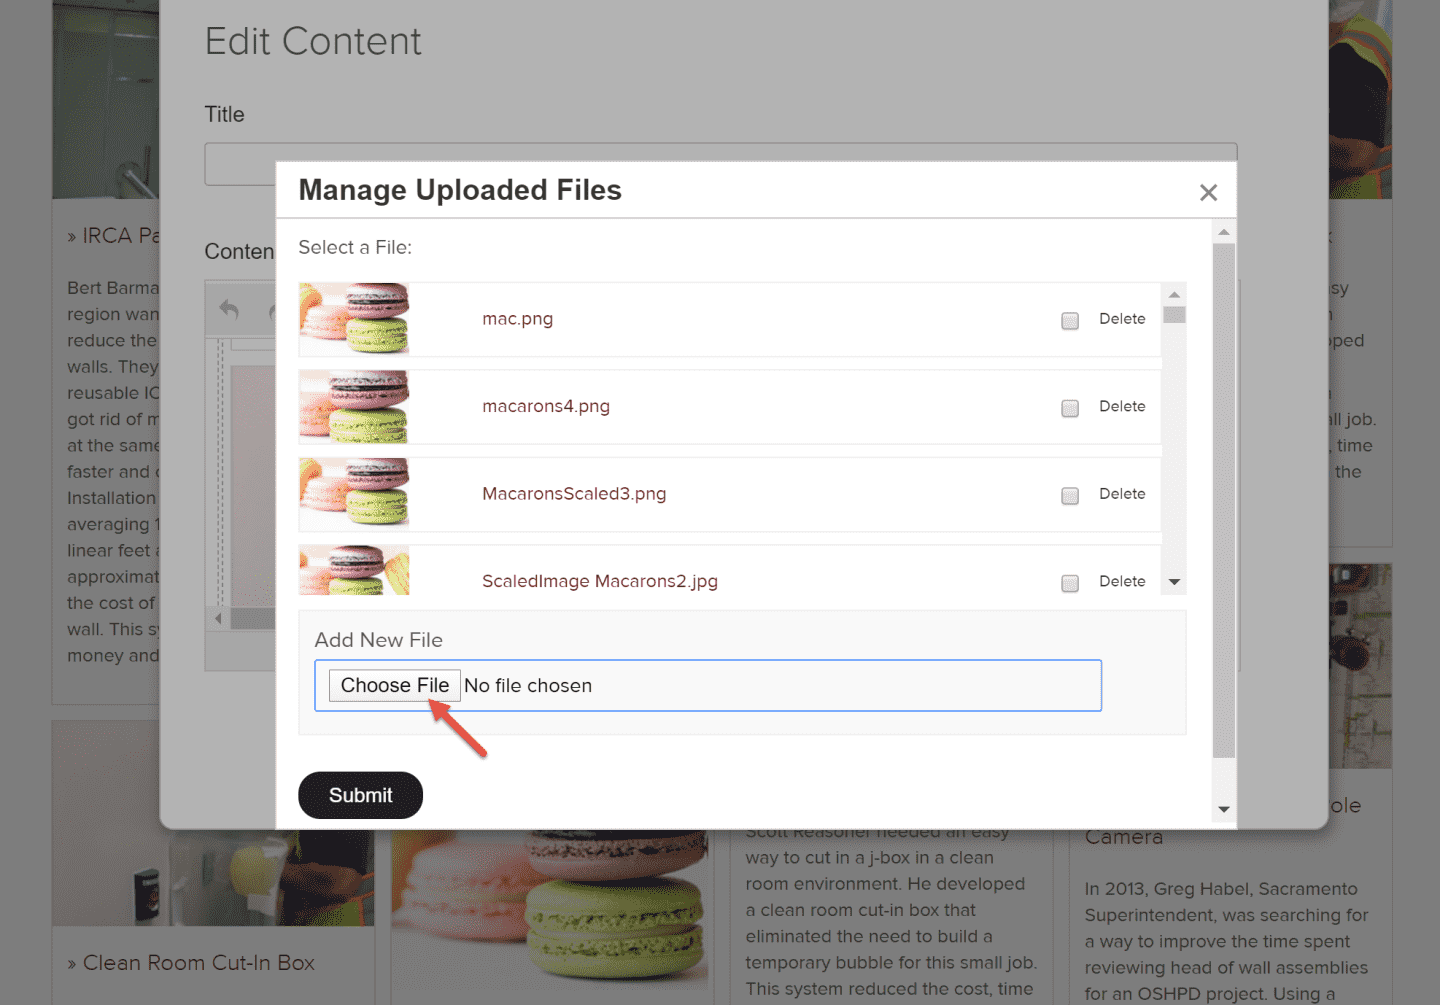
5. Select your external file and click the Submit button to upload.
6. Click on your uploaded file to select it on the Manage Uploaded Files > Select a file page.
7. Click OK on the Insert/Edit image page.
NOTE
This interface isn't WYSIWYG, so you might have to resize/scale your image.
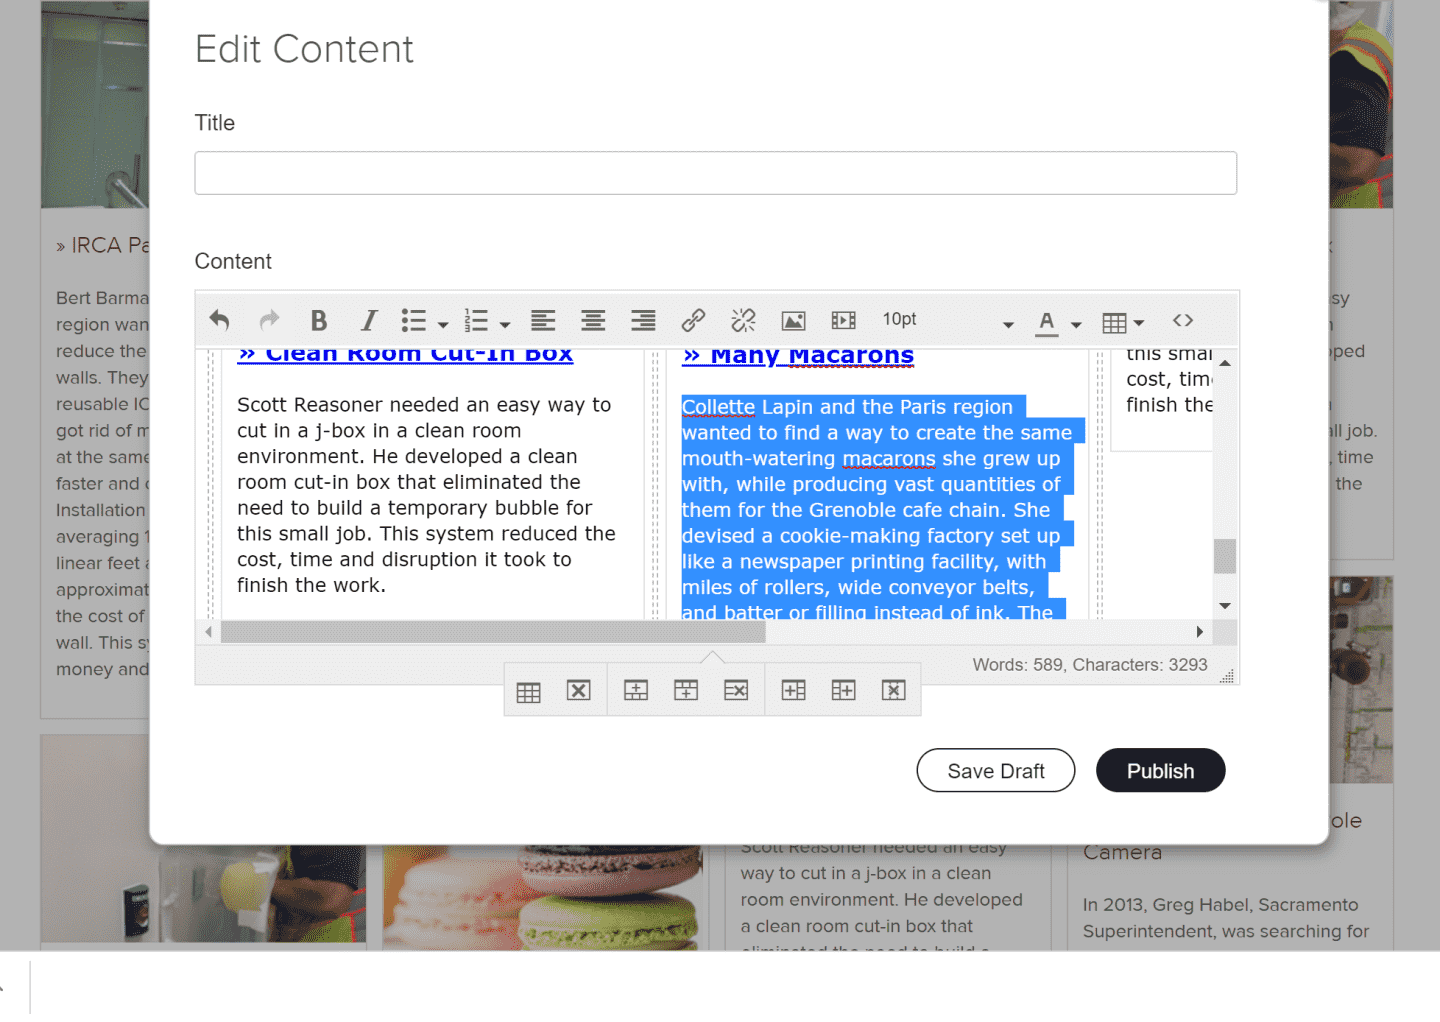
8. To replace the non-link idea title, click at the end of its text and replace the original title.
9. Select and replace the body text in a similar manner to replace with your own.
Complete HTML Code for Success Stories Page
<style><!--
/*Text reset*/
#DTS, #DTS h1, #DTS h2, #DTS h3, #DTS td {
font-size: 13px;
line-height: 1.35em;
text-transform: none;
}
#DTS h1 {font-size: 24px;}
#DTS h2 {font-size: 18px;}
#DTS h3 {font-size: 16px;}
#DTS a:link, #DTS a:visited, #DTS a:hover, #DTS a:active {font-size: inherit;}
/*Common*/
/*Remove background from home page content box*/#PSHome #contents, #ActivityStream #contents {background: none;}
#DTS table {table-layout: fixed;}
#DTS td {
vertical-align: top;
}
#DTS #pin td {padding: 5px;
}
.borderb {border-bottom: 1px dotted #ccc;}
.opacity {
background: rgb(0, 0, 0) transparent;
background: rgba(0, 0, 0, 0.8);
filter:progid:DXImageTransform.Microsoft.gradient(startColorstr=#80000000, endColorstr=#80000000);}
.opacity h1, .opacity h2, .opacity h3, .opacity p, .opacity a {color: white;}
.opacity a:link {text-decoration: underline;}
.pad {padding: 20px;}
.marginr {margin-right: 20px;}
.margint {margin-top: 20px;}
#DTS .nomarginb {margin-bottom: 0;}
#DTS .grad {background: url(/static/files/1/Default_SplashBackground.png) repeat;}
#DTS .bordershadow {
border: 1px solid #e2e2e2;
margin-bottom: 10px;
}
#DTS #pin {margin-top: 20px;}
#DTS #pin .bordershadow {
/* IE6, IE7, IE8 */
border: 4px solid #E3E3E3 \9;}
padding: 10px\9;}
--></style><div id="DTS"><h1 class="borderb"><span style="color: #000080;"><a href="http://www.google.com">Success Stories</a><br /></span></h1><p>Innovation is happening all around us but we’re not always aware of it. Browse the stories below to see how you and your colleagues are breaking down barriers and bringing ideas to life.</p><table id="pin"><tbody><tr><td><div class="bordershadow"><img src="https://training.spigit.com/main/sta...story_FPO1.png" /><div class="boxtext" style="padding: 10px;"><h3><a href="/main/Page/ViewIdea?ideaid=40" class="action_IdeaDetails">» IRCA Panel</a></h3><p>Bert Barman and the Phoenix region wanted to find a way to reduce the waste with temporary walls. They developed the reusable ICRA Panel system which got rid of majority of the waste and at the same time found it to be faster and cheaper over time. Installation time for this system is averaging 10 minutes for every 10 linear feet and the rental cost is approximately 20% cheaper than the cost of materials to build a stick wall. This system saves time, money and reduces waste.</p></div></div><div class="bordershadow"><img src="/images//static/files/1/27589_DPR_story_FPO2__1538065074422.png" /><div class="boxtext" style="padding: 10px;"><h3><a href="/main/Page/ViewIdea?ideaid=40" class="action_IdeaDetails">» Clean Room Cut-In Box</a></h3><p>Scott Reasoner needed an easy way to cut in a j-box in a clean room environment. He developed a clean room cut-in box that eliminated the need to build a temporary bubble for this small job. This system reduced the cost, time and disruption it took to finish the work.</p></div></div></td><td><div class="bordershadow"><img src="https://training.spigit.com/main/sta...story_FPO3.png" /><div class="boxtext" style="padding: 10px;"><h3><a href="/main/Page/ViewIdea?ideaid=40" class="action_IdeaDetails">» Overhead Inspection Pole Camera</a></h3><p>In 2013, Greg Habel, Sacramento Superintendent, was searching for a way to improve the time spent reviewing head of wall assemblies for an OSHPD project. Using a $200 GoPro and little more than ~$100 of accessories, he created an easy solution to this problem.</p><p>Using the newly born “overhead inspection pole camera”, Greg and team were able to mirror images to his iPad or iPhone using the GoPro app and reduce inspection times by nearly 67% (24 min/room to 7.5 min/room).</p></div></div><div class="bordershadow"><img src="https://training.spigit.com/main/sta...story_FPO1.png" /><div class="boxtext" style="padding: 10px;"><h3><a href="/main/Page/ViewIdea?ideaid=40" class="action_IdeaDetails">» ICRA Panel</a></h3><p>Bert Barman and the Phoenix region wanted to find a way to reduce the waste with temporary walls. They developed the reusable ICRA Panel system which got rid of majority of the waste and at the same time found it to be faster and cheaper over time.</p></div></div></td><td><div class="bordershadow"><img src="https://training.spigit.com/main/sta...story_FPO1.png" /><div class="boxtext" style="padding: 10px;"><h3><a href="/main/Page/ViewIdea?ideaid=40" class="action_IdeaDetails">» ICRA Panel</a></h3><p>Bert Barman and the Phoenix region wanted to find a way to reduce the waste with temporary walls. They developed the reusable ICRA Panel system which got rid of majority of the waste and at the same time found it to be faster and cheaper over time.</p></div></div><div class="bordershadow"><img src="https://training.spigit.com/main/sta...story_FPO2.png" /><div class="boxtext" style="padding: 10px;"><h3><a href="/main/Page/ViewIdea?ideaid=40" class="action_IdeaDetails">» Clean Room Cut-In Box</a></h3><p>Scott Reasoner needed an easy way to cut in a j-box in a clean room environment. He developed a clean room cut-in box that eliminated the need to build a temporary bubble for this small job. This system reduced the cost, time and disruption it took to finish the work.</p></div></div></td><td><div class="bordershadow"><img src="https://training.spigit.com/main/sta...story_FPO2.png" /><div class="boxtext" style="padding: 10px;"><h3><a href="/main/Page/ViewIdea?ideaid=40" class="action_IdeaDetails">» Clean Room Cut-In Box</a></h3><p>Scott Reasoner needed an easy way to cut in a j-box in a clean room environment. He developed a clean room cut-in box that eliminated the need to build a temporary bubble for this small job. This system reduced the cost, time and disruption it took to finish the work.</p></div></div><div class="bordershadow"><img src="https://training.spigit.com/main/sta...story_FPO3.png" /><div class="boxtext" style="padding: 10px;"><h3><a href="/main/Page/ViewIdea?ideaid=40" class="action_IdeaDetails">» Overhead Inspection Pole Camera</a></h3><p>In 2013, Greg Habel, Sacramento Superintendent, was searching for a way to improve the time spent reviewing head of wall assemblies for an OSHPD project. Using a $200 GoPro and little more than ~$100 of accessories, he created an easy solution to this problem.</p><p>Using the newly born “overhead inspection pole camera”, Greg and team were able to mirror images to his iPad or iPhone using the GoPro app and reduce inspection times by nearly 67% (24 min/room to 7.5 min/room).</p></div></div></td></tr></tbody></table></div>