
Accessing Planview IdeaPlace Data with Power BI Desktop Using OData
Introduction
Power BI Desktop can connect to Planview IdeaPlace data for reporting using an OData service that is provided as part of the IdeaPlace licensing package. This exciting development brings full flexibility in model and metric-building to your data insights approach, helping you to easily demonstrate value.
To accomplish this connection, the following steps are required:
Request Enablement of External Report Author Role
In order to authenticate to the Web Data Connector, each user must be assigned the External Report Author role within their IdeaPlace instance. This role is not available by default and will require a customer care ticket to be submitted in order for it to appear in your user management section.
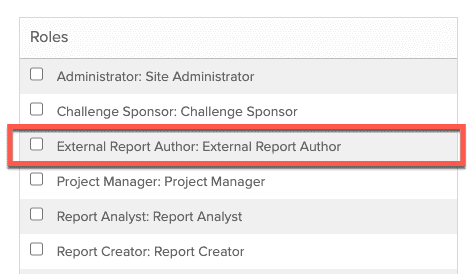
Figure 1 - External Report Author in the User Role Section
Grant the External Report Author Role
Once the Role has been added by the Customer Care team, you will need to assign the Role to the User that will be leveraging the OData connector. This new role, when granted, automatically registers the user for the connection and triggers an email to the nominated user, detailing their temporary authentication credentials for the connector. The credentials contain a username (IdeaPlace email address) and temporary password.
NOTE
The email from IdeaPlace to the user that sends them their credentials can take over an hour to receive, and must be activated that day. Otherwise, the role needs to be removed and added again to get a new activation.
NOTE
Only assign the External Report Author Role to the user in the Main Community (https://customerinstance.spigit.com/main/Page). The role is an instance wide setting and will grant you access to data across all communities and challenges.
These credentials should be used for the first-time login via the web connector. You will be asked to reset your password during that first login.
NOTE
There is a limit to the number of users that can be added to the external report service each day. Therefore we ask that you only add a role to the profile of a user that will actually be creating and publishing reports using our OData connector.
Ensure that you are using the October 2020 version of Power BI Desktop
NOTE
Previous versions will not have the IdeaPlace Connector.
- Open Power BI Desktop and select Get Data > More...
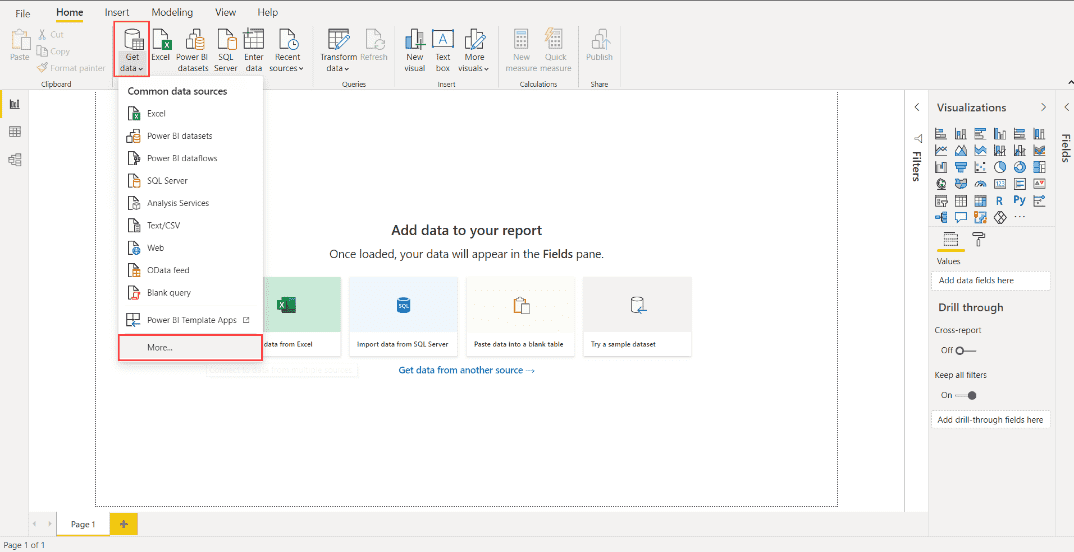
Figure 2 - Select Get Data > More...
- Search for IdeaPlace and click Connect.
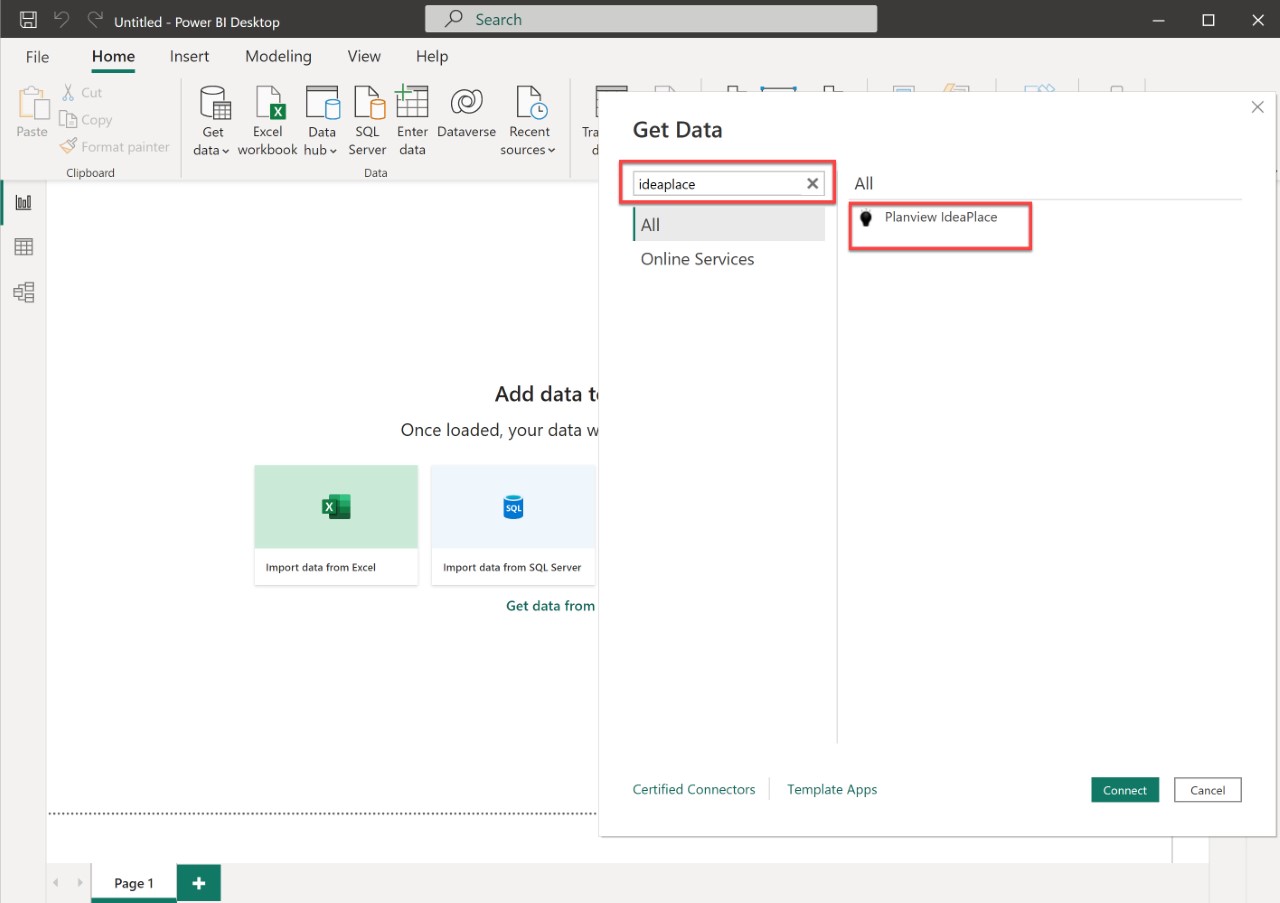
Figure 3 - Connect to IdeaPlace
- Enter the following URL when prompted for IdeaPlace OData URL and click OK.
US Hosting: https://odata-us.spigit-techops.com/odata/v4/Spigit.svc
EU Hosting: https://odata-eu.spigit-techops.com/odata/v4/Spigit.svc
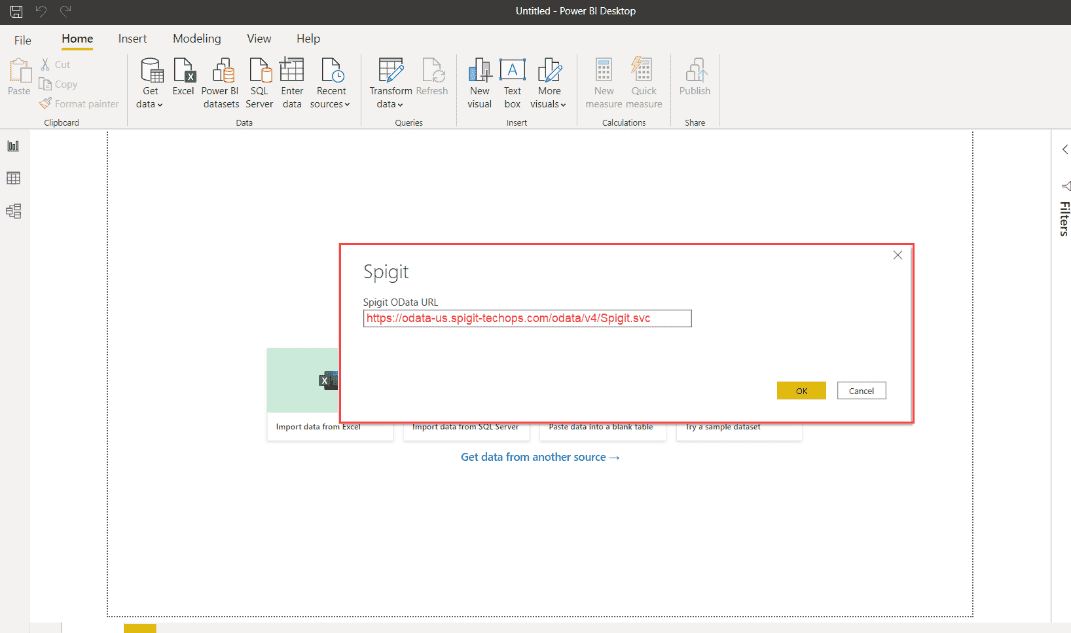
Figure 4 - Enter IdeaPlace OData URL
- Click Sign In and ensure that you apply settings to the most granular level (usually last and the one that includes the complete URL used).
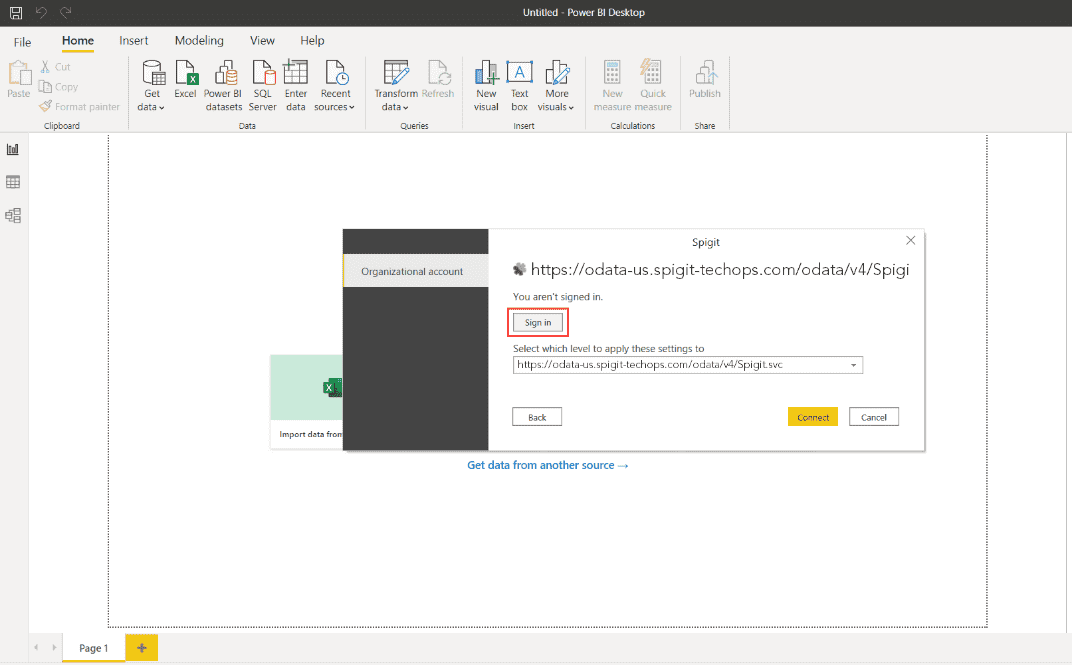
Figure 5 - Click Sign in
- Sign in with the login and password sent by the Enablement Request.
NOTE
Copy-Pasting directly from the email could result in a password not being recognized. We suggest manually typing it in or copy-pasting to a notepad and then back to the Password field here.
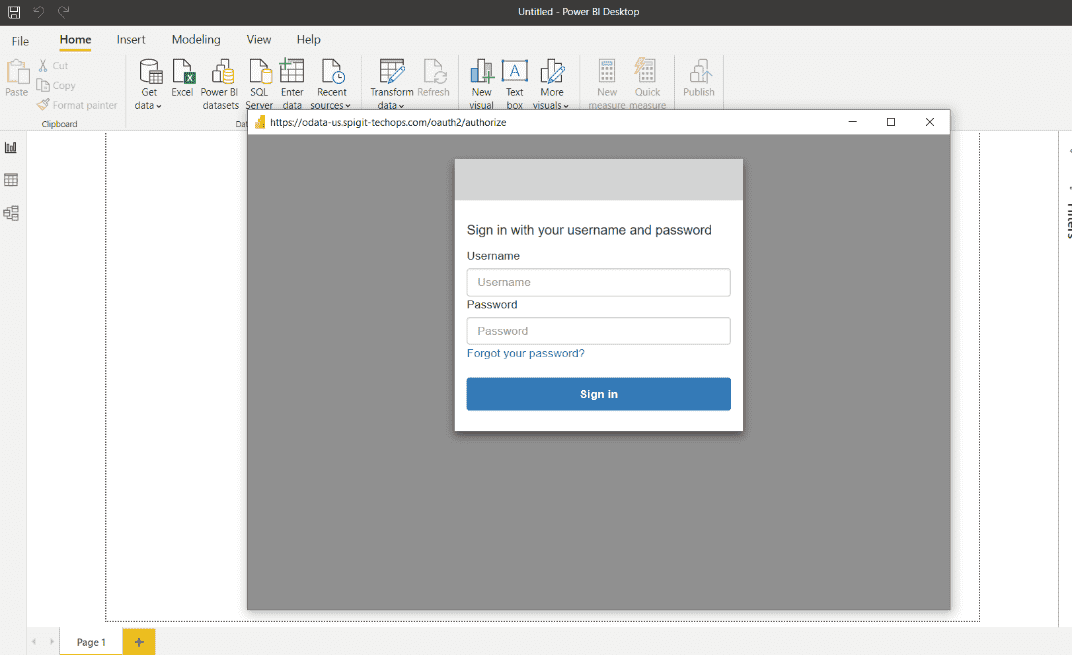
Figure 6 - Sign in with Username and Password
- You will be prompted to change the password immediately upon Sign in.
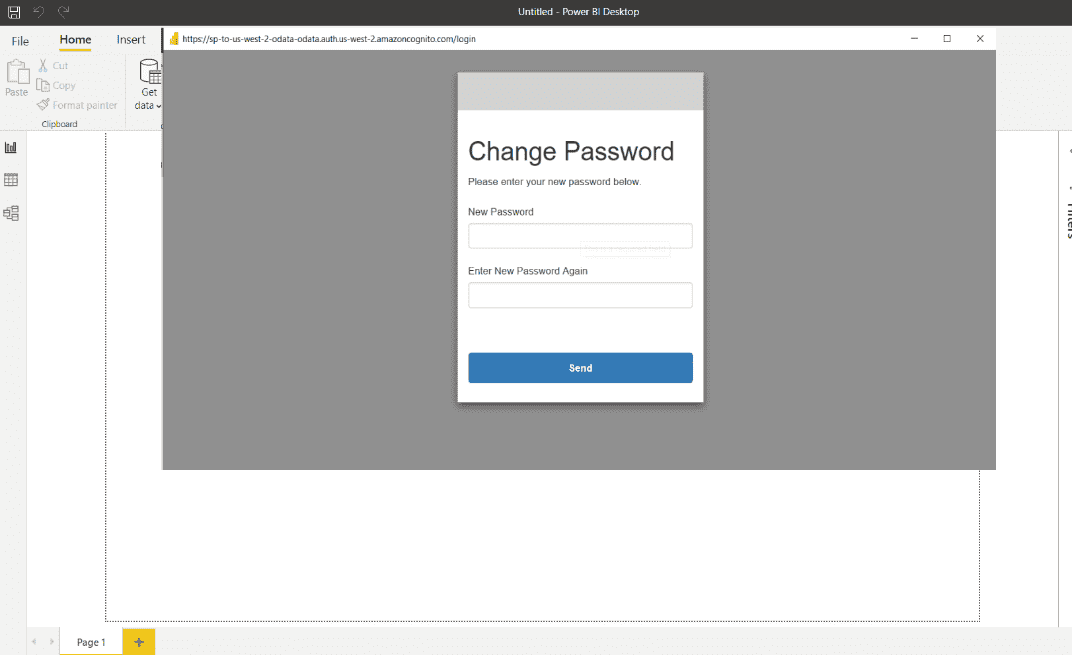
Figure 7 - Change Password
If the login is successful, you will be taken to the Navigator to select which Tables you want to load.
- Select all tables that are applicable and click Load.
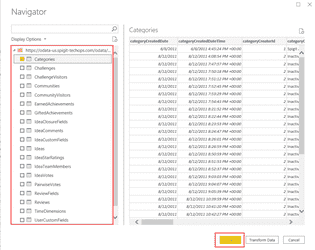
Fig 8 - Select and Load Tables
Here's some additional, useful information about the Tableau connector: