
Adding New Customers
Adding New Customers
This page describes adding new customers into the AdaptiveWork system and includes the following sections:
- About Adding New Customers
- Adding New Customers via the Navigation Panel
- Adding New Customers via Add Related
- Adding New Customers via the Customers Module
About Adding New Customers
New customers can be added to AdaptiveWork from the Navigation Panel, a Relations Panel Add Related link, as well as from the Customers module.
Adding New Customers via the Navigation Panel

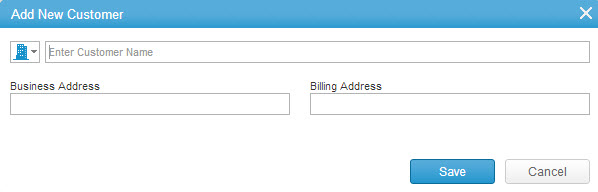
The Add New Customer pop-up window or in-line editor opens.
Note: AdaptiveWork in-line editors are equipped with  and
and  options, whereas pop-up windows are not.
Layouts for defining new items can be configured to display information and/or fields as pop-up windows or as inline editors by your organization's Admin user, via Layout Settings.
and options, whereas pop-up windows are not. Layouts for defining new items can be configured to display information and/or fields as pop-up windows or as inline editors by your organization's Admin user, via Layout Settings.

Adding New Customers via Add Related
- Navigate to any of the following modules:
- Bugs module
- Cases module
- Discussions module
- Issue module
- Projects module
- Requests module
- Risks module
- User Groups module
- Work Items module
Note: The inclusion of any or all modules in the Navigation Panel is defined by your organization's Admin user via the Layout Settings.
- Select an item in the grid.
- On the
 ribbon, click
OR
- Scroll to the bottom of the Relations Panel, and click the 'Add Related' link.

The Add Customers multi-find window opens.
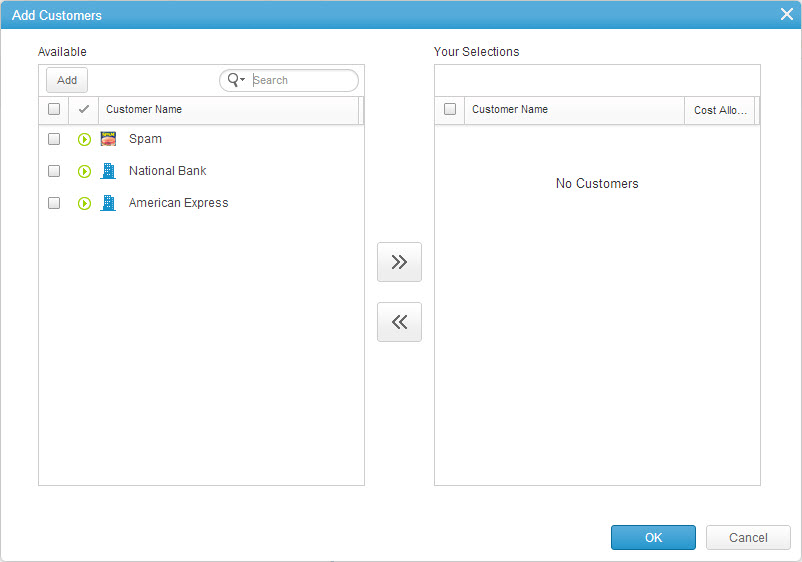
Figure 2: Add Customers
- Select a customer or multiple customers from the list of available customers.
OR
-
Click

The Add New Customer pop-up window or in-line editor opens.
- Follow Steps 3 through 6 of Adding New Customers via the Navigation Panel, above.
- The added customer appears in the Add Customers multi-find window under Your Selections.
- Click

Adding New Customers via the Customers Module
Note: The inclusion of the Customers modules in the Navigation Panel is defined by your organization's Admin user via the Layout Settings.
- Navigate to the Customers modules.
- On the
 ribbon, click
The Add New Customer pop-up window or in-line editor opens.
- Follow Steps 3 through 6 of Adding New Customers via the Navigation Panel, above.