
Global Settings
Overview
This page describes AdaptiveWork Global settings and includes the following sections:
See also Date-effective Cost and Billing Rates.
About Global Settings
AdaptiveWork Global Settings are divided into three sections.
Your organization's Admin user configures each section at the organization level, such as the organization's corporate image, name and logo, industry type, location, time zone, cost and billing rates, currencies, and the organization's calendar.
Additional fields—known as global fields — can be added to the organization's system using AdaptiveWork customization features. Global fields can then be used and referenced across the application even further using more customization capabilities.

Admin users define the following Global Settings in the General Information pane:
- Setting Organization Name and Icon (Logo)
- Display Organization Name
- Industry Type
- Organization Size
- Package Type
- Billable Add-ons
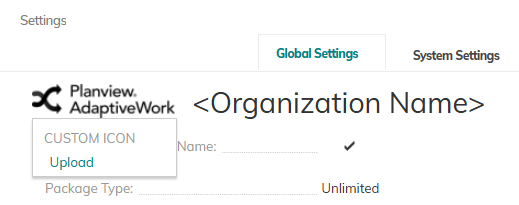
Setting Organization Name and Icon (Logo)
- Click the Global Settings, General Information Organization Name field.

The Logo and Organization Name fields become active. - In the Organization Name field, select the current text.
- Type to replace the organization name.
- Click the Icon
- Click

- Locate the desired icon, logo or image file on your computer, and click Open .
- Click

The data is sent to the server.
The updated data appears in the organization's Properties Card.
Note: The option Revert to default is added to the Icon field drop-down menu.
To revert to the default icon, click the Icon field and select 
Display Organization Name
- Hover over the Display Organization Name field.
The Display Organization Name switch control opens.

- Click
 to disable (or
  to enable).
The data is sent to the server. The information is added to the organization's Properties Card .
Industry Type
A drop-down list e nables you to define the organizations' industry types.
- Click the industry type field.
The drop-down list opens. - Scroll to and select the relavent industry.
- Click

The data is sent to the server. The information is added to the organization's Properties Card.
Organization Size
A drop-down list enables setting the number of employees in the organization.
- C lick the organization size field.
The drop-down list opens. - Scroll to and select the required number or range of numbers.
- Click

The data is sent to the server. The information is added to the organization's Properties Card.
Organization Settings
Admin users define the following Global Settings in the Organizational pane:
- Country
- State
- Organization Language
- Time Zone
- Calendar
- Landing Page
- Default Workflow User
- Federated Authentication
- Currency Type
- Currencies
- Error Notifications
- Capacity Planning Heatmap
Note: Personalizing a AdaptiveWork profile for individual user settings, such as Time Zone, Language, Landing Page, etc. override Organization and Group level settings.
Set your default organizational country.
- Click the Country field.
A drop-down list opens. - Scroll to and select the country.
- Click

The data is sent to the server. The information is added to the organization's Properties Card.
State
This setting is accessible only if your country parameter is set to the United States.
- Click the State field.
A drop-down list opens. - Scroll to and select the state.
- Click

The data is sent to the server. The information is added to the organization's Properties Card.
Organization Language
Set the default system language. This can be customized by group or per individual user.
Available languages include: Chinese (Simplified and Traditional), English, French, German, Hebrew, Japanese, Polish, Portuguese, Russian and Spanish.
- Click the Organization Language field.
The drop-down list opens. - Scroll to and select the language.
- Click

The data is sent to the server. The information is added to the organization's Properties Card.
Time Zone
Set the default organizational time zone for groups and individual users.
- Click the Time Zone field.
The drop-down list opens. - Scroll to and select the time zone.
- Click

The data is sent to the server. The information is added to the organization's Properties Card .
Calendar
Set the organizational work day settings.
- Click the 'edit...' link.
- The editable system Calendar opens.
- Click
 to open the schedule settings dialog
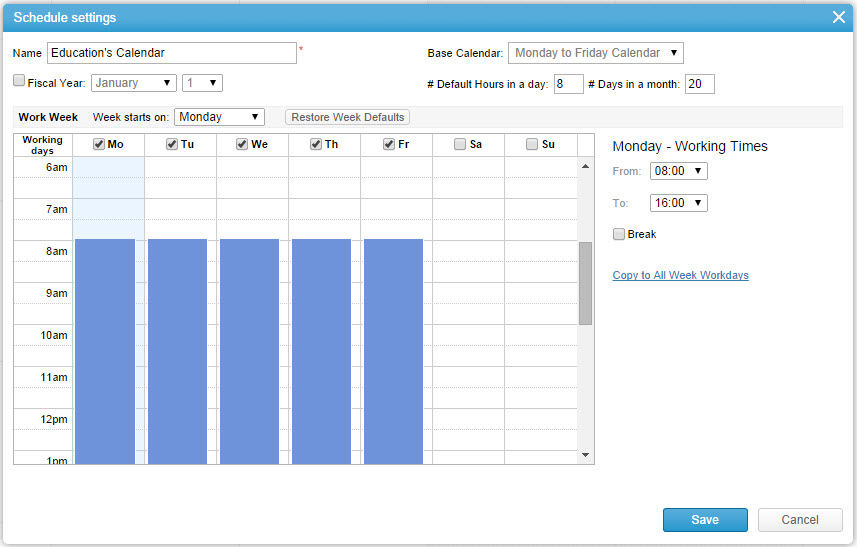
Set the following calendar and work day parameters:- Type the Calendar's Name
- Select the Fiscal Year option to activate fiscal year options.
- Change the Fiscal year start date. (Only available if Fiscal year is selected)
- Select whether to Show quarters # relative to fiscal month. (Only available if Fiscal year is selected)
- Define the default number of hours in a day
- Define the default number of days in a month
- Define the work week's 'Starts on' day
- In the displayed calendar check the days defined as 'Working days'
- For each day (if different) set normal office hours, add breaks if applicable
- Click

- Click
 and define the Add Exception fields in order to add vacation days, holidays, etc... to the calendar

- Click

- Click
 to close the editable system calendar.
Landing Page
Set the default landing page.
- Click the Landing Page field.
The drop-down list opens displays all potential modules/pages that can be selected as the default landing page for the organizational users. - Scroll to and select the page.
- Click

The data is sent to the server. The information is added to the organization's Properties Card.
Default Workflow User
A Default Workflow User in Planview AdaptiveWork is a setting that defines which user will be listed as the "Last Updated By" or "Created By" when items are updated or created using workflow rules that don't specify a particular user. This setting is useful when you want to have a default user assigned for workflow actions where no specific user is indicated. This allows for consistent and automated user attribution in scenarios where workflow rules are triggering updates or creations without direct user involvement.
The Default Workflow User field can therefore not be empty.
The assigned user has to
- be active
- have user type 'Full'
- be assigned with a valid Full license
- have Admin rights
- have Superuser rights
- have Financial permissions
New organization's Default Workflow User field is by default populated with the primary contact that meets the above prerequisites.
To update the Default Workflow User, please follow the steps below:
- Click the Default Workflow User field

- Click
 to open the Select User dialog.
 - Use the Multi-find window to select the user.
- Click

Administrators are prompted if any of the above prerequisites are not met when assigning a Default Workflow User and notified in case the license of the Default Workflow User is about to expire to take necessary actions.
The data is sent to the server. The information is added to the organization's Properties Card.
Federated Authentication
Federated Authentication allows users to connect to AdaptiveWork via their organizations identity provider credentials rather than using their AdaptiveWork user name and password.
Set the Federated Authentication credentials, and sign-in options.
Note: For more on Single sign-on solutions and integration with Federated Authentication, see Integration With Identity Providers and Configure Microsoft ADFS 2.0 to work with AdaptiveWork SSO
- Click the 'edit...' link.
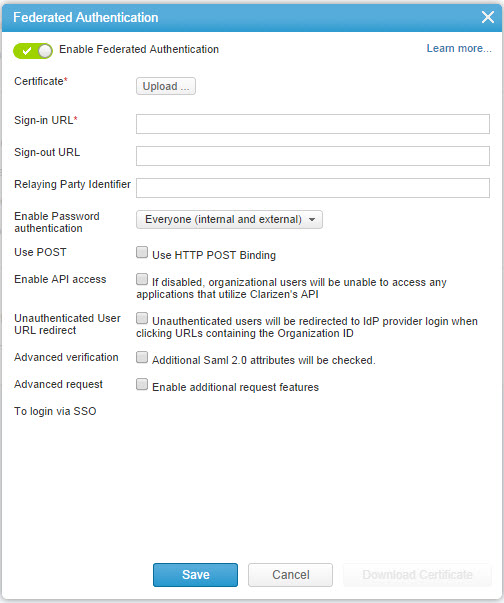
The Federated Authentication dialog opens.
- Click
 to enable (or
  to disable).
 - Click
 to browse and upload a Certificate.
 - Enter a URL into the Sign-in URL field.
- Enter a URL into the Sign-out URL field (Optional).
- Define the identifier in the Relaying Party Identifier field (Optional).
- Define the password authentication in the Enable Password authentication menu.
- Click

- Select one of the available options:
- No One (except Administrators)
- External users only
- Everyone (internal and external)
- Click
- Check or uncheck the Use POST setting to enable or disable HTTP POST Binding
- Check or uncheck the Enable API access setting.
Notes:- If disabled, organizational users will be unable to access any applications that utilize AdaptiveWork's API
- This setting must be enabled for mobile users to be able to log in when using Federated Authentication
- Check or uncheck the Unauthenticated User URL redirect setting.
If checked, unauthenticated users will be redirected to IdP provider login when clicking URLs containing the Organization ID - Check or uncheck the Advanced verification setting.
If enabled, Additional Saml 2.0 attributes will be checked. - Check or uncheck the Advanced request setting.
If checked, enables additional request features. - Click

The data is sent to the server.
Currency Type
Note: Enabled for Financial users only.
If multi currency is enabled, once defined, the default currency type cannot be changed.
Set the default organizational currency.
- Click the Currency Type field.
The drop-down list opens. - Scroll to and select the currency.
- Click

The data is sent to the server. The information is added to the organization's Properties Card
Currencies
Note:
Enabled for Financial users only if the organization is set to use multi currency (see module activation, under system settings).
The system supports the definition and use of monthly exchange rates between multiple currencies and the organization base currency type.
See below how to add currencies and their monthly exchange rate periods:
- Click the 'edit..' link next to the Currencies field.
The Currency Exchange Rates page opens.
The exchange rates shown can be filtered by using the Foreign Currency and Time Frame drop-down menus
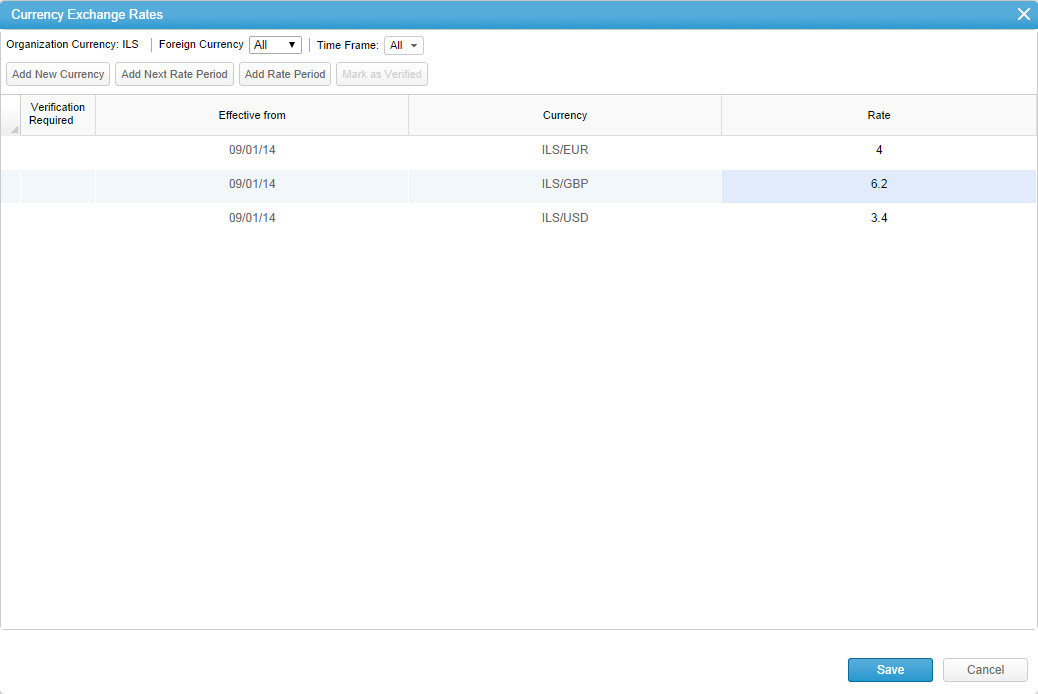
- To add a new currency and exchange rate, Click
 , the Add new currency dialog opens.
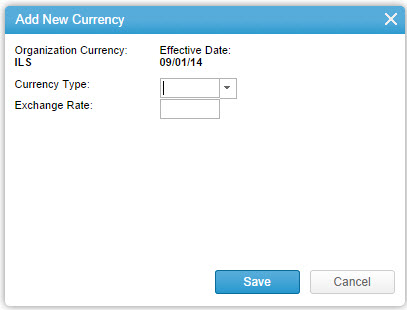
- Select the Currency type from the list
- Define the Exchange rate between the added currency and the organization base currency type
Note:
- Click

- Click
 in order to add the next exchange rate period for the each of the currencies managed in the organization.
 - Click
 in order to add one or more exchange rate periods for all of the currencies managed in the organization. Selecting the same From and Till dates will create one period.
 - Click
 in order to mark an exchange rate as verified.
- Sort and filter the Verification column as necessary.
- Click

The data is sent to the server.
Error Notifications
- Click the Error Notifications field to activate it.
- Click
 to open the Add Error Notification dialog.
 - Use the Multi-find window to select the desired users / user groups designated to receive notifications.
Note: If left empty, all admins will receive error notifications. It is recommended not to leave this field empty. - Click

The data is sent to the server.
Capacity Planning Heatmap
The colors in the Capacity Planning module represent the demand as a percentage of the capacity. The default threshold settings show red as exceeding 100% capacity, and blue means demand is less than 51% of the capacity. You can change these percentages, for example, define an overload as being above 110% rather than 100%. Click here to learn more.
Costs and Billing Rates
The Cost and Billing Rates pane enables an Admin or Financial user (depending on the setting) to define user default cost and billing rates within the system.
The cost and billing rates are used to automatically calculate the Cost and/or Revenue for a project work plan .
Cost and billing rate options include:
- Cost Regular Hourly Rate
- Cost Overtime Hourly Rate
- Billing Regular Hourly Rate
- Billing Overtime Hourly Rate
Note: Both cost and billing rates can also be set to a group or individual user (where the user level setting overrides the Group level and organization level settings).
To define costs and billing rates:
- Click the relevant field.
The Rate dialog box opens.

- Enter the rate value.
- Scroll to and select the required currency from the list of available currencies as defined in the Organization Settings.
- Click

The data is sent to the server. The costs and billing rates are defined.