
Custom Pages
Creating Custom Pages
- Access the settings module either via the Navigation Panel or the User Data menu located on the masthead , as detailed in the Settings overview .
- Open the Configurations Tab
- From the list of Item Types select Organization
- From the Create New list , select Custom Page
The New Custom Page opens
- Give the custom Page a name
- Select a custom Icon to associate with the page.Add an optional description
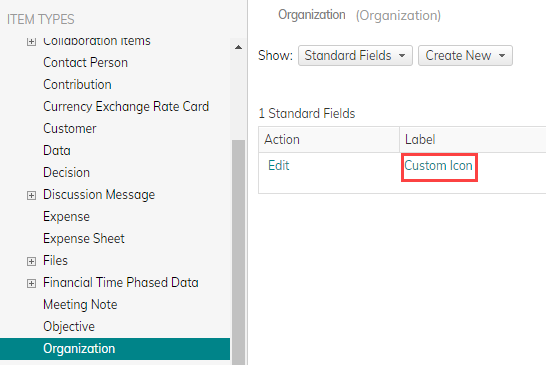
Note: To add a new custom icon to the list of available icons, you must first add the icon to the Custom Icon standard field.
- Define the page's viewing permissions, select to either make the page available for all users or select the Allowed by option to define specific People, or user Groups, you can also define a set of rules and variables to further customize the permission level of who can view the page.

- Define when the page is visible
- Select Show without conditions to keep the page available at all times
- Select Show Under Conditions to define visibility rules.
- Set the formula you wish to use
Click Formula Options to open the Formula Options Window - Test your Syntax by clicking

- Set action associated with the page.
- To set a variable action:
- In the Set Action menu select Set Variable
- Select New Variable (to update an existing page with a variable already set, select Update Existing Variable )
- Give the action a name
- From the Type list, select the type of variable to be used
- Enter the required Value or else Click Formula Options to open the Formula Options Window and create a formula to be calculated as the value
- To set a conditional action:
- In the Set Action menu select Conditional Action List
- Set the formula you wish to use
Click Formula Options to open the Formula Options Window - Test your Syntax by clicking

- Define as many actions and sub-action as you require
- To set a variable action:
- Define the content of the page:
- Select URL and type in the internal or external URL address of the desired content
- Select HTML and write the HTML code for your page in the text box.
You can add formulas as well
Click Advanced to open the dynamic HTML options:- Add external JavaScript libraries under External Script
- Add CSS rules under the Style field
- In the Script field enter JavaScript which will run once the page loads
Warning:
AdaptiveWork has no way of protecting you when implementing your own JavaScript and cannot guarantee the security level once a user created script is used.
- Enter any Data in Json Format, this field can also utilize formulas
-
Data (JSON Format):
This field allows you to pass data to your script via a JSON object. JSON is basically a key-value format with support for “nested” objects. For example, the following JSON object describes user details:
{
  "name": "John Smith",
  "email": "john.smith@example.com",
  "age": 15,
  "address": {
    "city": "London",
    "country": "United Kingdom"
  }
}


The above JSON object has several attributes: name, email, age and address. Note that “address” is itself a JSON object with the following attributes: city and country.

To pass data to your script, you can create a JSON object with several keys each containing the relevant data needed by the script. Then, in the script, you can access that data by calling:
API.Context.getData().
So, assuming you used the above sample object in the Data section, and you retrieved that object in the script via the following call:
var user = API.Context.getData();

alert("hello "+user.name); //will display: Hello John Smith
if (user.age<18) alert("No entrance!"); //compare numeric attributes
alert("City: " + user.address.city); //Access nested objects via "." (dot) notation. Will display: City: London

You may sometime want to include data from AdaptiveWork objects inside the Data section.
If you want to include the value of a specific field of the current object, you can do the following:
{
  "projectName": {{$Name}
}
The above will generate a JSON object which looks like this:
{
"projectName": "Project1"
}
You can then access the project name via:
API.Context.getData().projectName

If you want to include multiple fields from the same object as a nested object, you can do the following:
{
  "project": {{JsonObject(CurrentObject(),"Name,StartDate,CreatedBy,Manager.Name")}
}

The above will generate a JSON object that looks like this:
{
"project": {
  "id": "/Project/68dfcc86-7842-4e08-9084-8c4263c905c5",
  "Name": "Proj1",
  "StartDate": "2008-11-17T06:00:00.0000000",
  "CreatedBy": {
   "id": "/User/2ccf83c4-15b6-48e6-a0bf-734813d60e4d"
  },
  "Manager": {
   "id": "/User/2ccf83c4-15b6-48e6-a0bf-734813d60e4d",
   "Name": "john.smith@example.com"
  }
}
}

Note that "project" is now a nested JSON object containing the fields you requested. Because the field "CreatedBy" is a reference to a User object, the resulting JSON contains a nested object with the user "id" field.
Note also, that you can request fields from fields which reference other objects (Like Manager.Name in the example above).
You can now access the name of the project manager via:
API.Context.getData().project.Manager.Name;

To access the StartDate of the project as a normal javascript date, you can do the following:
var startDate = new Date(API.Context.getData().project.StartDate);

You can also include data from related object using the JsonObjects function. For example, to add the list of Customers to the Data object you can do something like this:
{
  "project": {{JsonObject(CurrentObject(),"Name,StartDate,CreatedBy,Manager.Name")},
  "customers": {{JsonObjects("$Customers","Name","TargetObject.AccountStatus='Lead'")}
}

The JsonObjects function accepts 3 parameters: The name of a relation, the fields of the target object and an optional Filter. In the example above, we are running on the "Customers" relation and take the "Name" field for each customer.
We are also filtering this list to return only customers whose AccountStatus is 'Lead'. The format of the filter parameter is a formula which works the same way a filter formula works when using the "Run on related" capability.
You can use both TargetObject and LinkObject to access the related objects.

{
"project": {
  "id": "/Project/68dfcc86-7842-4e08-9084-8c4263c905c5",
  "Name": "Proj1",
  "StartDate": "2008-11-17T06:00:00.0000000",
  "CreatedBy": {
   "id": "/User/2ccf83c4-15b6-48e6-a0bf-734813d60e4d"
  },
  "Manager": {
   "id": "/User/2ccf83c4-15b6-48e6-a0bf-734813d60e4d",
   "Name": "eyal.post@clarizen.com"
  }
},
"customers": [
  {
   "id": "/Customer/b9e3bfa4-abb9-43a2-9ad9-80251480c289",
   "Name": "Acme Inc."
  },
  {
   "id": "/Customer/0889a83b-a92e-433e-a6f7-60cccaee5330",
   "Name": "InVisible Inc."
  }
]
}


When using the JsonObject function, the resulting nested object is an array of objects. As you can see above, the "customers" attribute is now an array where each value is a JSON object container the customer details.
You can get the name of the first customer like this:
var customer1Name = API.Context.getData().customers[0].Name;

To loop over all customers, you can do something like this:
var customer;
for (var i=0; i<API.Context.getData().customers.length;i++)
{
  customer = API.Context.getData().customers[i];
  //Use the customer object
}
-
- Click
 or
or  to save your page.
 - In the Configuration tab click Enable (adjacent to the created Page) in order to enable the page created