
Custom Actions
Use Custom Actions to streamline work processes by creating one-click actions that trigger workflows, create new processes and customize dynamic forms. They can be used from anywhere in the system, including panels, grids, emails, discussions and more.
To access Custom Actions:
- Click Settings from the menu under your username.
- Open the Configurations tab.
- To see all Custom Actions (for all item types), select All Item Types in the left menu and from the Show menu, select Custom Actions.

In the list of Custom Actions, Display Order refers to their order in drop-down menus and ribbons with buttons.
To create a new Custom Action:
- Select an Item Type in the left menu for which you want to create the Custom Action, such as Work Item, and click Create New > Custom Action.
- Enter the Custom Action properties:
- Name (mandatory)
- Description
- Error notifications
- Expand the Advanced section and enable settings if needed.
- Define Permissions; enable the action for all users or specified users and groups.
- Define the Evaluation Criteria. This defines conditions to be met for the action to be accessible, for example, only when a task state is complete.
- Define the User Input fields. Enabling this option means the user must enter certain information.
- Enter the Dialog box title, and optionally, instructions for the user.
- Define the Variables. These include the items in the form such as dates, text, etc. Click Formula Options to select from the available options.
- Define the Set Actions fields. Actions can include creation of new work items, sending an email, adding a post, etc.
- (Optional) Define the Success message.
The Success message is displayed upon running the Custom Action. - Clicking the Open URL radio button opens a new window with the specified URL once the Custom Action is successfully run.
A standard URL can be entered, or you can create a URL via a formula customized for the current user using any variables or parameters and run them directly through URLs and even create wizards.
Note: When a Custom Action run is unsuccessful, the URL does not open and an error message appears.
Click Formula Options to select from the available options. - Click Save.
The new Custom Action is created.
Best Practices
- For Custom Actions, you can set up to 5 actions - one action can trigger another action that can trigger another one…
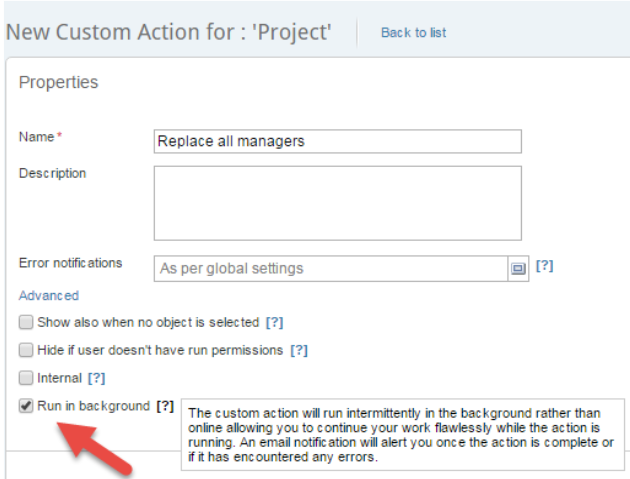
- For complex Custom Actions, enable Run in background to avoid impacting the end-user experience. Note that:
- The order is not guaranteed
- Validations are not checked (including evaluation criteria that are not checked again)
See also