Importing and Exporting to MS Project
Jump to:
Import From MS Project
This page describes importing a project from MS Project into AdaptiveWork and includes the following sections:
- Uploading Conditions
- Saving an MS-Project File as an XML File
- Uploading the MS Project to AdaptiveWork
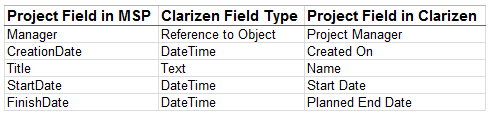
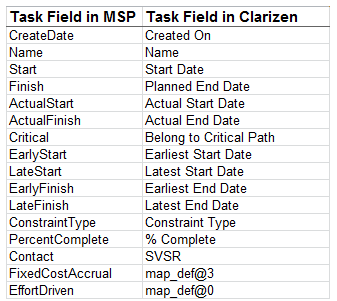
- Field Mapping Table - Import From MS Project To AdaptiveWork
- Field Mapping Table - Import To MS Project From AdaptiveWork
Uploading Conditions
AdaptiveWork maintains the framework of project plans managed in MS-Project, but due to system differences, the following conditions may vary:
- Resources that are assigned to milestones in MS-Project, are not assigned to milestones in AdaptiveWork
If non-working days differ in the applications project components (project, task , milestone), start and end dates are - shifted in order to synchronize deadlines
- In order to execute the process, you must first save your project in MS-Project as an XML file
Saving an MS-Project File as an XML File
To import a project from MS-Project, you first need to save your project in MS-Project as an XML file and than proceed with the import process. The following steps describe how to save your project in MS-Project as an XML file:
- Open the project in MS-Project.
- Click File located on the menu bar, and select Save As .
The Save As dialog box opens. - From the Save In drop-down list, select the destination either on your computer or on the server of where you would
like to save the XML output file. - In the File name text box, enter the project name you are saving as an XML file.
- From the Save as type drop-down list, select type XML Data .
- Click Save .
The project is saved as an XML file.
Uploading the MS Project to AdaptiveWork
Once you have saved your project in MS-Project as an XML file, you can upload it to the server.
XML files larger than 10MB should first be compressed into .zip files and then uploaded into AdaptiveWork, this will ensure a speedier upload.
To import the XML file into AdaptiveWork do the following:
- open the Navigation panel
- From the New submenu Select Import from MS-Project .
The Import Project From MS Project dialog opens.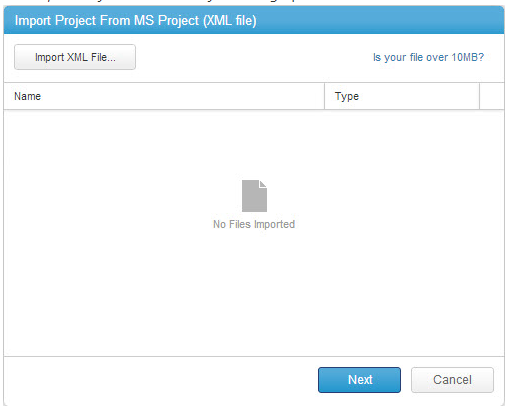
Figure 1: Import Project From MS Project Dialog - Click Import XML FIle.
- Browse to and select the .XML or .zip project file required.
- Click Next.
The .XML or .zip file is loaded in the dialog.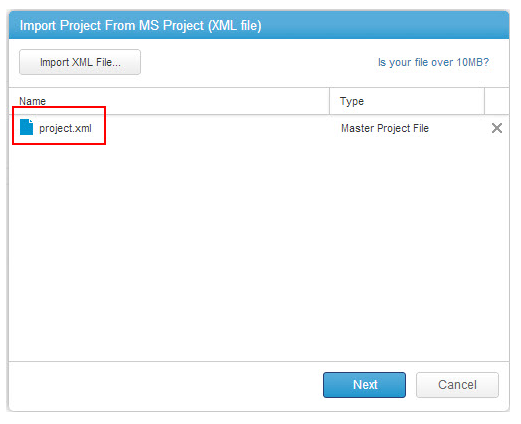
Figure 2: Project Selected - Click Next.
The system performs a data integrity verification to ensure that the data is not corrupt. After confirmation a validation report, including a summary of the project that has been imported, is displayed on the screen.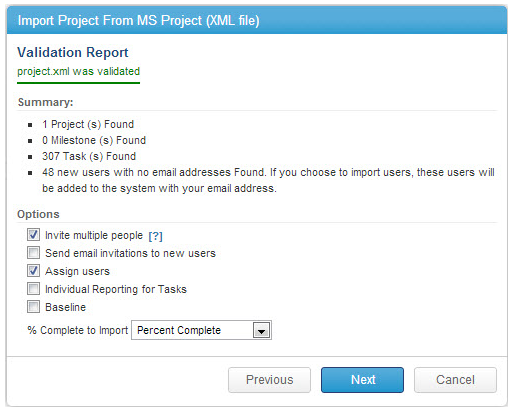
Figure 3: Validation - Check options as necessary:
- Decide whether to import new Users from the MS-Project file into your AdaptiveWork organization using the
Import Users check box. - Regulate whether to send an invitation email to the imported Users, use the corresponding Send Email
Invitation to New Users check box. - To assign people that are already part of your AdaptiveWork organization to tasks during the importation
process, check the Assign Users check box. - To import the last saved baseline and the other information in the file, check the Baseline check box.
- Select '% Complete to import' from the drop-down menu.
Note:
Users who do not have assigned email addresses during the importation process are automatically assigned the email address of the User currently logged into AdaptiveWork.
To operate these Users within the system, update each User's email address in Users of the Settings subsystem. Users can then activate the Forgot Your Password link from the Login page. The system sends an email including the User password. - Decide whether to import new Users from the MS-Project file into your AdaptiveWork organization using the
- Click Next.
The project is imported to AdaptiveWork.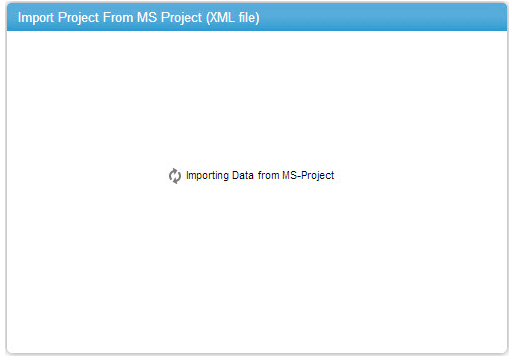
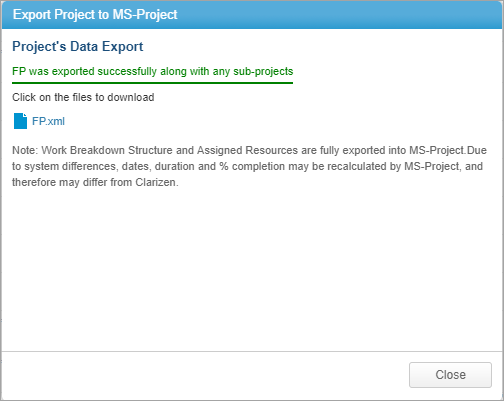
Figure 4: Importing Project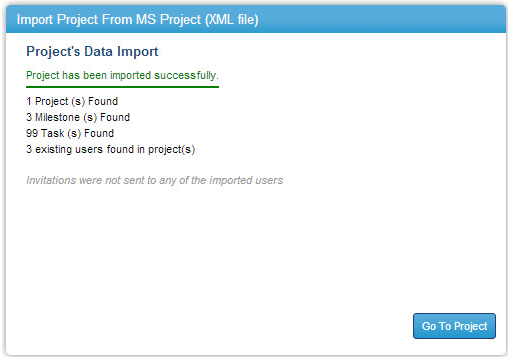
Figure 5: Data Import Confirmed - Click Go to Project.
The imported project opens in Overview View (DEFAULT) .
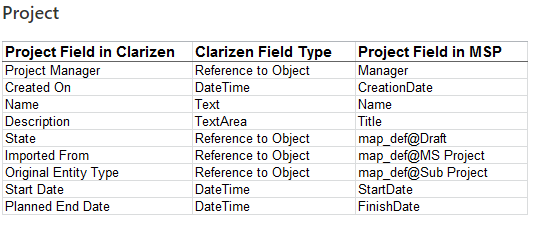
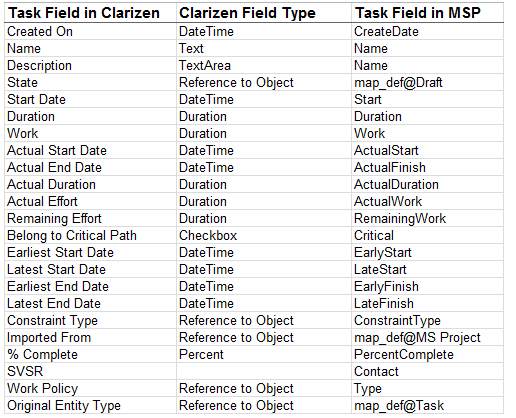
Field Mapping Table - Import To MS Project From AdaptiveWork
The below field mapping tables are provided:
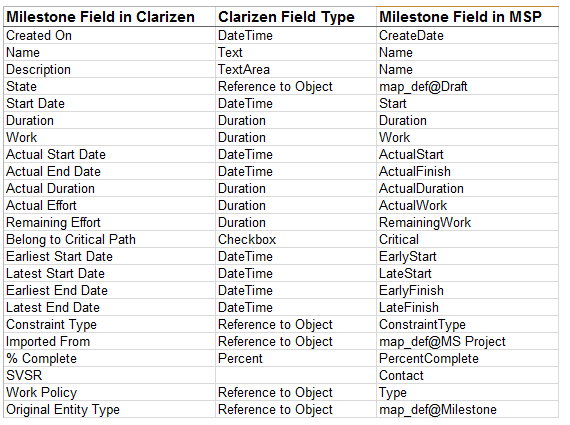
Milestone
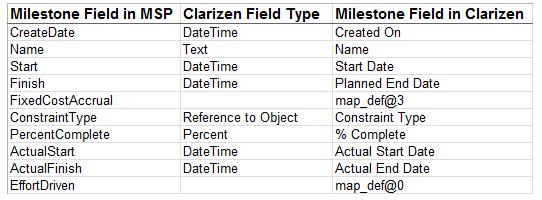
Note:
MS Project displays data according to Actual Start/Actual Finish dates, assuming these fields are not blank, rather than planned start and end dates.

Exporting to MS Project
Export your Projects to MS Project, for example, to work offline or when you need to send the Project to an external client. The export process creates an XML file that you can import into MS Project.
To export a Project:
- In your Project, open the Utilities tab.
- Click Export > Export to MS Project.
- Select the relevant settings.
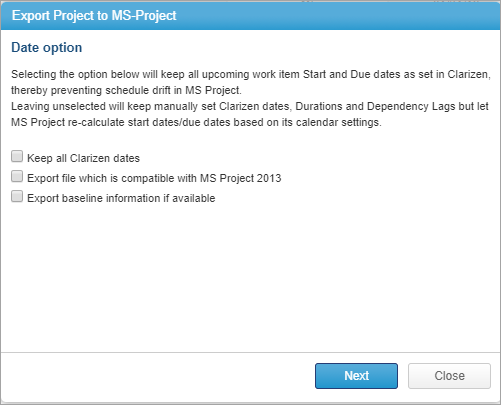
- Keep all AdaptiveWork dates keeps set start and end dates preventing MS Project calendars from shifting dates. Not selecting this option will only keep manually set dates in AdaptiveWork, while other dates will be updated according to calendar settings in MS Project.
- Export baseline information if available will export the last saved baseline.
- Click Next.
When done, click on the XML file to download it. You can now import the file into MS Project.