
Milestones
Jump to:
Overview
A AdaptiveWork milestone has two usages:
- a hammock of tasks
- a significant event (empty milestone)
A milestone is typically used as a container of tasks to be completed in order to achieve the milestone’s goals (in terms of content and dates). This methodology enables an instant understanding of every milestone’s status, especially since it is reflected in the project's work items.
You can refer to a milestone as a significant phase or hammock in your project plan, as this needs to be highlighted in the high-level overview of your project. By setting a milestone's due date you can make it behave like a date-driven milestone rather than being fully scheduled by its planned work effort.
- On Roadmaps, icons fill up with a grey color to indicate the percent completion, schedule status and the milestone progress.
Milestone Roadmap schedule status examples: -
 — Milestone is 4% complete
 -
 — Milestone is 65% complete
Indicators in the Roadmap
Note: New Roadmaps are being developed.
Click here to read about the new Portfolio Roadmaps.
Click here to read about the new Program and Project Roadmaps.
Border Colors
The below images represent the potential roadmap icons:
 — The grey border around this milestone icon indicates that this work item's status is 'Not Active'.
 — The green border around this icon milestone indicates that this work item's status is 'On Track'.
 — The orange border around this icon milestone indicates that this work item's status is 'At Risk'.
 — The red border around this milestone icon indicates that this work item's status is 'Off Track'.
Other Indicators
 — The down arrow on the top left of this milestone icon indicates that this work item is impacted by other work items.
 — The up arrow on the top left of this milestone icon indicates that this work item impacts other work items.
 — The up and down arrows on the top left of this milestone icon indicate that this work item both impacts and is
impacted by other work items.
 — The blue arrow on the bottom left of this milestone icon indicates that this work item is a shortcut.
Creating a Milestone
Milestones can be created from several locations in AdaptiveWork, including from the Navigation Panel, a Work Plan, a Roadmap, as well as from the Milestones and Work Items modules.
This page describes creating a milestone in AdaptiveWork and includes the following sections :
- Creating a Milestone via the Navigation Panel
- Creating a Milestone from the Roadmap
- Creating Milestones from Modules
Creating a Milestone via the Navigation Panel
 and
and  options, whereas pop-up windows are not.
Layouts for defining new items can be configured to display information and/or fields as pop-up windows or as inline editors by your organization's Admin user, via Layout Settings.
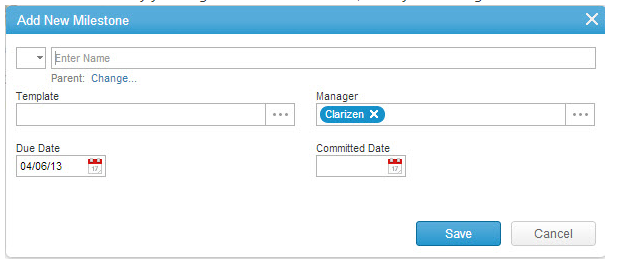

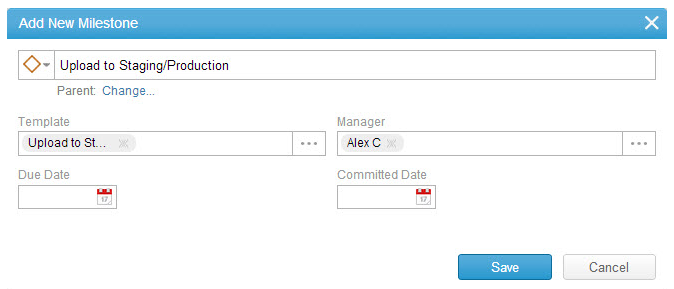
- Click the link below the Name field to change the parent.
- In the Template field, click the menu (...) to select a template. (Optional)
The template may include user assignment.
- In the Manager field, click ... to select a manager (other than the default manager).
- Click the Start Date field to define the milestone's start date.
- Click the Committed Date field to define the committed date.
- Click Save.
Creating a Milestone From The Roadmap
Note: New Roadmaps are being developed.
Click here to read about the new Portfolio Roadmaps.
Click here to read about the new Program and Project Roadmaps.
- Navigate to the project Item Detail view's Roadmap.
- Click Add Milestone located on the ribbon.
The Add Milestone dialog opens.
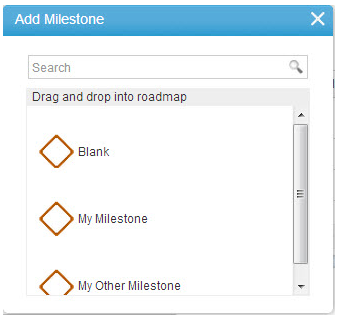
- Click and hold to choose the required milestone and 'drag and drop' it to the desired location on the Roadmap.
The New Milestone properties dialog opens.
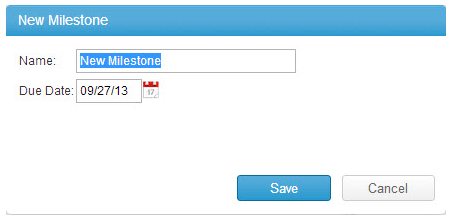
- Enter a milestone name and define the Due Date.
- Click Save.
The new milestone is created and appears on the roadmap in the selected location.
Creating Milestones From Modules
Note: The inclusion of specific modules in the Navigation Panel is defined by your organization's Admin user via the Layout Settings.
Creating a Milestone From the Milestone Module
- Access the Milestone module.
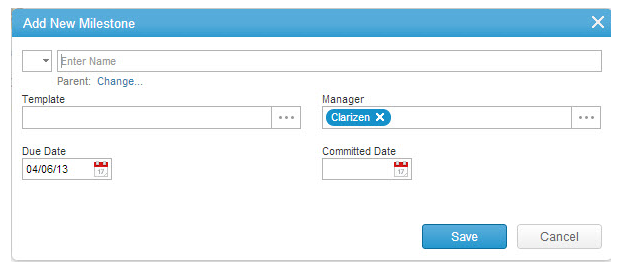
- Click Add Milestone located on the ribbon.
The Add New Milestone window opens. - Follow Steps 3 through 8 of Creating a Milestone via the Navigation Panel.
Creating a Milestone From the Work Items Module
- Access the Work Items module.
- Click Add Work Item located on the ribbon.
- Select Milestone from the drop-down menu.

- Follow Steps 3 through 8 of Creating a Milestone via the Navigation Panel.
Using Templates
Using templates to provide the basic framework for creating new milestones from a previously used milestone saved in the system saves you time. All fields and data are maintained when a milestone is saved as a template.
When creating the new milestone, the template properties define the configuration of the milestone's overall architecture and strategy for achieving the milestone's deliverables. The template may include a user assignment.
Creating a New Milestone Using a Template
- Follow Steps 1 through 4 of 'Creating a Milestone via the Navigation Panel'.
- In the Template field, click ...
The Select Template find window opens listing the milestone templates.

- Sort columns, define column sets and/or define search filters.
- Select a template.
- Uncheck the item type properties not to be included in the new milestone.
- Click OK.
The Add New Milestone pop-up window or in-line editor loads with the selected template properties.
- Click Save.
Milestone Module
The Milestone Work Item See also supports the following modules:
-
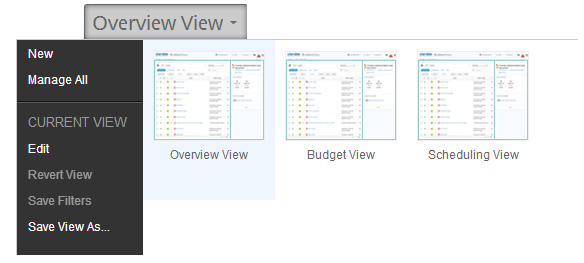
View Navigator - AdaptiveWork's View Navigator 'out-of-the-box' default view options vary from module to module. The figure below shows the Milestone Item Detail out-of-the-box' default view options.
-
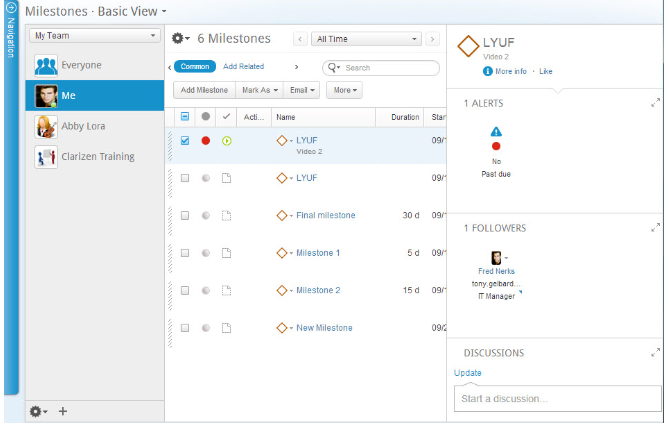
Team Panel - The Milestones module supports including AdaptiveWork's Team Panel to the view. The addition of the Team Panel creates a team-centric view to better assist with team collaboration on all deliverables.
-
Grid - The grid is AdaptiveWork's standard data table display for viewing, managing and editing data, and items in most modules.
A grid display is one of three display type options used to configure several of the out-of-the-box view options available in the View Navigator for most modules.
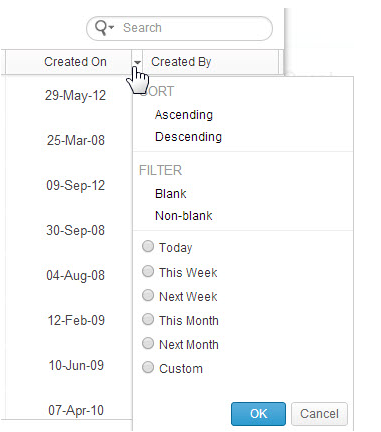
Using the Time Range Filter enables filtering the grid to show items and events occurring during the actual period/date(s) defined.
Clicking the cog icon, located above the ribbon enables managing grid column sets which can then be further filtered and sorted.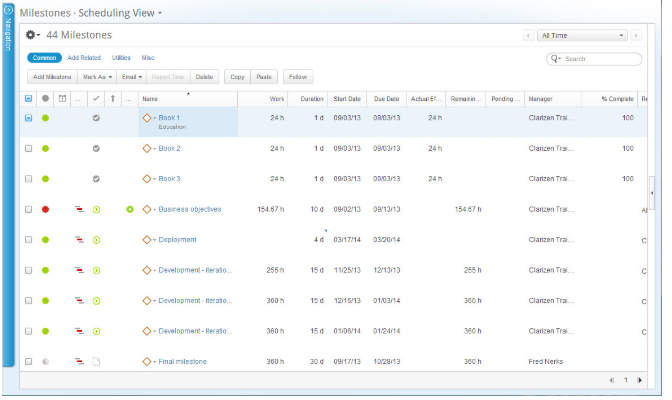
-
Ribbon - The Milestones module ribbon, located under the masthead (at the top-left) provides controls for performing actions on selected items.

- Relations Panel - The Relations Panel displays any related items, such as assigned resources, files, and discussions, etc.) of a selected item type in the grid, as well as cases including bugs, issues and requests, and enables working with the related items while staying in context of your original view.
- Properties Card - A Milestone's properties card can be accessed from the Milestones module by selecting the item in the grid, and clicking More info located in the Relations Panel.