
Adding New Expenses
Adding New Expenses
This page describes adding new expenses to an Expense Sheet and includes the following sections:
- Adding New Expenses to a Project via The Ribbon
- Adding New Expenses to a Work Item via the Relations Panel
- Adding New Expenses to a Work Item via the Grid
Adding New Expenses to a Project via the Ribbon
- Select the project.
- On the ribbon, click
 and then
The Add Expenses multi-find window opens.
Tip: An existing Expense Sheet can be selected from the Add Expenses multi-find window .

The Add New New Expense pop-up window or in-line editor opens.
Note: AdaptiveWork in-line editors are equipped with  and
and  options, whereas pop-up windows are not.
Layouts for defining new items can be configured to display information and/or fields as pop-up windows or as inline editors by your organization's Admin user, via Layout Settings.
and options, whereas pop-up windows are not. Layouts for defining new items can be configured to display information and/or fields as pop-up windows or as inline editors by your organization's Admin user, via Layout Settings.
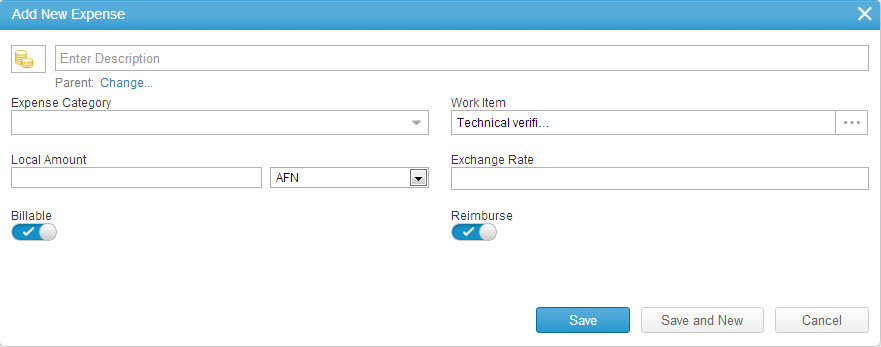
Figure 1: Add New Expense Form
- Enter a description.
- To change the Expense Sheet parent (if relevant), click
 and select the new parent from the Select Expense
Sheet multi-find window. - Enter the expense category.
OR
- Click
 and scroll to select a category.
- Edit the work item as necessary.
OR
- Click
 to select another work item.
- Enter the local amount value and click
 to select a currency.
 - Enter the exchange rate.
Note: If necessary, set an exchange rate and amount with the corresponding currency.
- Click the
 controls to define Billable and Reimburse settings.
Notes:
Billable is set to ‘On’ b y default meaning the resource Cost and Revenue rates assigned are factored into Expected Costs .
The Reimburse control sets whether or not any incurred costs are reimbursed.
Billable is set to ‘On’ b y default meaning the resource Cost and Revenue rates assigned are factored into Expected Costs .
The Reimburse control sets whether or not any incurred costs are reimbursed.
- Click

New expenses are added to the Expense Sheet.
Adding New Expenses to a Work Item via the Relations Panel
Note: When adding an expense to a milestone or to a task , AdaptiveWork automatically generates an associated Expense Sheet if one does not exist.
- Click
 located in the upper-left of a grid .
The grid expands. - Select the work item to which a new expense is to be added.
- On the Relations Panel , click

- Click

The Add Expenses multi-find window opens.
Tip: An existing Expense Sheet can be selected from the Add Expenses multi-find window.
- Follow Steps 3 through 11 of the above procedure.
Adding New Expenses to a Work Item via the Grid
- Click
 located in the upper-left of a grid .
The grid expands. - Hover the mouse pointer over the work item in the grid to reveal the Quick Peek icon.
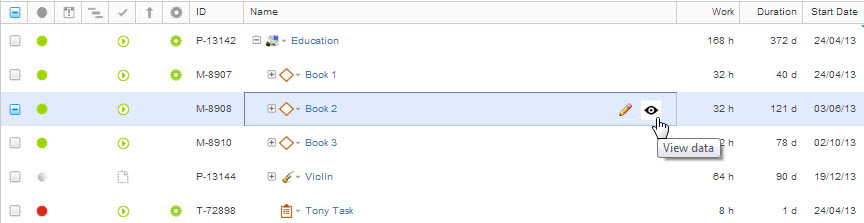
Figure 2: View Data
- Click

The Data Preview window opens.
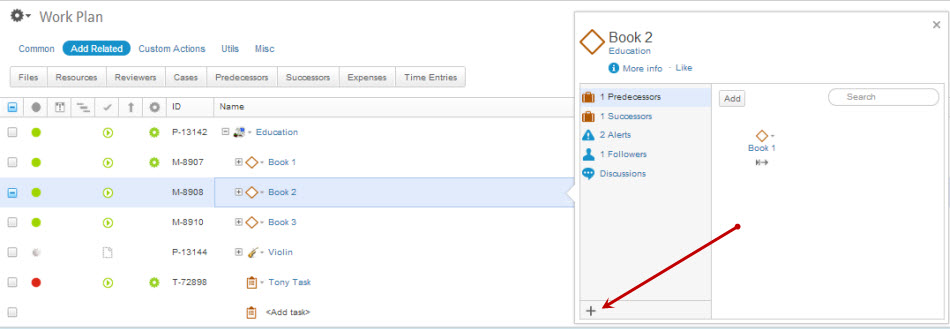
Figure 3: Item Short Path Pop-up Window
- Click the
 shown in Figure 2 above.
The Add Related pane opens. - Click

The Add Expenses multi-find window opens.
Tip: An existing Expense Sheet can be selected from the Add Expenses multi-find window.
- Follow Steps 3 through 11 of Adding New Expenses to a Project via The Ribbon, above.