
To access custom actions
- Click user menu > Settings.
- In the Settings view, click the Configurations tab.
- To see the custom actions for all item types:
- In the Item Types panel, click All Item Types.
- In the Show list, select Custom Actions.

In the list of Custom Actions, Display Order refers to their order in drop-down menus and ribbons with buttons.
To create a custom action:
- In the Item Types panel, select the entity that you want to create the custom action for, for example, Work Item.
- In the Create New list, select Custom Action.
- Enter the properties for the custom action:
- Name (mandatory)
- Description
- Error notifications
- Expand the Advanced section and then enable settings as required.
- By default, all users have access to new custom actions, but you can specify the users who can access the custom action. In the Permissions section, enable either all users or the specific users who can access the custom action.
- By default, new custom actions are always displayed. To display the custom action under specific conditions (for example, only when a task state is complete):
- In the Evaluation Criteria section, click Show under conditions.
- In the If True= text box, enter the conditions.
- To check the syntax, click Check Syntax.
- To make the custom action mandatory or require confirmation from users:
- In the User Input section, select the Request values or confirmation from user check box.
- Enter the Dialog box title, and optionally, instructions for the user.
- Define the Variables. These include the items in the form such as dates, text, etc.
- Click Formula Options to select from the available options.
- Define the Set Actions fields. Actions can include creation of new work items, sending an email, adding a post, etc.
- (Optional) Define the Success message:
The Success message is displayed after the custom action is completed successfully. (When a custom action fails, an error message appears/.)
To open a new window with the specified URL instead, click the Open URL option.
You can enter a standard URL or generate a URL for the current user by inputting a formula that uses variables or parameters and run them directly through URLs and even create wizards.
Click Formula Options to select from the available options. - Click Save.
Best Practices
- For Custom Actions, you can set up to 5 actions - one action can trigger another action that can trigger another one…
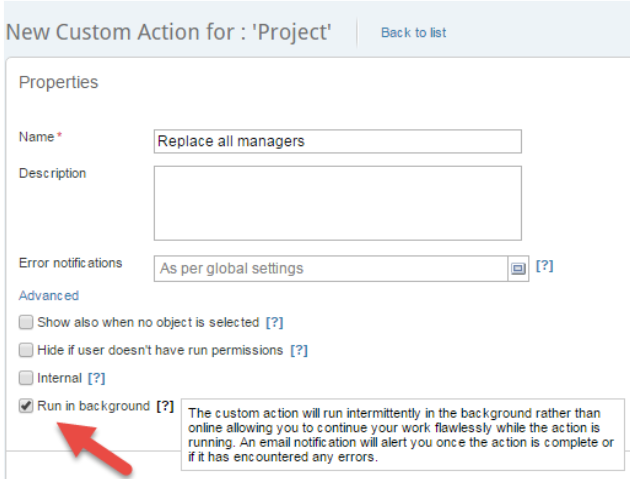
- For complex Custom Actions, enable Run in background to avoid impacting the end-user experience. Note that:
- The order is not guaranteed
- Validations are not checked (including evaluation criteria that are not checked again)
See also