
Creating a Case
Creating a Case
This page describes creating a case in AdaptiveWork and includes the following sections:
- About Creating Cases
- Creating a Case via the Navigation Panel
- Creating a Case via Add Related
- Creating a case via a Case Module
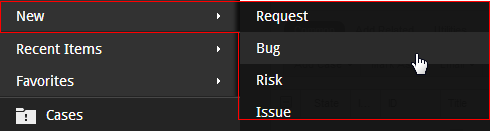
Creating a Case via the Navigation Panel
- From the Navigation Panel , click New and select the case type you want to create.
An Add New (case type) pop-up window or in-line editor opens.
 and
and  options, whereas pop-up windows are not.
 Layouts for defining new items can be configured to display information and/or fields as pop-up windows or as inline editors by your organization's Admin user, via Layout Settings.
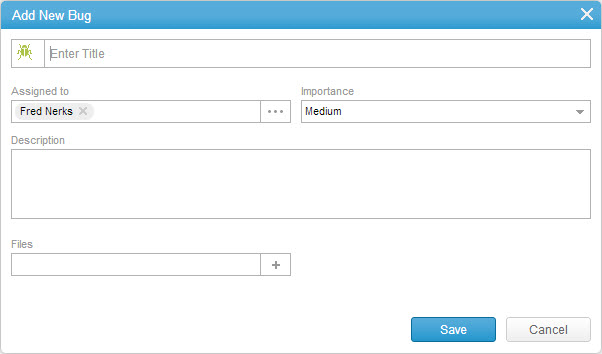
- Enter the case title .
To upload a custom icon , click the default case icon on the left.
![]()
- Assign user(s), select case type, set Importance , Severity or Risk Strategy status, add files and description:
—Bugs and Issues:
To assign a user to the case other than your profile ( DEFAULT ):
- Click the Assigned to field:
- Either click
 and enter the name of an existing user and select from the 'type-ahead' option.

OR
- Click
 to select a user to assign the new case to.
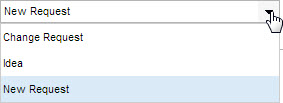
— Requests:
- Click the Request Type field and select the request type.
— Bugs, risks and issues :
To change the user assigned to the case from your profile ( DEFAULT ):
- Click the Assigned to field.
- Either click
 and enter the name of an existing user and select from the 'type-ahead' option.

OR
- Click
 to select a user to assign the new case to.
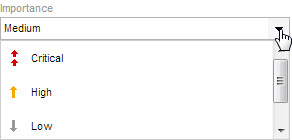
- Click the Importance field and select the case importance definition.
— Issues :
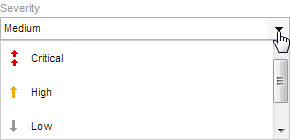
- Click the Severity field and select the issue's severity definition.
- Click the Description field and enter a case description.
— Requests :
To change the user assigned to the request from your profile ( DEFAULT ):
- Click the Assigned to field.
- Either click
 and enter the name of an existing user and select from the 'type-ahead' option.

OR
- Click
 to select a user to assign the new case to.
— Requests , bugs and issues :
- Click the Files field to add files to the case.
— Risks :
- Click the Impact field and enter a value to reflect the risk impact
- Click the % Probability field and enter a value to reflect the percentage of estimated impact probability
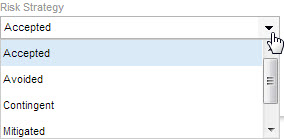
- Click the Risk Strategy field and select the required strategy

The new case opens in Item Detail view .
Creating a Case via Add Related
- Navigate to either the Projects, Tasks or Milestones module.
- Select an item in the grid .
- On the
 ribbon, click
OR
- Scroll to the bottom of the Relations Panel , and click the 'Add Related' link.

The Add Cases multi-find window opens.
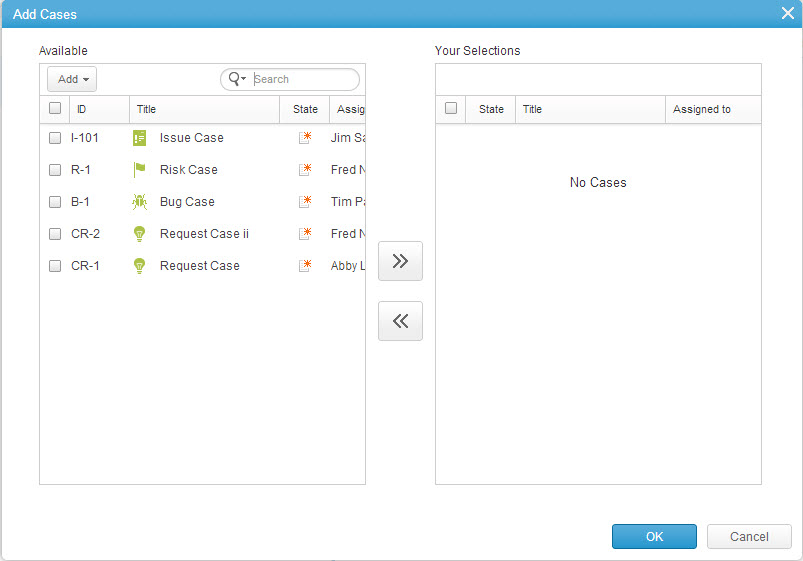
Figure 3: Add Cases
-
Select one or more cases from the list of available cases.
OR
-
Click
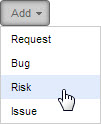
 and select the case type from the drop-down menu.
The Add New (Case type) window opens.
- Follow the Steps 2 through 4 of Creating a Case via the Navigation Panel above.
- The added case appears in the Add Cases multi-find window under Your Selections .
- Click

The new case opens in Item Detail view.
Creating a Case via a Case Module
- Navigate to one the of the case type modules ( Requests , Bugs , Risks , Issues ).
- On the
 ribbon, click the relative Add button.


The Add New (Case type) window opens.
- Follow Steps 2 through 4 of Creating a Case via the Navigation Panel , above.
The new case opens in Item Detail view .