Find Your Way Around ProjectPlace
Navigating ProjectPlace
Use ProjectPlace tools and resources to help get work done. Navigate a variety of tools, workspaces, and other resources associated with your user account.

- Use the tool selector
 to access the following resources. Note that tool options differ between users, depending on the current plan you use and the access rights that have been assigned to you. If you select Workspaces or My teams, next to the tool selector, you will be able to view another dropdown menu where you can select any workspace or team of which you are a member.
- My overview helps you understand the status of you and your team's work. Every time you log into ProjectPlace, you will land on this page.
- My teams provides an overview of all of the teams you are a member of.
- Workspaces is the most commonly used tool; this is where you will find all your workspaces.
- Time reporting permits users to report time when working with cards and activities associated with a project you are working on.
- Portfolios allows users to follow up on status for a group of project workspaces.
- Workload provides for the ability to follow up on the workload of account members.
- Requests allows account administrators and account members with access rights to become aware of and handle incoming workspace requests.
- Account administration allows account administrators to manage users and workspaces within the account.
- Workspace templates can be used to create a predefined structure and work method to use as a base when creating new workspaces.
- Search documents, document tags, folders, boards, cards, milestones, and activities in all workspaces you are a member of, and apply filters to make search results more relevant. Learn more.
- Use the Knowledge center
 to access product help, contact support, get training, read product updates, and give feedback.
 - Notifications provides alerts when events occur in your workspaces. Click a notification to navigate to the corresponding area in ProjectPlace (for example, if a card is due today, you can click the notification to navigate to that card.) You can also respond to meeting requests, set reminders on notifications, mark notifications as important, mark notifications as read/unread, and delete notifications.
- Your Personal menu includes settings to add a user's personal information. You can select a variety of settings helping each user personalize the way you use ProjectPlace. If you need to log out of ProjectPlace, navigate to the Personal menu.
- The product switcher
 allows you to quickly navigate to other Planview products, (like Roadmaps or AgilePlace) that you have access to. You will only be able to view the product switcher if you have been added in Planview Admin.
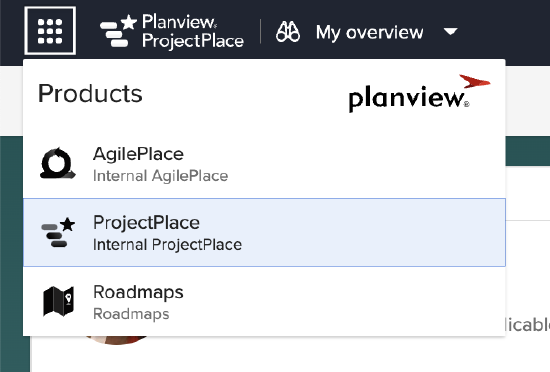
Product Switcher
- Planview Anvi®
 lets you interact with an AI chatbot that summarizes relevant information from the ProjectPlace Customer Success Center. Users can customize how Planview Anvi formats responses by asking pointed questions. For example, "How can I delete a card? Please respond in bullet points."
You will only be able to view Planview Anvi if you have been added in Planview Admin.
With Planview Anvi, you can:
-
Get answers quickly – i.e., “How do I add a dependency in a plan?” or “How do I mirror a card?”
-
Receive guided help – find the right features and documentation faster.
-
Troubleshoot issues – get suggestions for common problems (such as login or access errors).
-
Onboard smoothly – learn how to use boards, plans, documents, and more.
Planview Anvi makes it easier and faster to get the help you need, right within ProjectPlace.
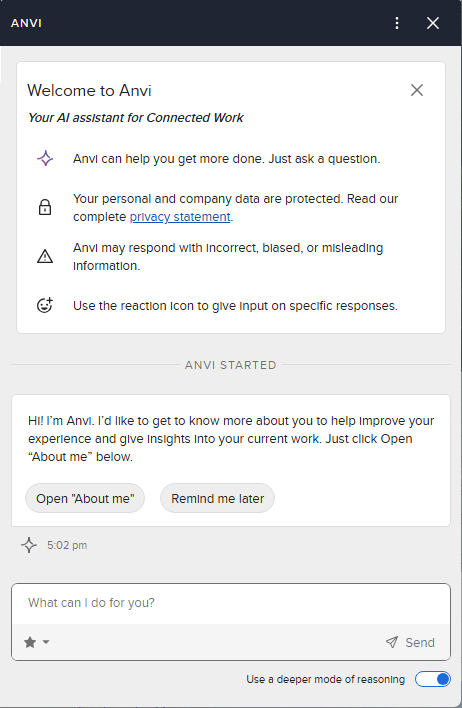
Planview Anvi
For more information, see Planview Anvi in ProjectPlace.
-
My Overview
Every time you log in to ProjectPlace, you will land on the My overview page. This is where you will find all of the work that needs to be completed, and from here you can get to where you need to be.
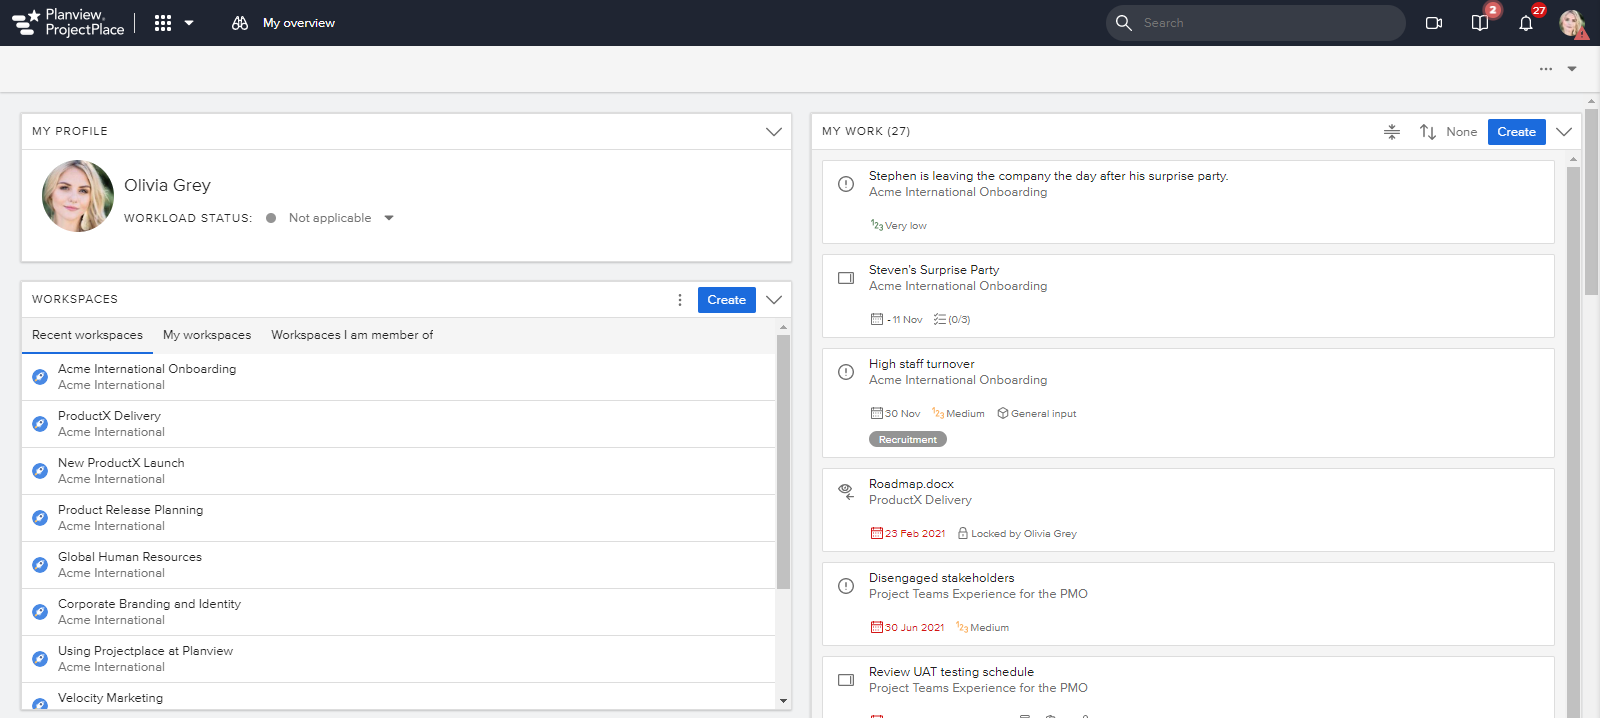
In My overview you find the following widgets that are enabled by default:
- My Profile shows your avatar, name and workload status. From here you can also set your workload status.
- The Recent boards section includes a list with the five most recently boards you have visited.
- The Recent documents section provides a list of the documents you have last read or edited.
- On the Workspaces widget, the Recent workspaces tab provides a list with the workspaces you have most recently visited. The My workspaces tab provides a list of workspaces that you own, and the Workspaces I am a member of tab lists the workspaces you are a member of.
- The Meetings widget lets you know which meetings you're scheduled to attend today, as well as all your upcoming meetings.
- The My work widget includes a list of work assigned to you, as well as your personal tasks. Learn more about how to keep track of work.
- The Following widget includes a list of cards you are following.
- Notes is where you can add your personal note. This note is only be visible to you.
- Workload will present your daily workload over the last 30 days.
Customize My Overview
You can customize your widgets' layout and also the background of My overview.
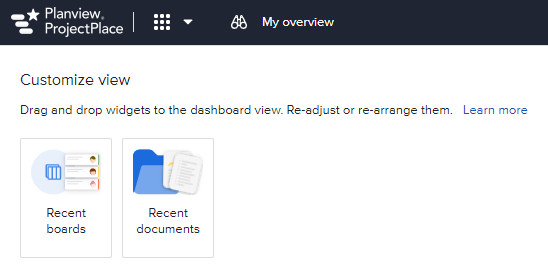
Customize view
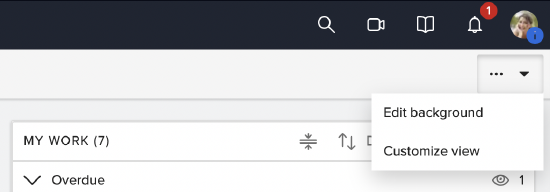
To edit the My overview page, click the More options  menu in the upper right of the menu bar, and then select Customize view. In this view you can:
- Select which widgets you want to appear on the page by dragging them on or off the dashboard.
- Arrange widgets on the page by dragging and dropping them to the desired position.
- Resize individual widgets by clicking the lower right corner and dragging and dropping to the desired size.
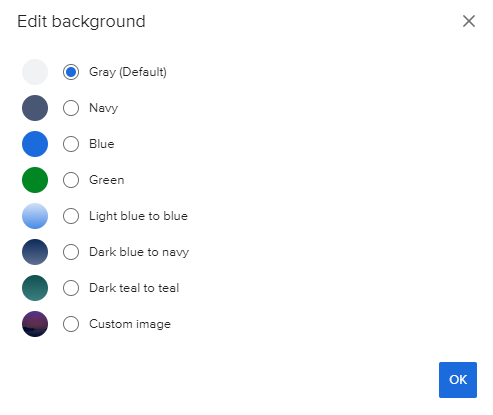
Edit background
You can also change the background color of My overview and add a custom image, if desired. Click the More options menu in the upper right of the menu bar, and then select Edit background.
My Teams
From My teams, you can access an overview of all of the teams you are a member of. On each team overview page, you can also edit the team page to customize the size and position of the widgets to prioritize what is most important to the team, and also create new teams. Learn more about Working with teams.
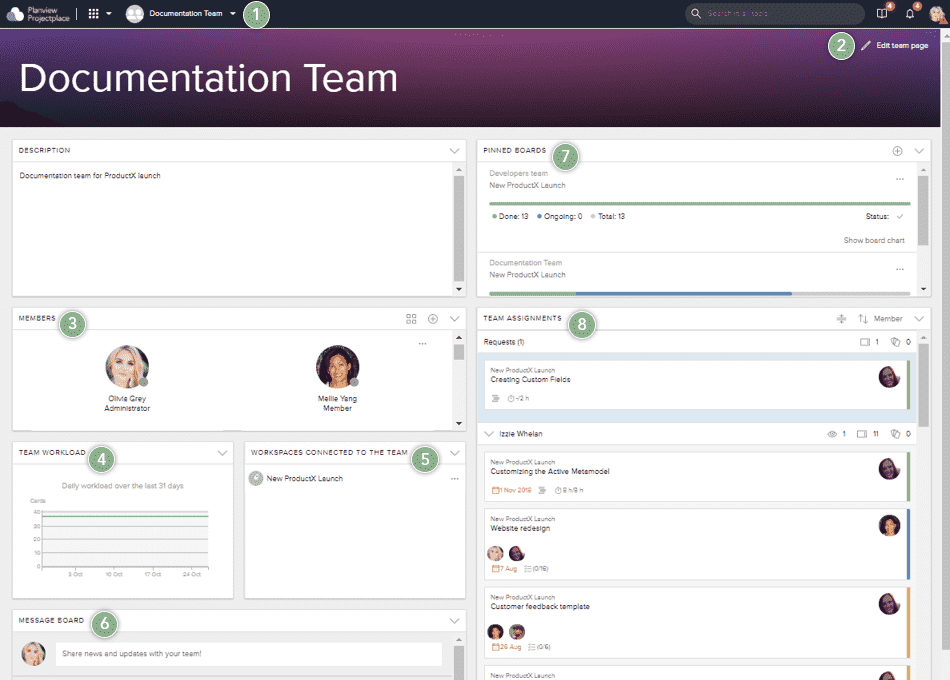
- Use the dropdown menu to select the team for which you want to view an overview.
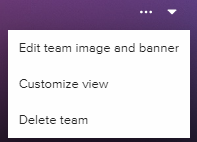
- Click the More icon
 on the far right to update the team page's banner image, rearrange widgets, resize widgets, or collapse widgets.
- The Members section includes a list of members included in the team, and their individual workload trend charts.
- The Team Workload trend widget displays the team's total workload over time (including assignments in non-Team workspaces).
- The Workspaces connected to the team section includes a list of workspaces connected to the team. To add a workspace to this list, the Team needs to be invited to the workspace. Learn more by visiting Work with members and groups.
- Use the Message Board widget to communicate with your team members.
- The Pinned Boards widget displays boards you've added to the widget for quick access, and basic statistics about those boards. Only boards from workspaces connected to the team can be pinned to this widget.
- The Team Assignments widget includes a list of the work team members are assigned to in the workspaces that the team is connected to, including active requests.
Get to Know the Workspace
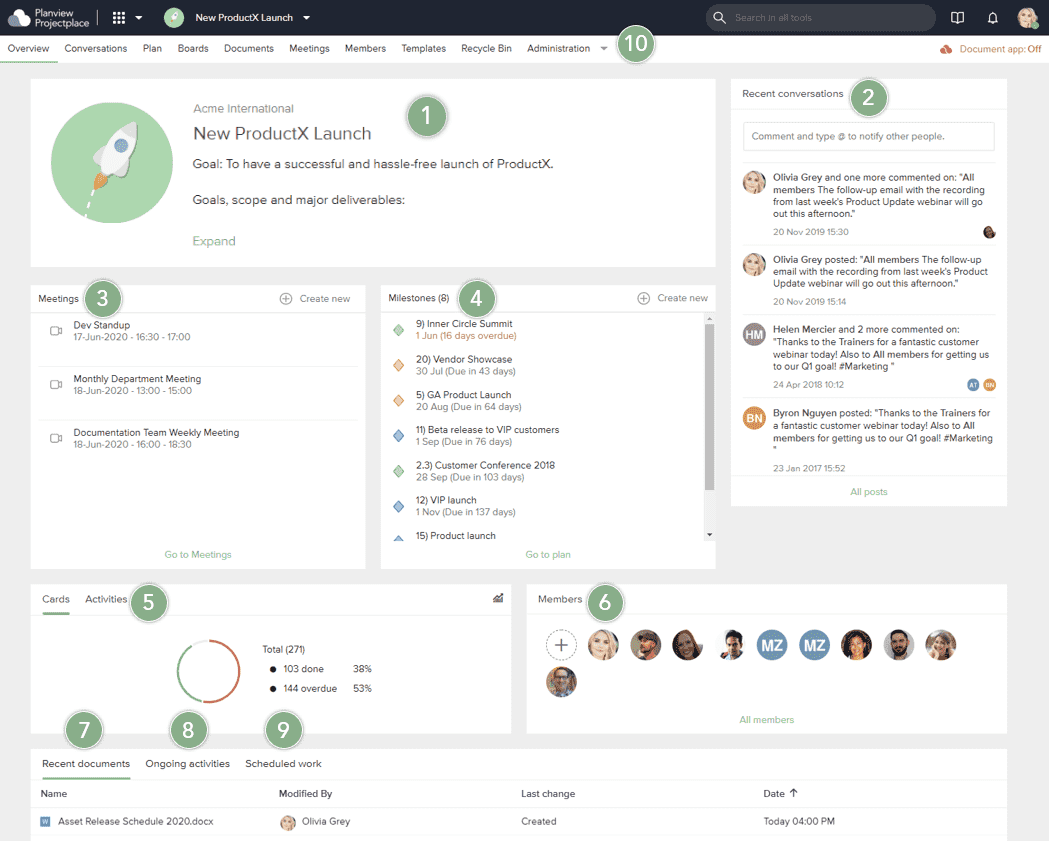
The workspace overview allows users to quickly and easily find important information about the workspace and provides the work status of your project at any moment.
-
The Workspace name, the name of the account the workspace belongs to, and the workspace description (such as its purpose and goals) are found in this section.
-
See recent workspace member conversations in the Conversations tool.
-
The Meetings section displays your upcoming meetings. From here, you can click Create new to create a new meeting, or Go to Meetings to access the Meetings tool.
-
The Milestones sections helps you review upcoming and overdue milestones.
-
This dashboard provides progress for both Cards and Activities. Click the Cards tab to see a summary status of cards and get the same type of information by clicking the Activities tab for activities. Hover the cursor over the legend to get more detailed information. Click the Dashboard Full View icon
 to access a full screen view with a variety of charts providing a graphical view of ongoing work progress.
 -
The Members section identifies workspace members. Click a member's avatar to access member contact information.
-
The Recent documents tab includes information from the Documents tool. You will have instant access to see those documents that have been added or edited during the last ten days. The list includes the name of the document that was added or edited, the type of edits that were made, who the edits were made by, and when the edits were made.
-
The Ongoing activities tab lets you review activities from the Plan tool that are currently being worked on.
-
The Scheduled work tab includes the work in progress from cards, issues, and meetings that are currently scheduled.
-
Select one of these ProjectPlace tools (Overview, Conversations, Plan, Board, Documents, Whiteboards, Meetings, Issues, Members, Status, Reports, Templates, and Administration) to get your work done.
Workspace List
Hide/Unhide Workspaces in the List
Hide a Workspace
You can hide a workspace that is of lower priority. Hidden workspaces will not show up directly in the workspace selector or the workspaces section in My overview.
You need at least two workspaces to use this feature.
To hide a workspace:
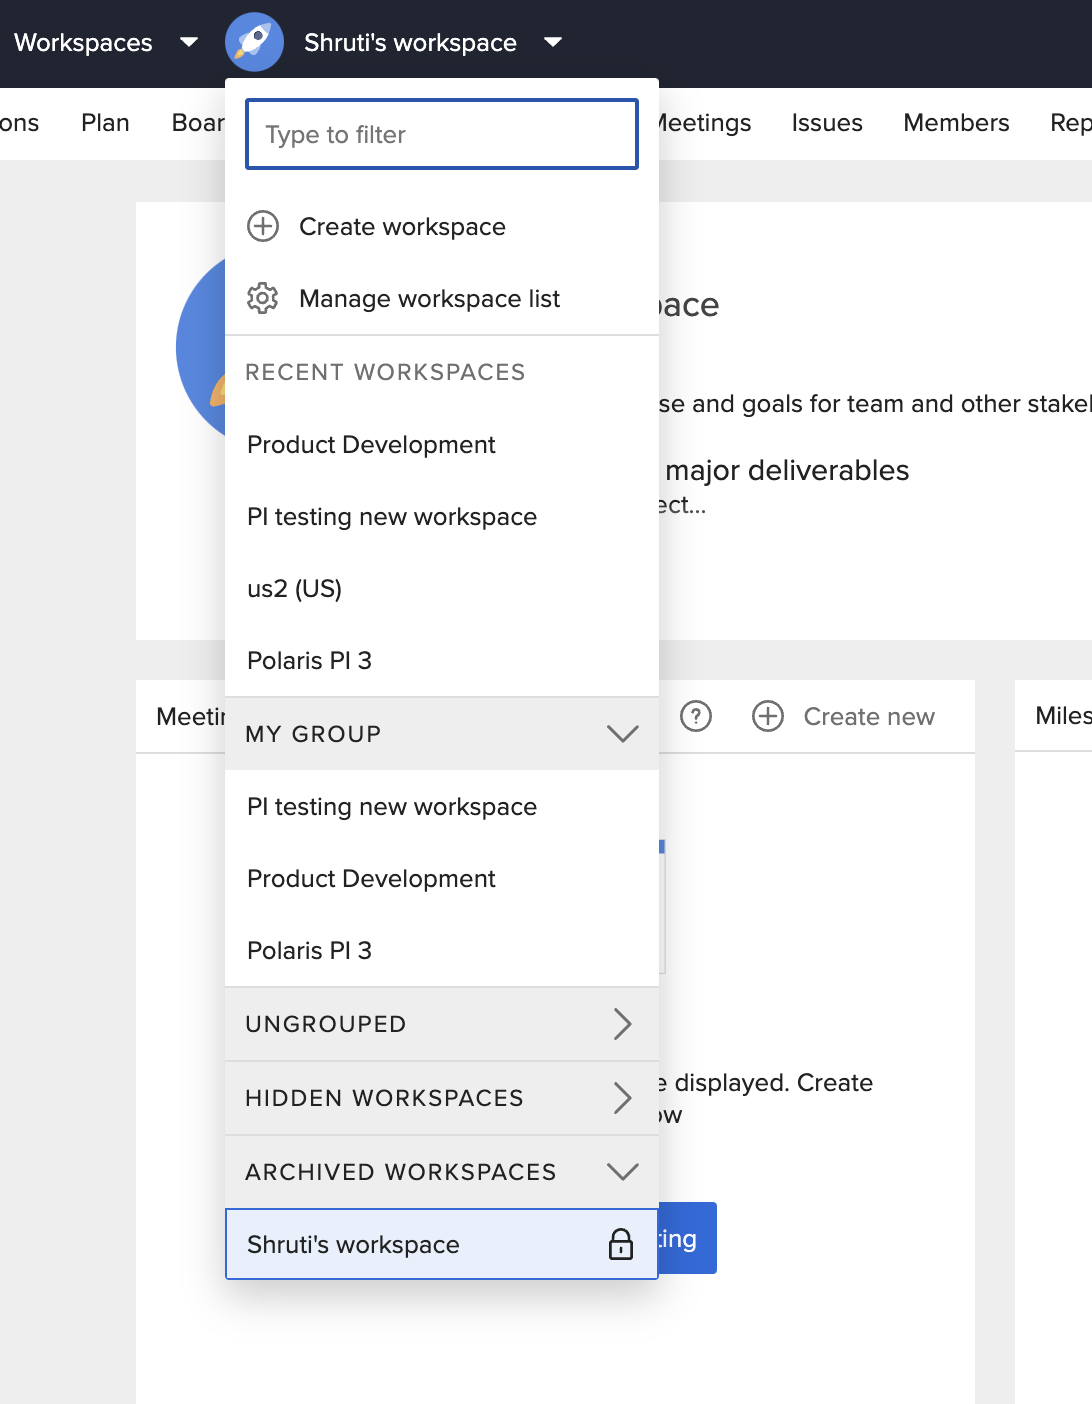
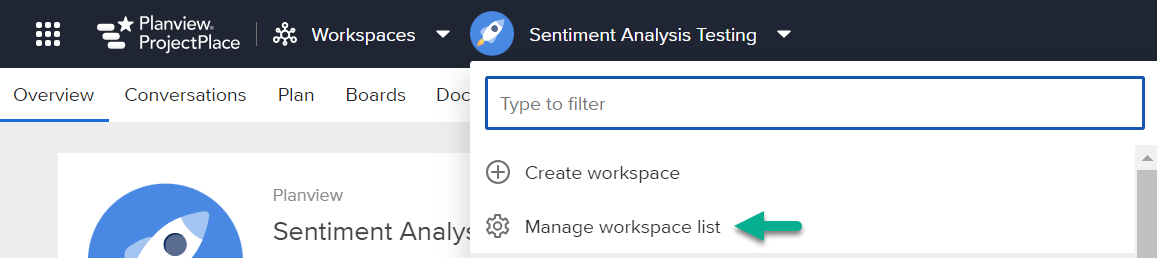
- Click the Workspace selector in the toolbar and select Manage workspace list.
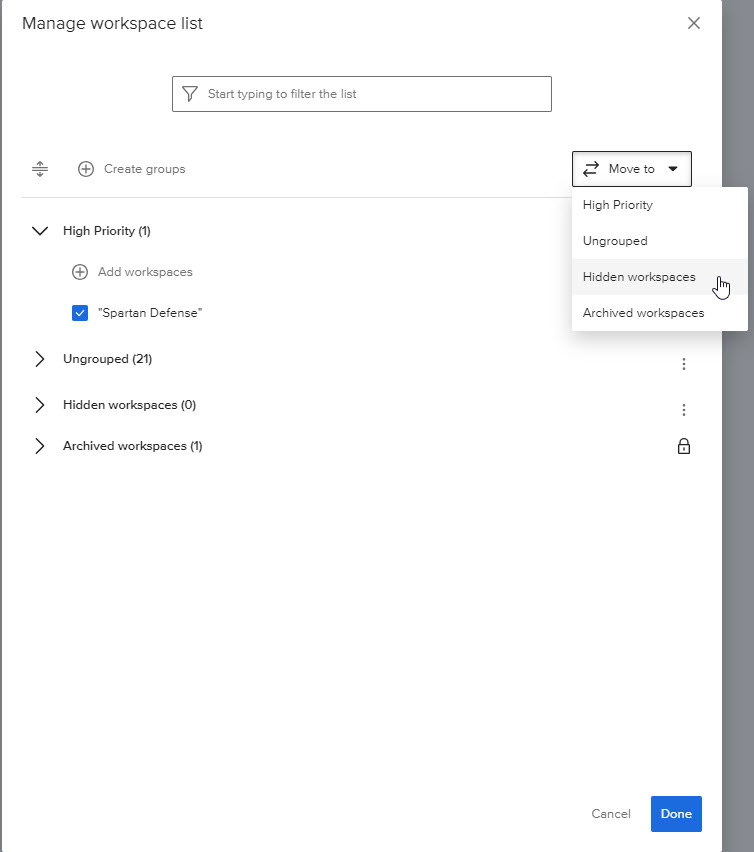
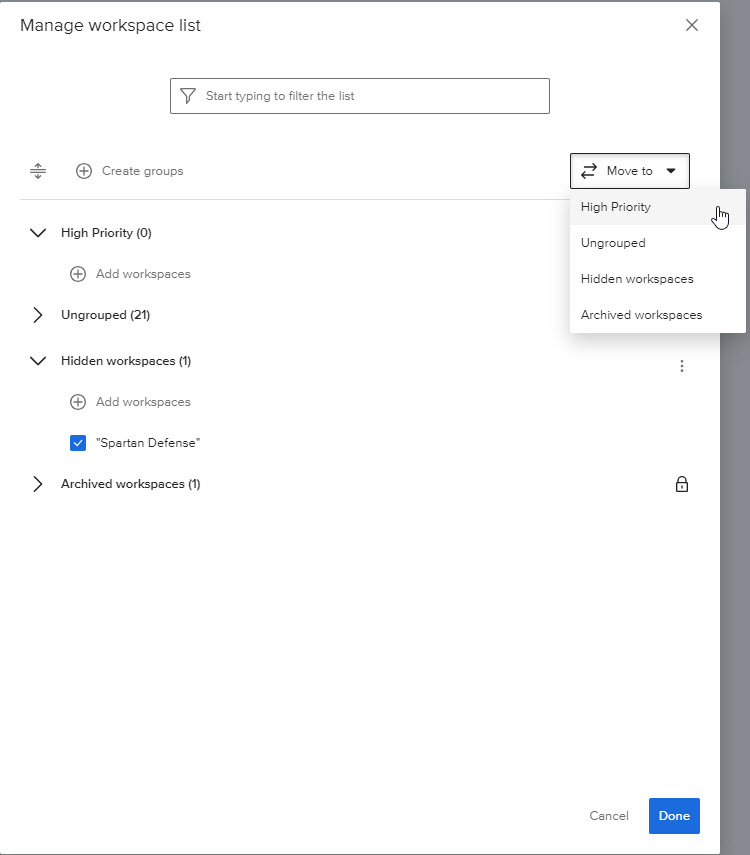
2. In the Manage workspace list window, check the workspaces you want to appear in the hidden list.
3. Select Move to > Hidden workspaces from the dropdown.
3. Click Done to save your changes.
You can also filter workspaces by starting to type in the filter field:
Unhide a Workspace
1. Click the Workspace selector in the toolbar and select Manage workspace list.
2. In the Manage workspace list window, check the workspaces you want to appear in a group other than the hidden list.
3. Select Move to > Group from the dropdown.
3. Click Done to save your changes.
Group Workspaces in the List
- To easier find and navigate to the workspaces, users can define custom groups of workspaces and be able to expand/collapse single groups, just as it works with hidden/archived workspaces. When you collapse a group, you're hiding the workspaces within; condensing it to a more manageable view. On the other hand, expanding reveals the workspaces.
- Users can create, rename, and delete custom groups. These groups are user-specific.
- One workspace can only be added to one group at a time.
You need at least two workspaces to use this feature.
To group workspaces:
- Click the Workspace selector in the toolbar and select Manage workspace list.

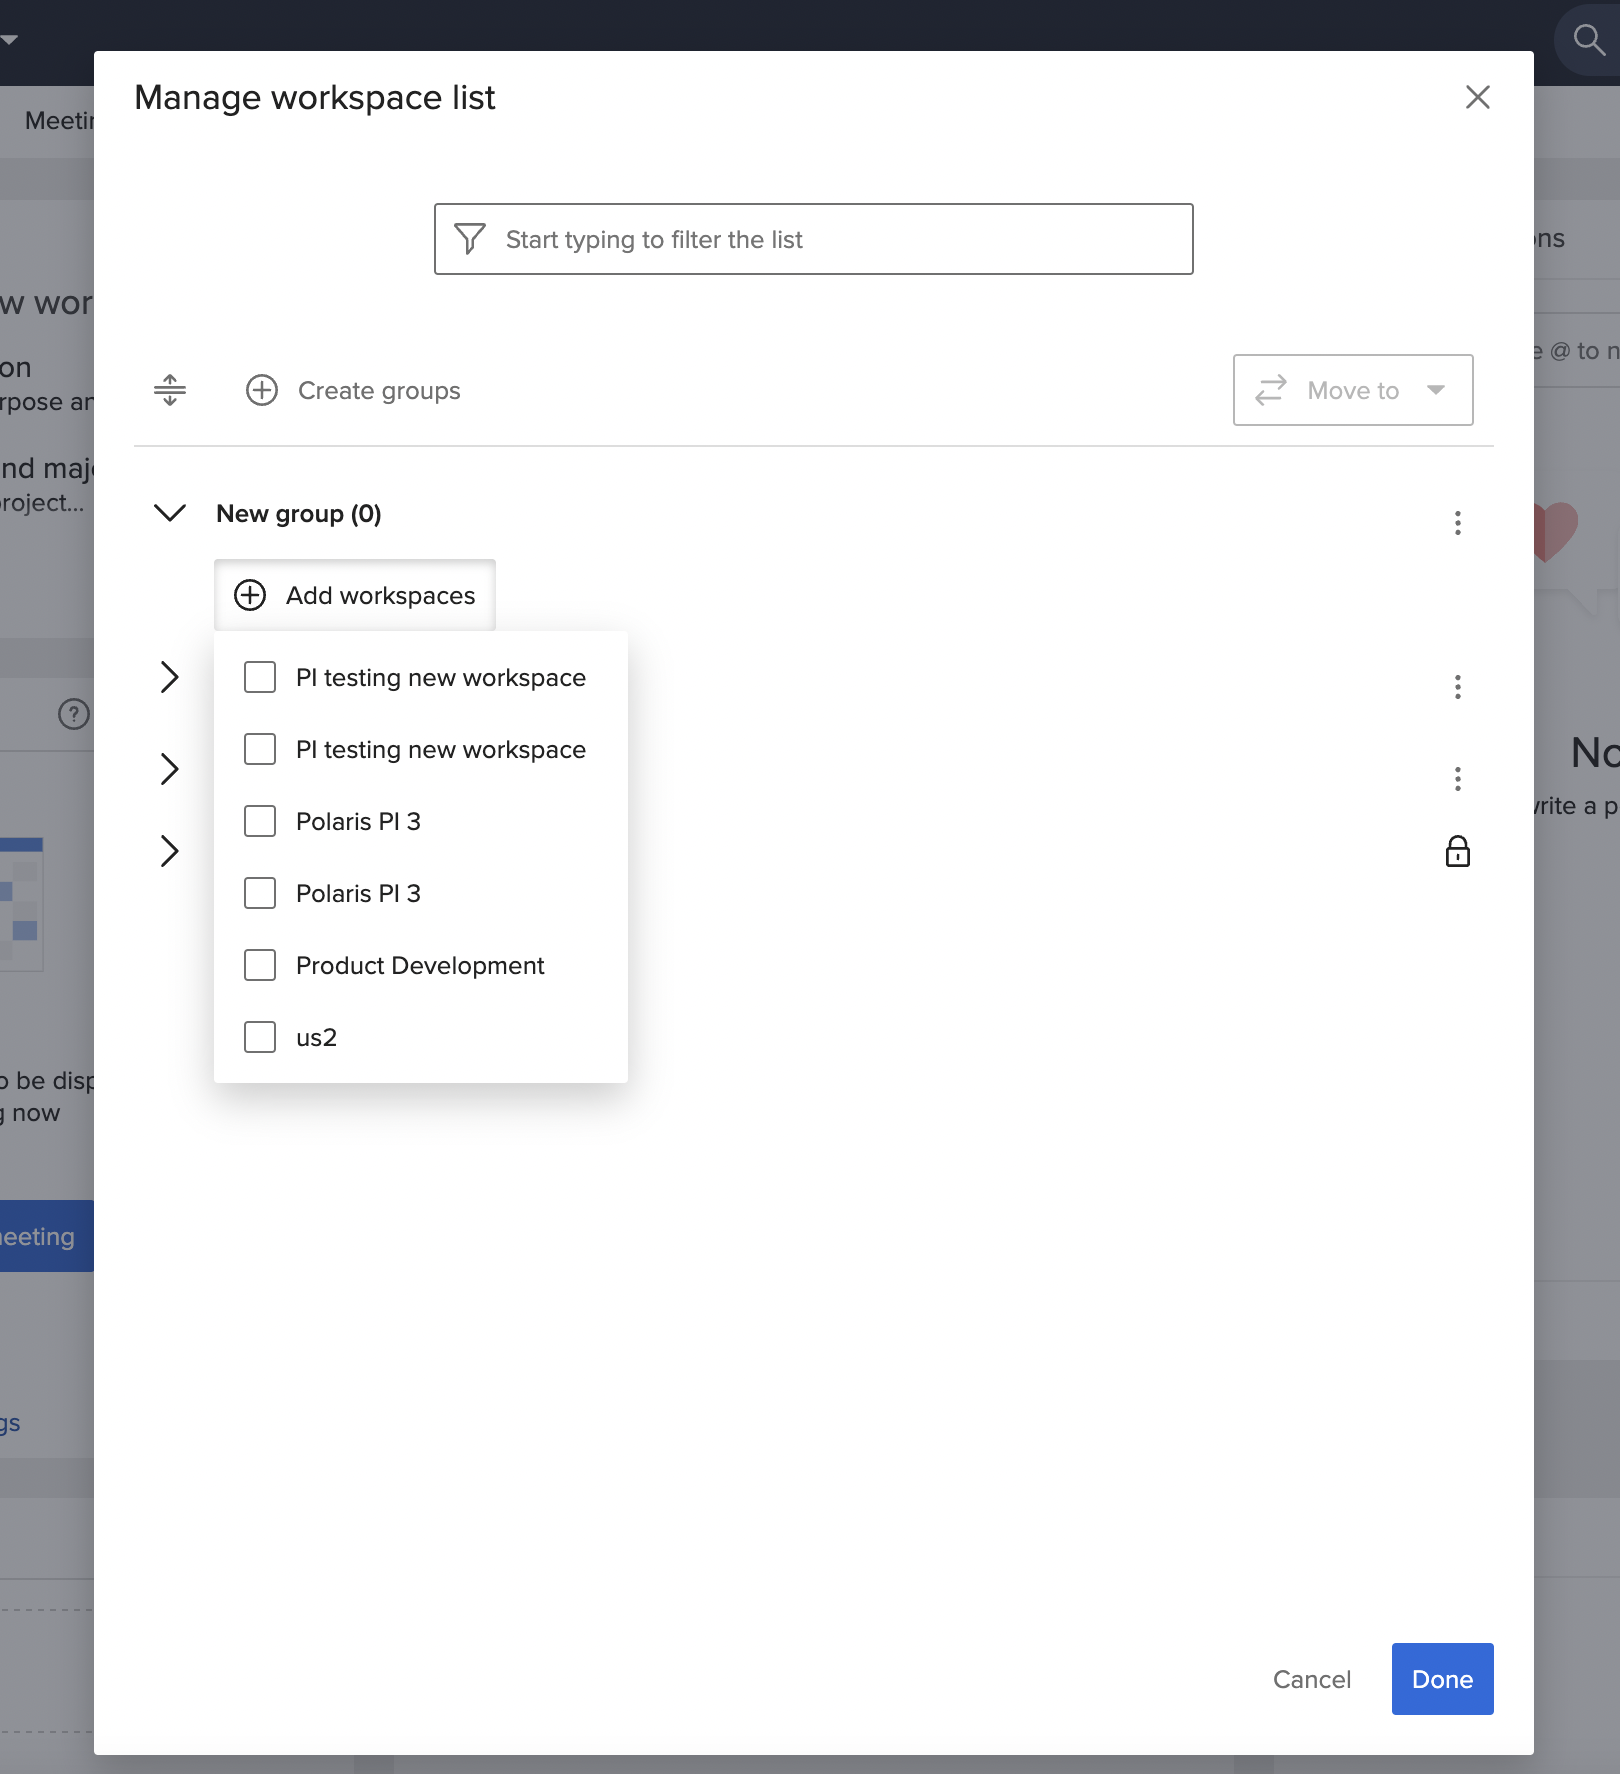
- In the Manage workspace list window, Click +Create groups.
- Type the group name where indicated.
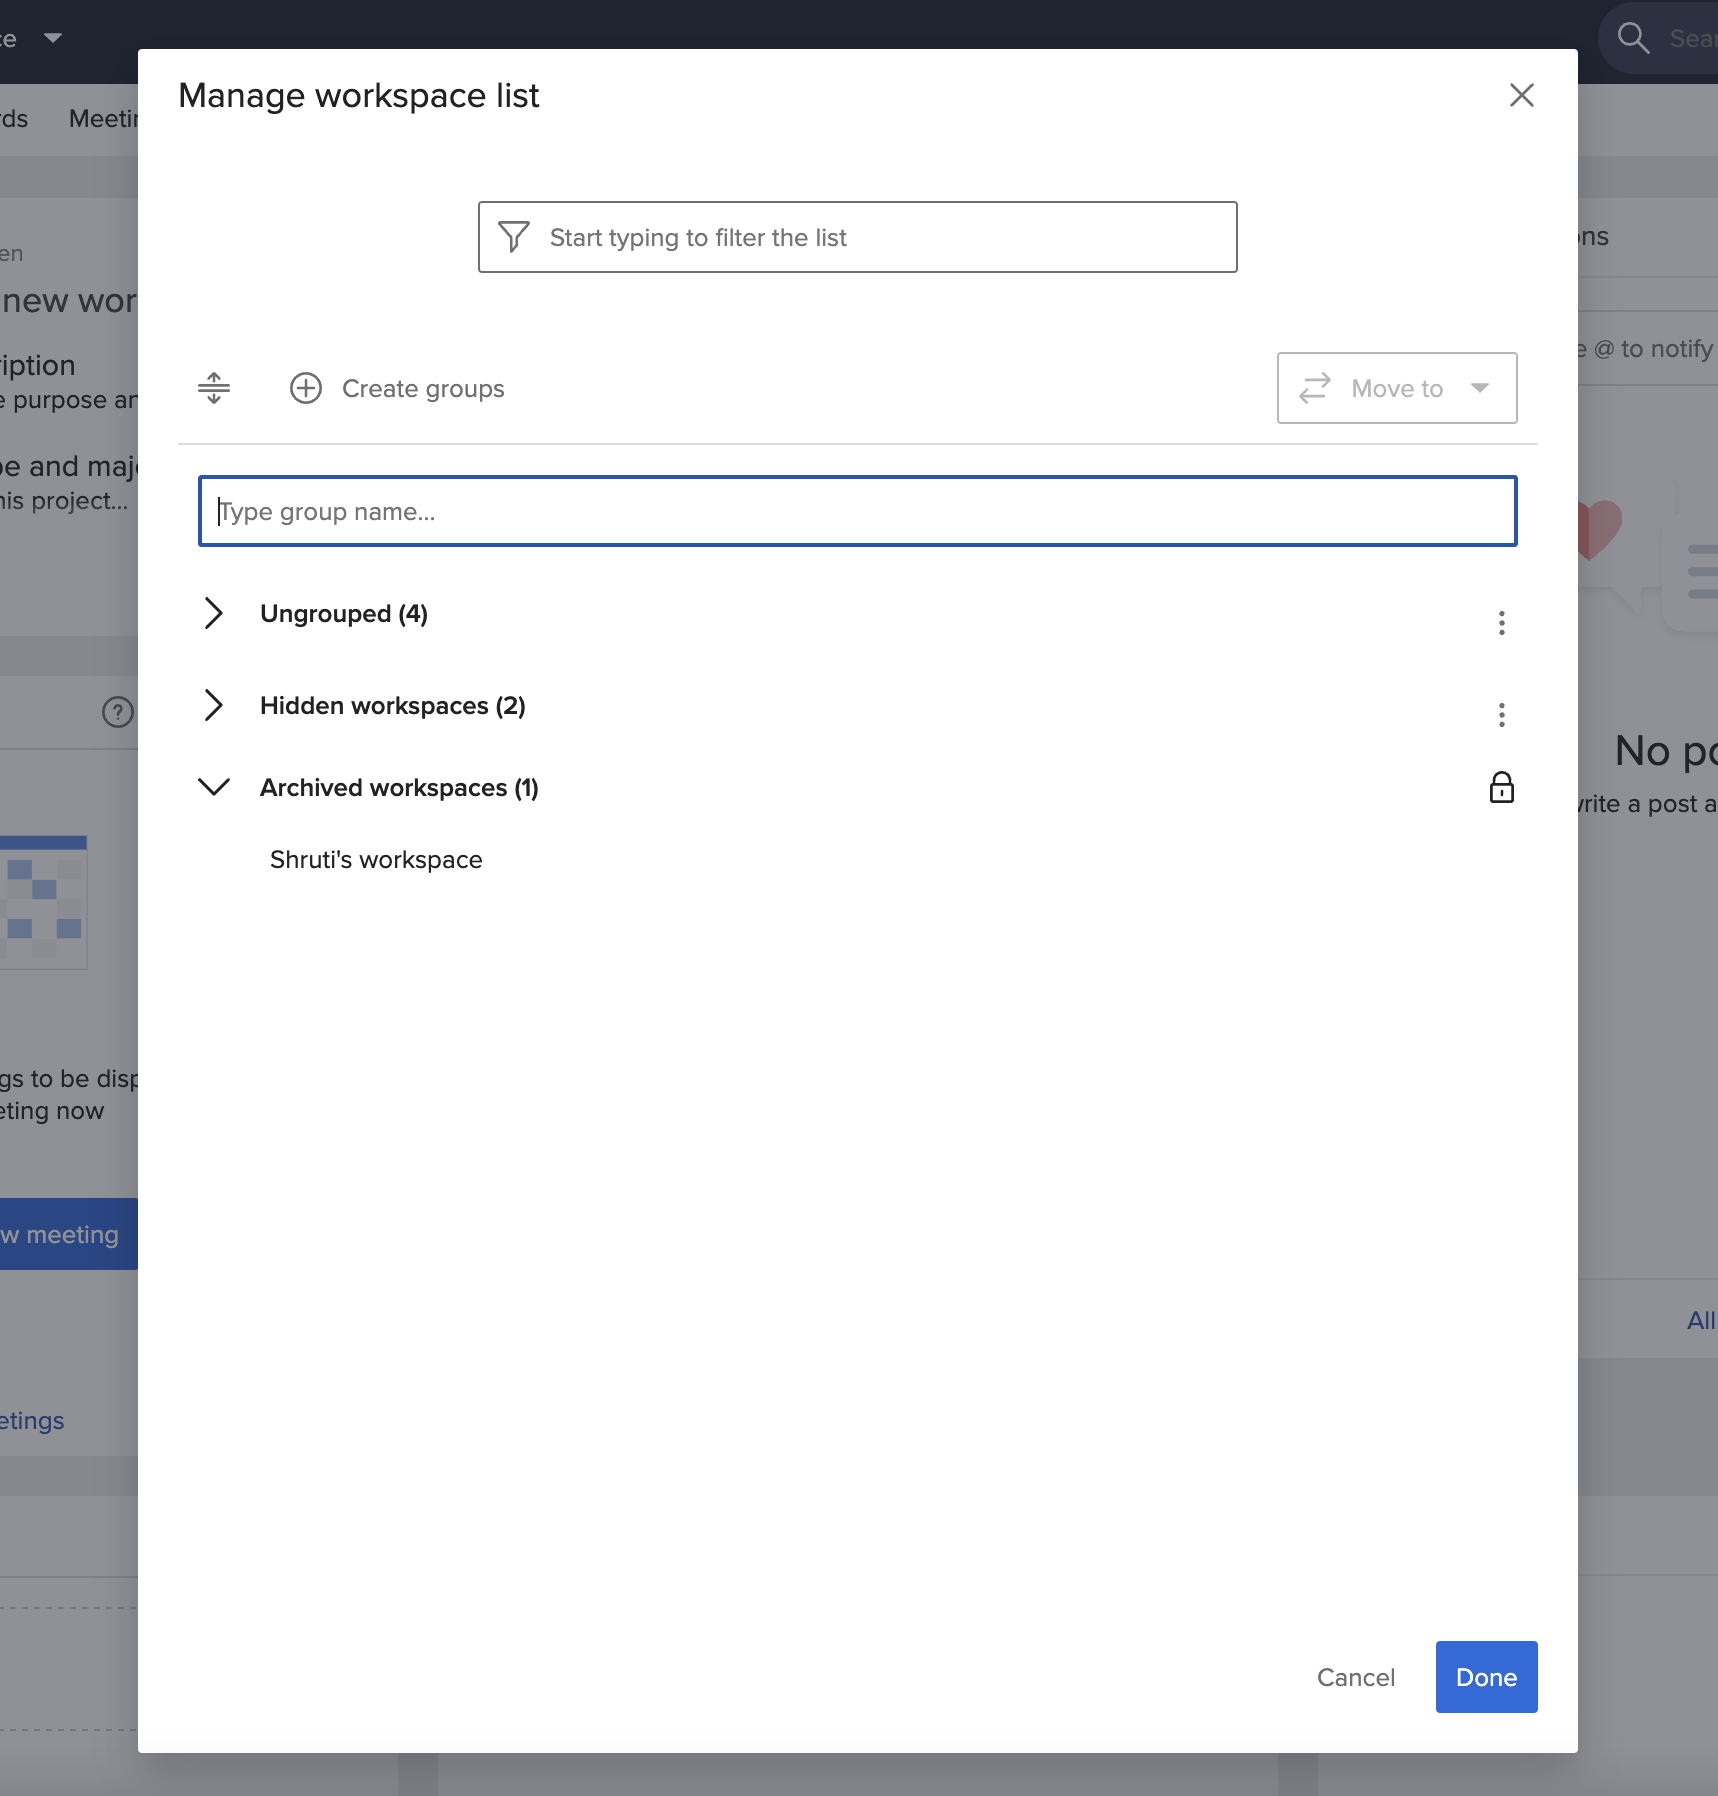
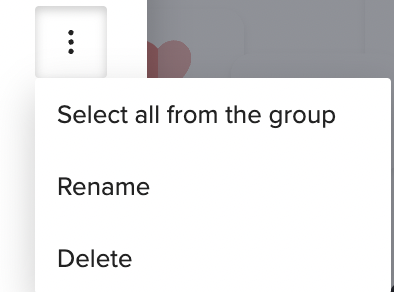
4. Click Done to save your changes. (From this screen's action menu, users can delete or rename the group, and select all workspaces from the group.)
5. Click +Add Workspace.
6. Check the boxes for all workspaces you with to add to the group. Each workspace will appear in the group.
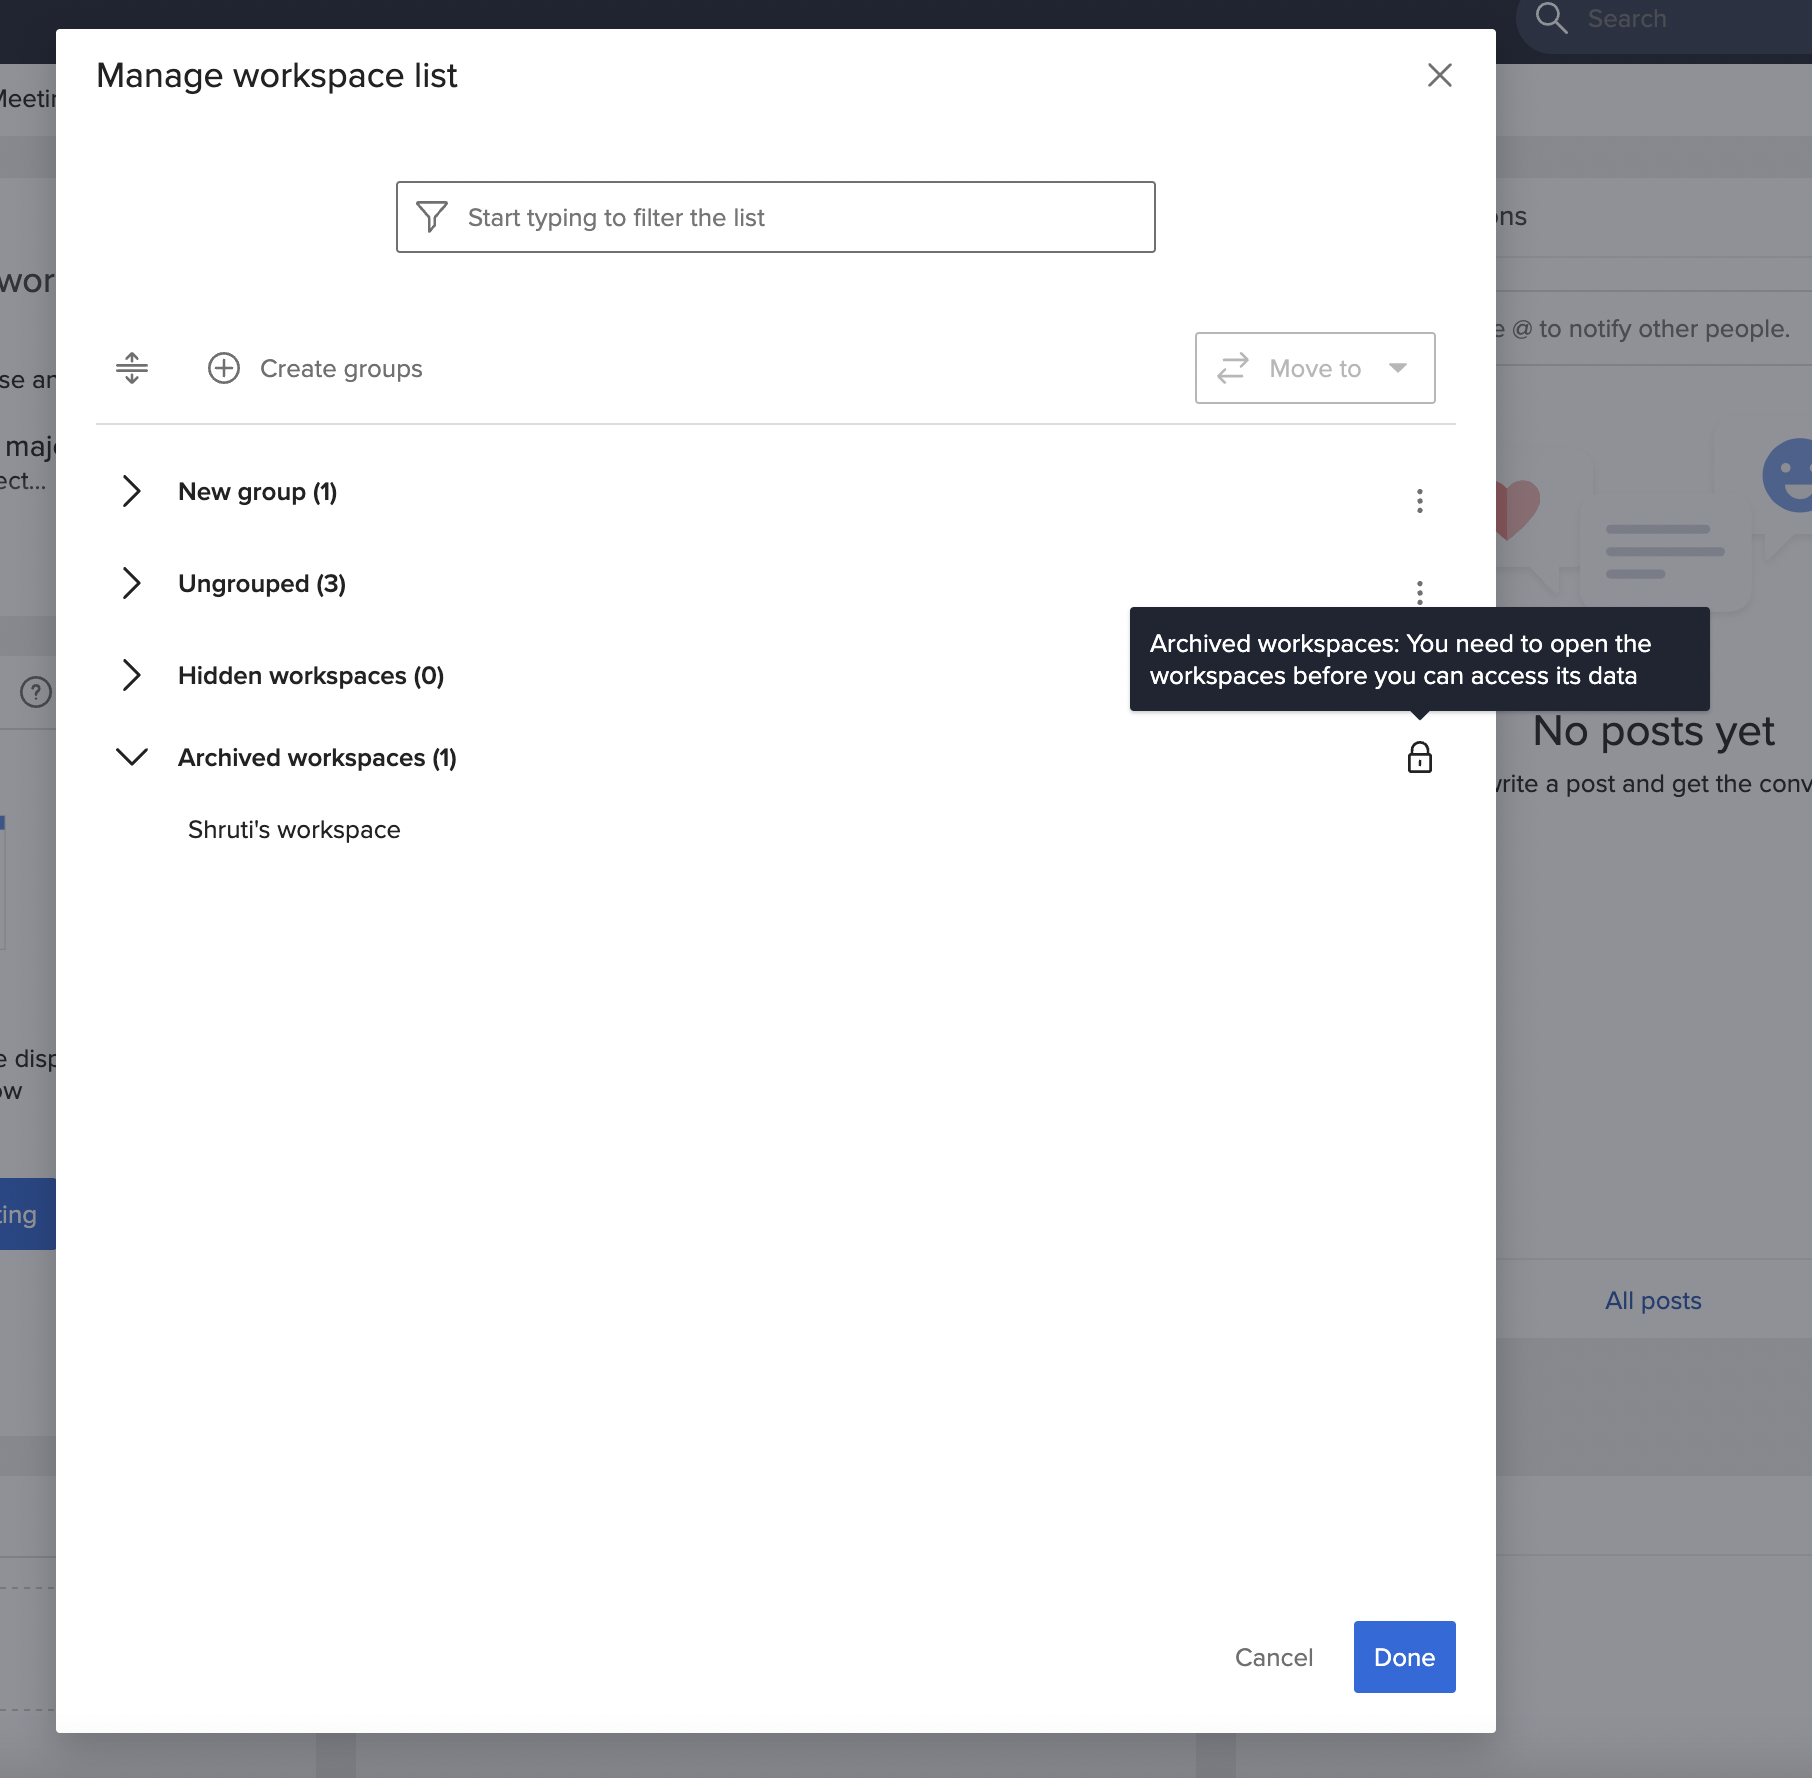
Archived workspaces will also be listed but will be read-only inside the manage workspace list popup:
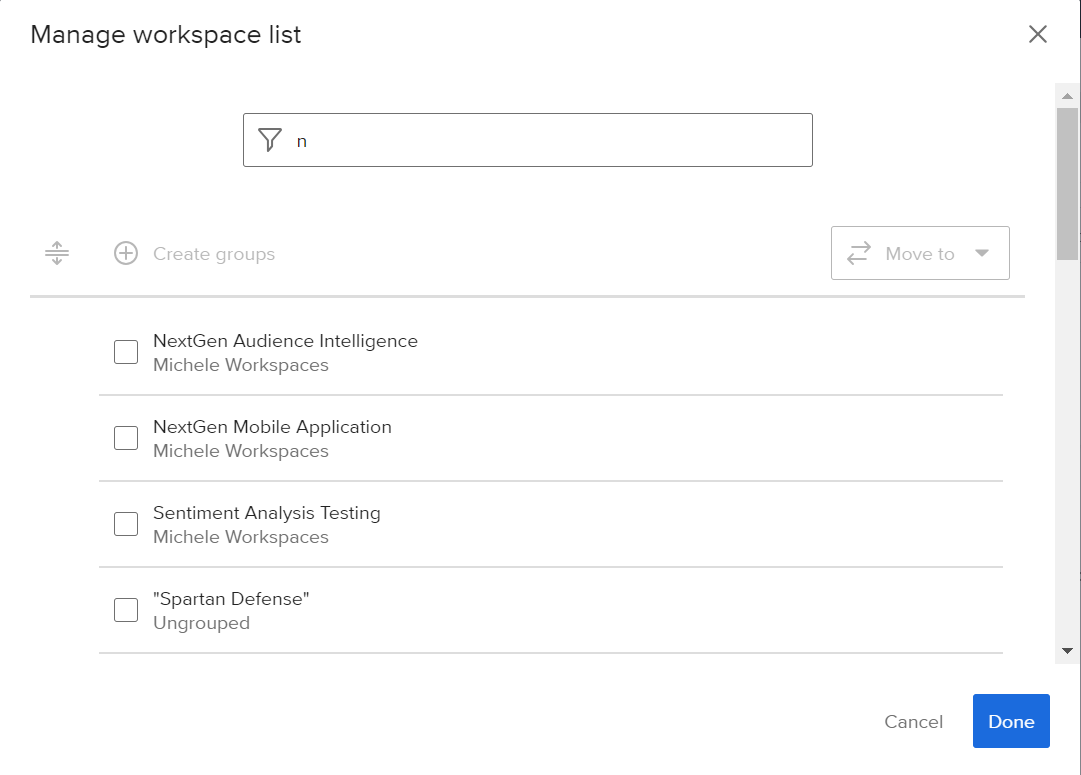
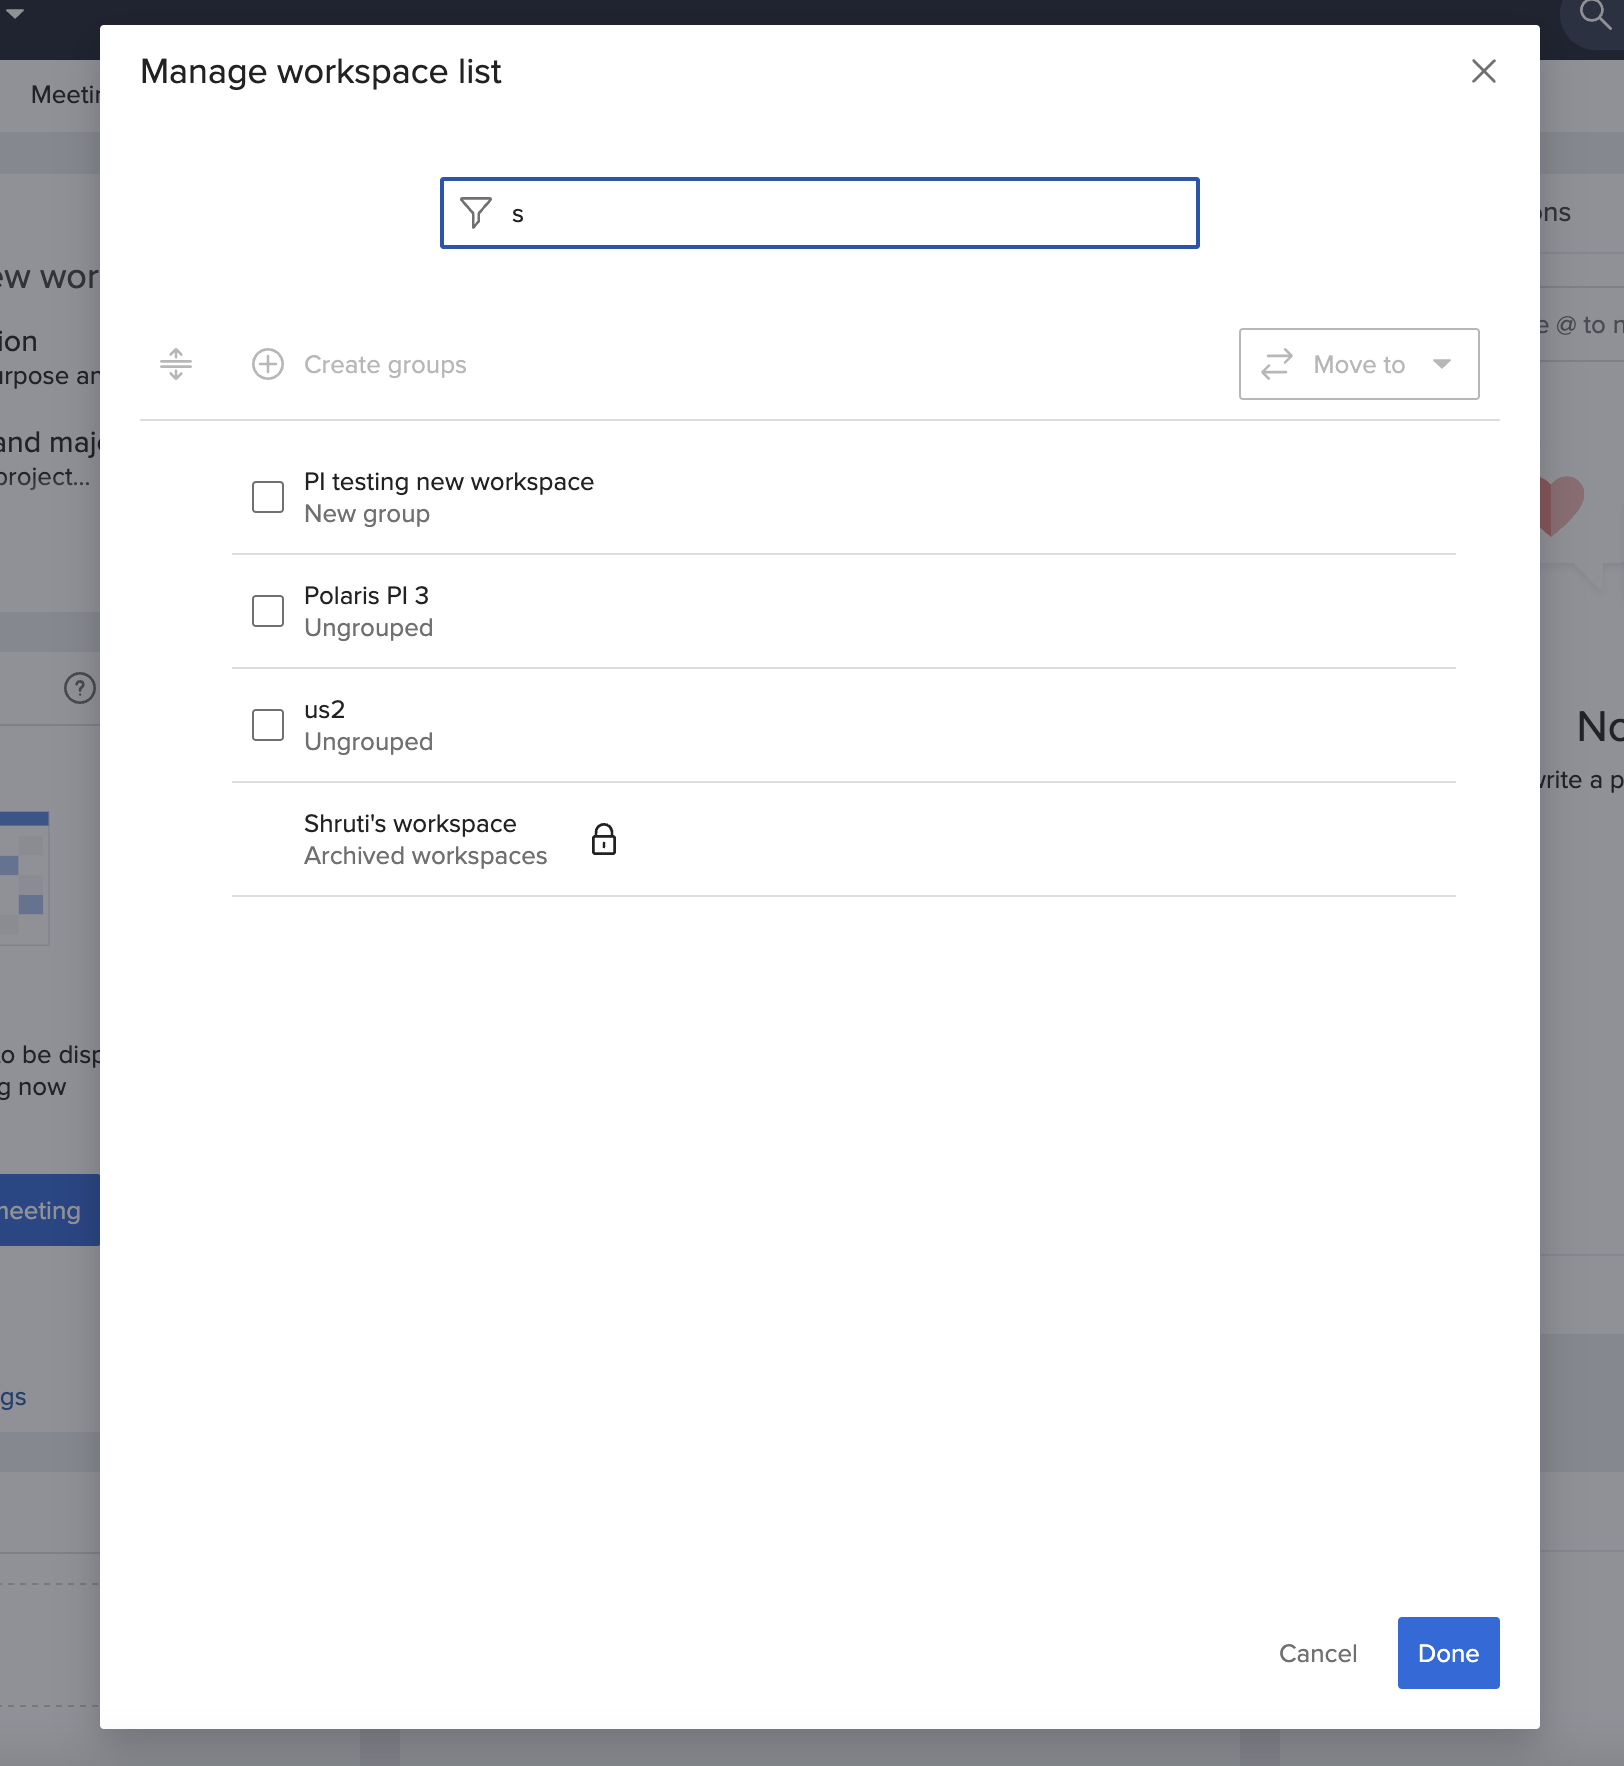
Filter the list of workspaces:
To filter the workspace list by keywords, start typing in the field with the funnel icon. This will bring up available choices:
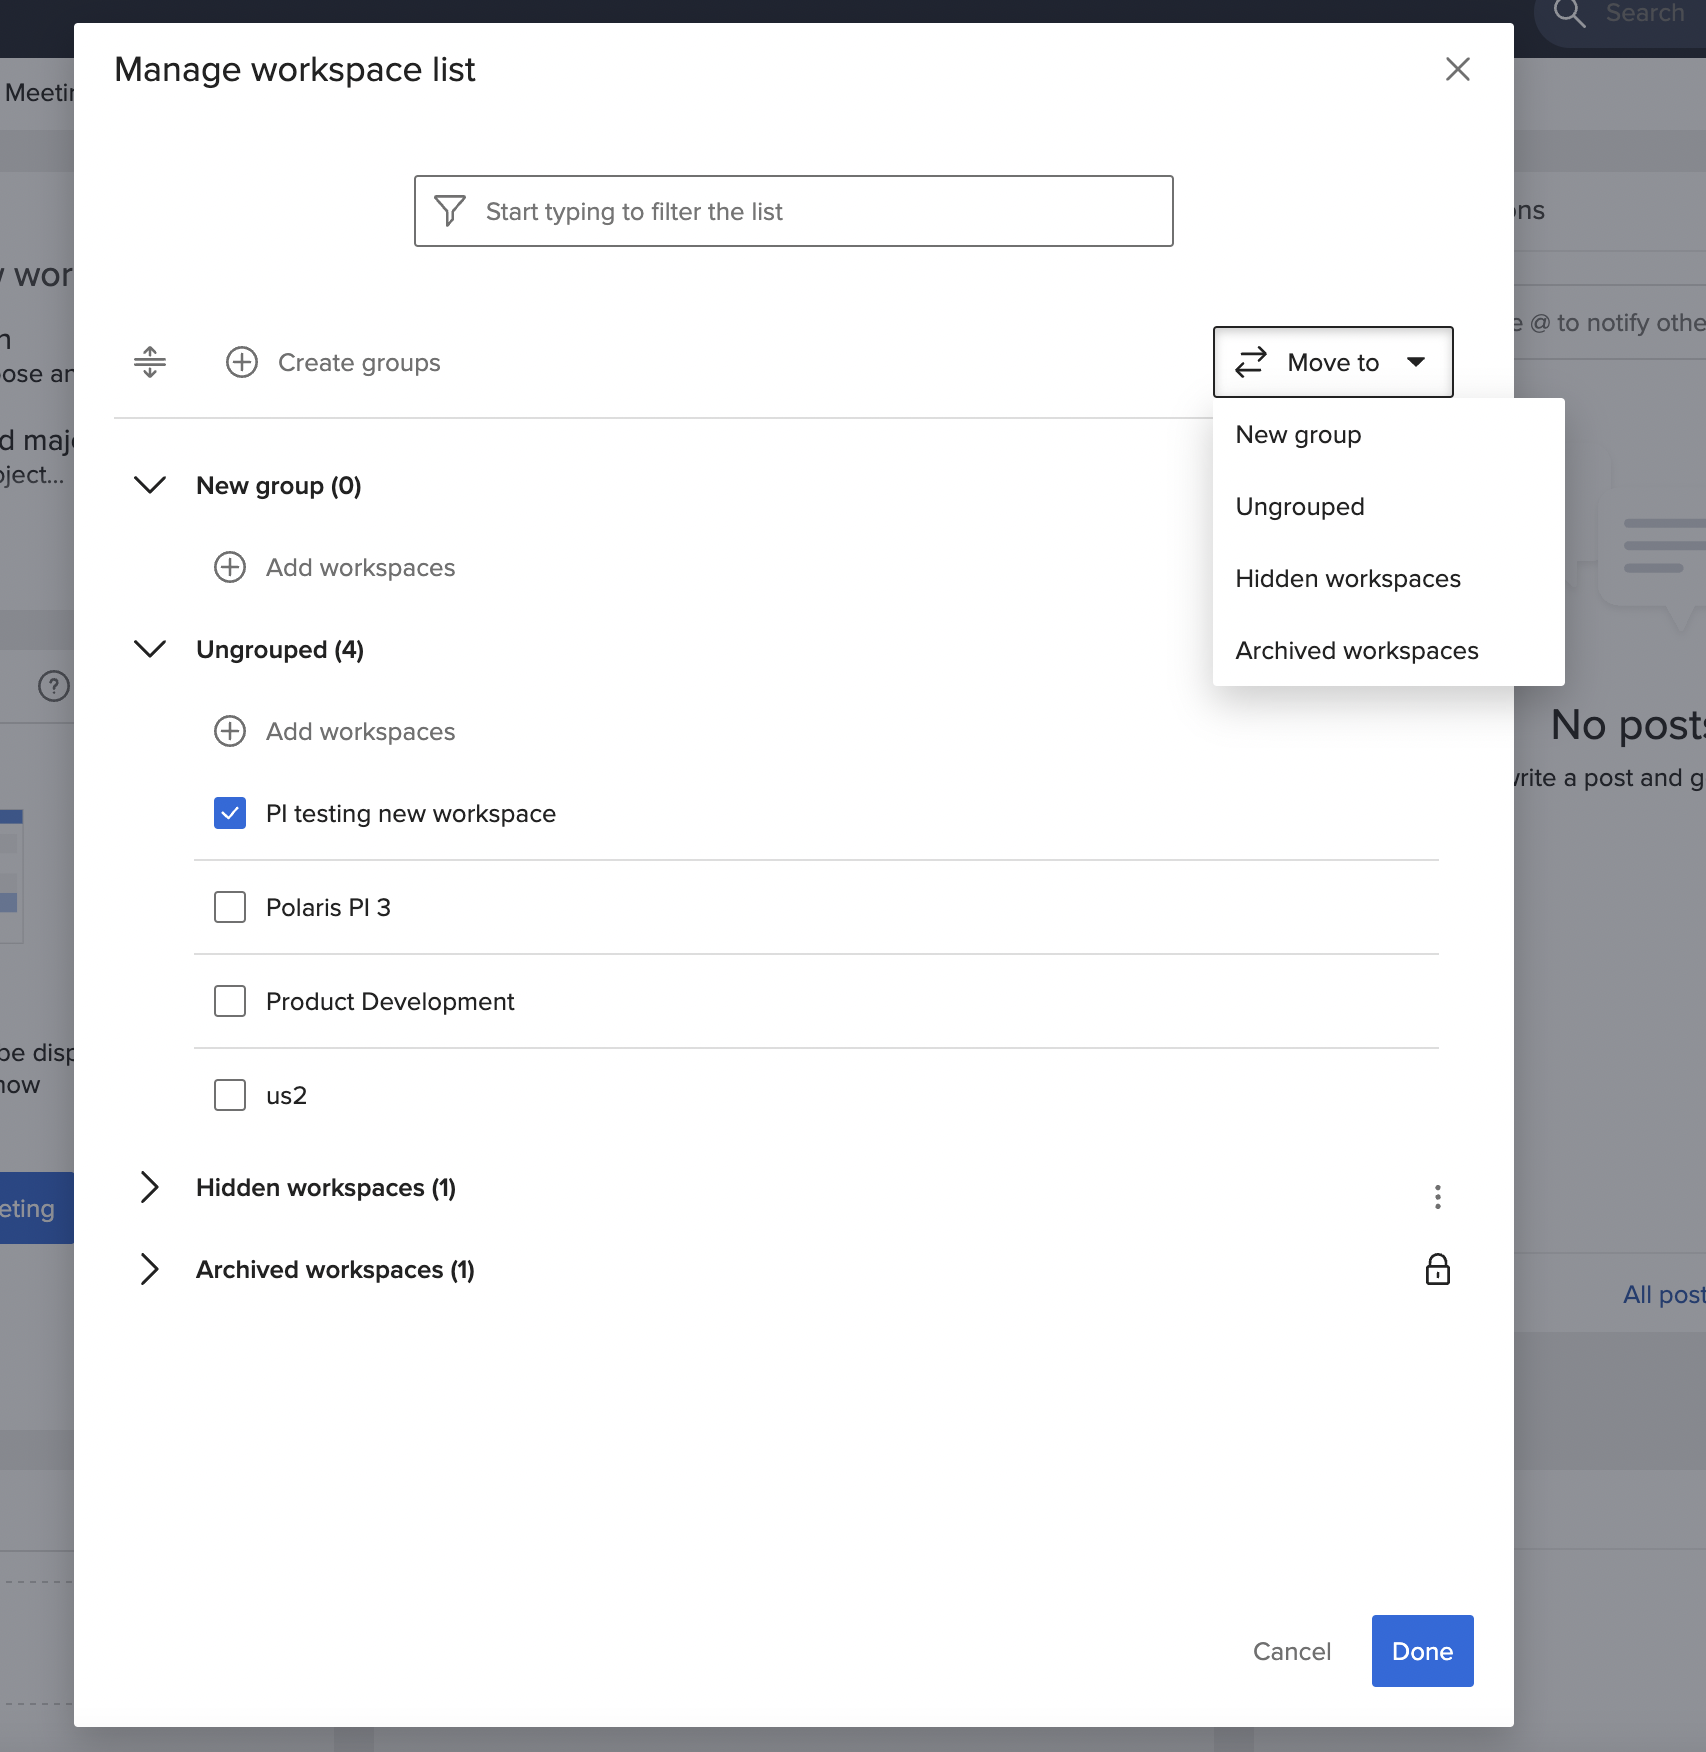
To move a workspace to a different group:
- Select the workspace.
- Click Move to > new location.
The workspace dropdown shows recent and archived workspaces: