
Data Loss Prevention
Introduction
Data Loss Prevention (DLP) is a tool in ProjectPlace that provides an additional layer of data security for documents that are shared and downloaded. DLP keeps sensitive information private, and allows you to determine your own privacy settings. DLP Administrators have the option to create and publish a DLP policy to all workspaces, and edit or delete the policy once it is created.
Here are some important aspects of this feature:
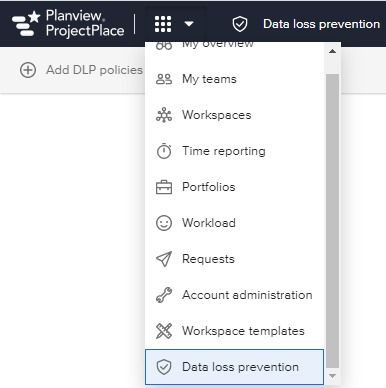
1. A user who is given access to DLP from account administration can access the Data Loss Prevention tool from the tool selector.
2. These DLP Admins can add policies to control sharing and downloading of files.
3. Once added, these policies need to be associated with one or more projects.
4. Members of these projects can then assign these policies to documents of their choice.
5. Workspace administrators of these projects can additionally control group level access to the policies from workspace administration.
6. An audit log of all access to tagged documents can be downloaded from the Data Loss Prevention tool by DLP admins.
Access
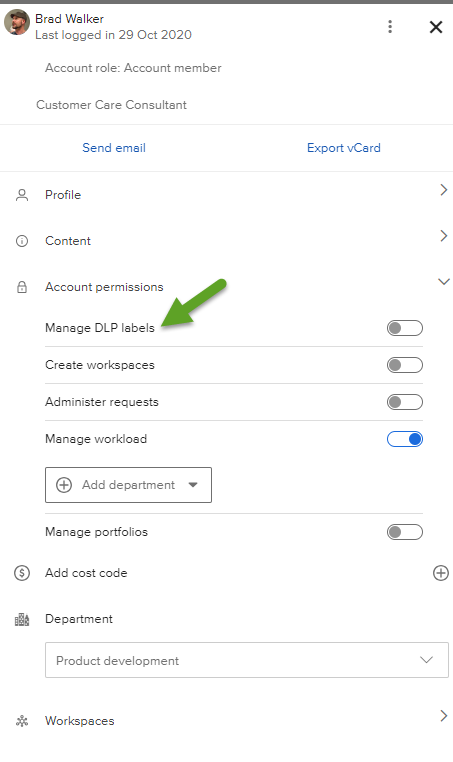
Account admins and account owners can give DLP access to account members. This is different from other tools in that account admins and account owners do not have access to the tool by default.
Create a DLP policy
1. Use the Tool selector  to open the Data loss prevention tool.
2. Click the Add DLP policies.
3. On the popup, enter:
- Label: Name the policy.
- Description: Provide a short description of its purpose.
- Policy settings: For Share and Download select to either Allow or Block the action. Select from the Notifications dropdown whether to include or exclude a notification for these events.
- Click the radio button for whom this policy applies: All, Internal, External, or Departments.
- If Departments, Select or enter Department.
- Click Customize warning message, if you would like to create your own.

4. Click OK.
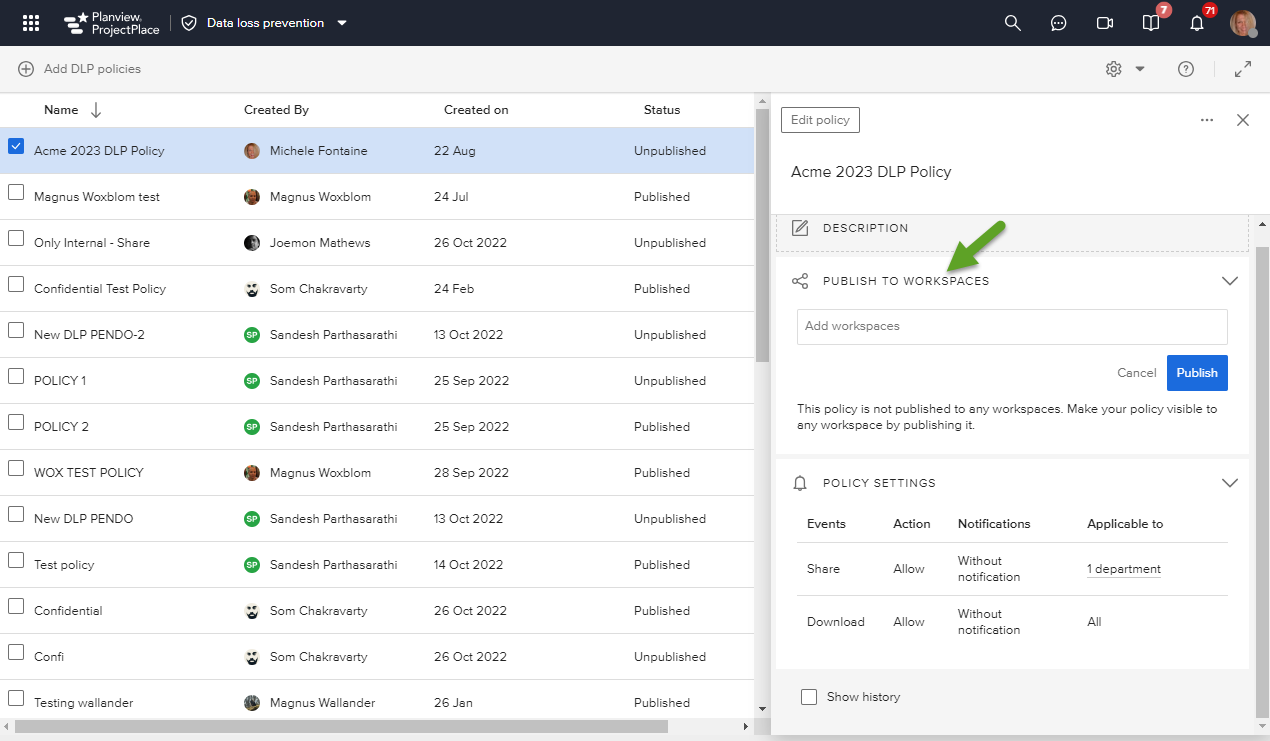
5. Once created, the policy can be Published to workspaces via a toggle in the Detail pane. Select one or more workspaces from the Add workspaces field.
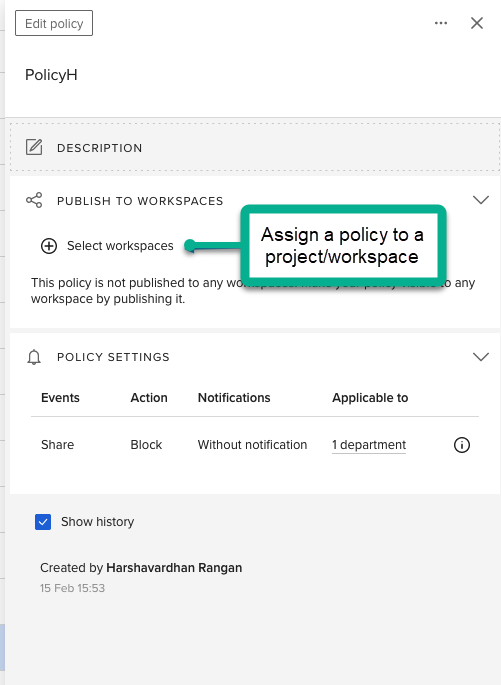
Associate a Policy with a Workspace
You can assign projects/workspaces from the details pane of the policy in the DLP tool. This is done by the DLP Admin; the Project Manager won't have access to it.
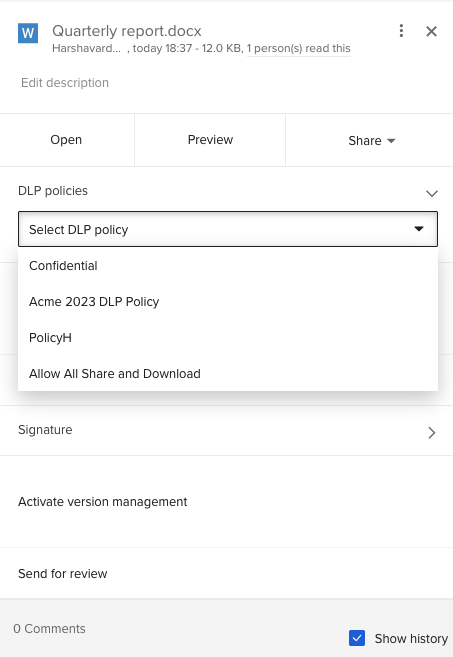
Assign Policies to Documents
Members of these projects can then assign a policy to a document from the details pane of that document inside the workspace.
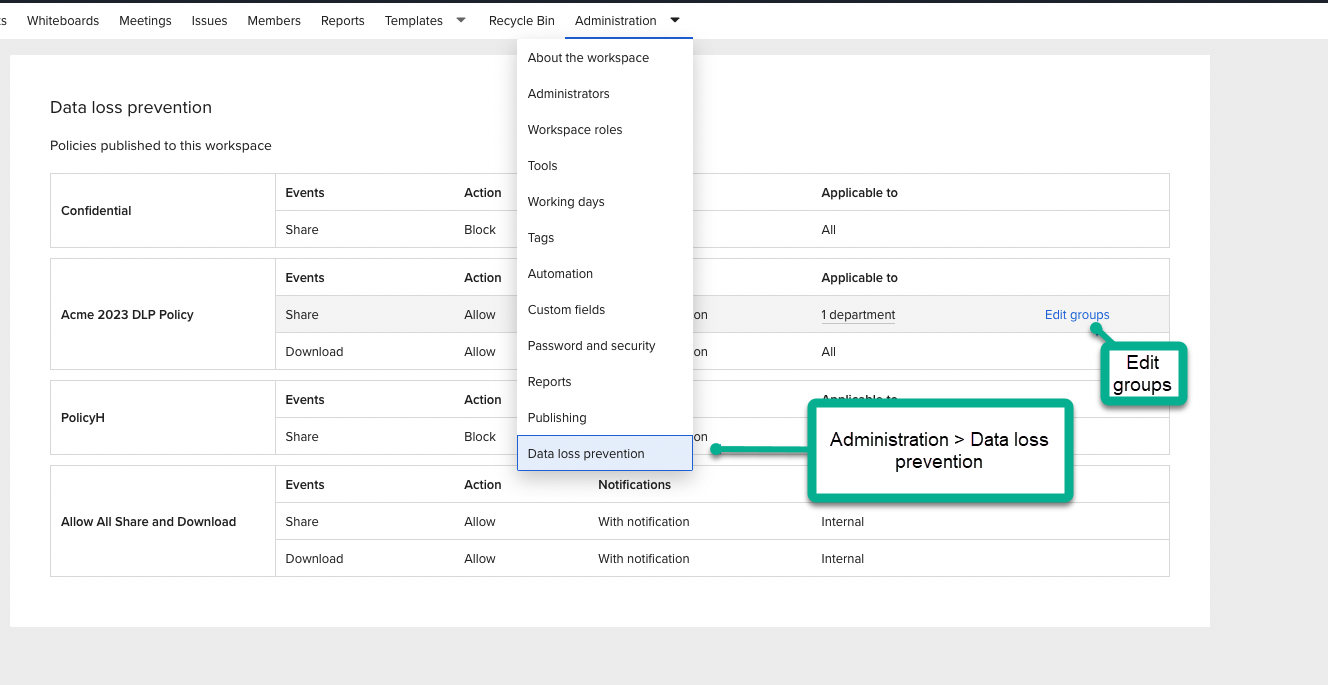
Control Group Level Access
Workspace administrators of these projects can additionally control group level access to the policies from workspace administration. There's a menu option in the workspace administration to edit groups.
Download Audit Log
The DLP tool (accessible by the DLP admin) has an option to export an audit log for all policies.
