
Manage Custom Fields
Manage Custom Fields
Custom fields allow Workspace administrators to create additional data fields for items in the workspace, such as Cards, Documents, Activities and Milestones. This enables administrators to fine-tune ProjectPlace tools to fit their needs.
Workspace administrators can create custom fields through the Workspace Administration tool.
The following custom field types are available.
- Text
- Drop-down list
- Time
- Date
- Multi-select
- Numeric (including negative and decimal values)
- Currency
- Percentage
Create a Custom Field
To create a custom field:
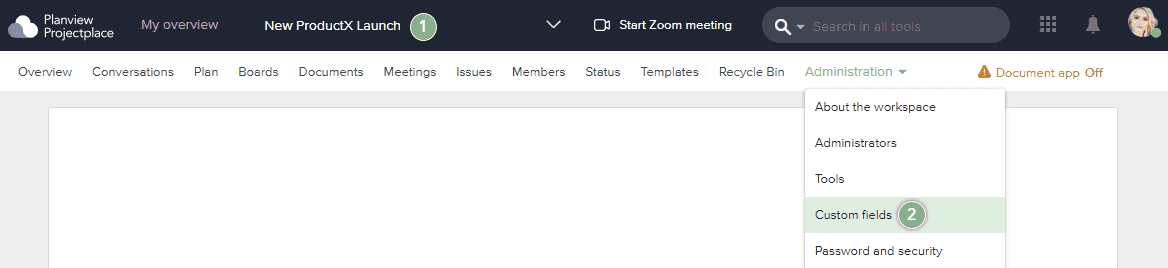
- Navigate to a workspace you are a member of.
- In the workspace toolbar, click the Administration menu and select Custom fields.
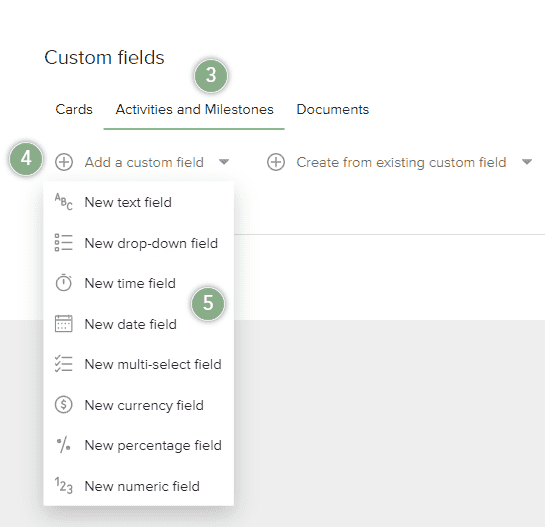
- In the Custom fields section, use the tabs to select the tool (Cards, Activities, or Documents) for which you would like to create a custom field.
- Click
 Add a custom field. You can also click Create from existing custom fields option to create a new custom field based on an existing one.
 - Select the custom field type from the available list.
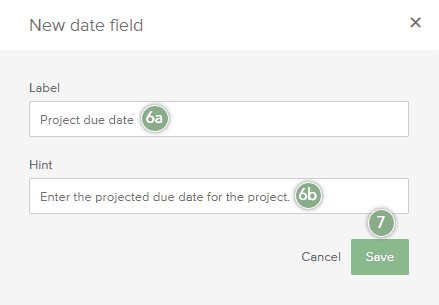
- In the window that appears, enter a Label and Hint for the new field.
- Click Save.
Users can reuse existing custom fields in more than one location. You can use the same custom fields in cards as you do with activities so there is no need manually recreate the custom fields you use in each instance.
Edit a Custom Field
To edit an existing custom field:
- Navigate to a workspace you are a member of.
- In the workspace toolbar, click the Administration menu and select Custom fields.
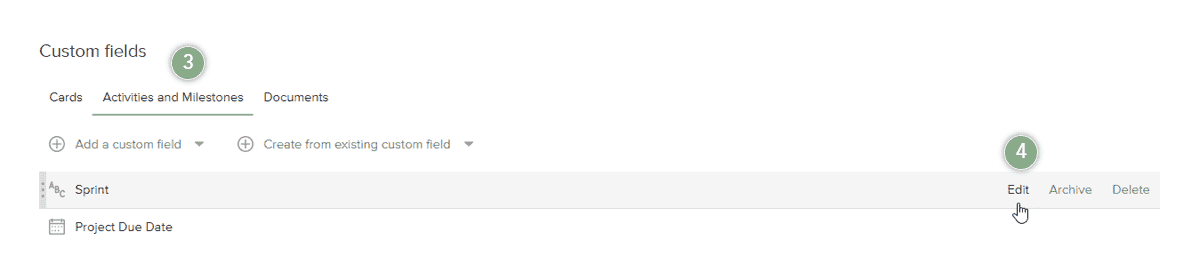
- In the Custom fields section, use the tabs to select the tool (Cards, Activities and Milestones, or Documents) that contains the custom field you want to edit.
- Hover over the custom field and click Edit.
Archiving a Custom Field
Workspace administrators can archive a custom field. When a custom field is archived, it will not be visible in the user interface, but all the data previously entered will be preserved. If a custom field is reactivated, the data associated with the custom field will become available.
To archive a custom field:
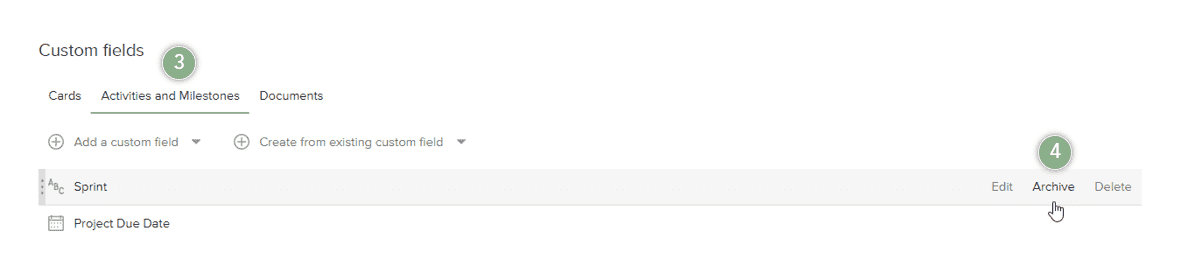
- Navigate to a workspace you are a member of.
- In the workspace toolbar, click the Administration menu and select Custom fields.
- In the Custom fields section, use the tabs to select the tool (Cards, Activities and Milestones, or Documents) that contains the custom field you want to archive.
- Hover over the custom field and click Archive.
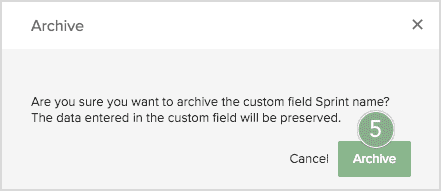
- In the new window that appears, click Archive. The custom field will be archived and moved to the Archived section.
Reactivate a Custom Field
To reactivate an archived custom field:
- Navigate to a workspace you are a member of.
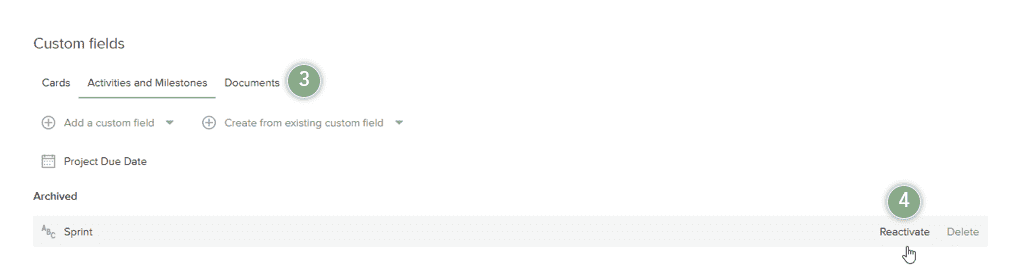
- In the workspace toolbar, click the Administration menu and select Custom fields.
- In the Custom fields section, use the tabs to select the tool (Cards, Activities and Milestones, or Documents) that contains the custom field you want to reactivate.
- In the Archived section, hover over over the custom field and click Reactivate.
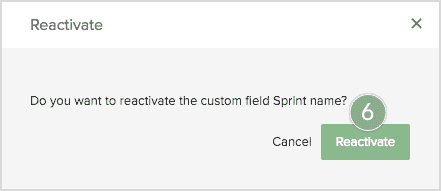
- In the new window that appears, click Reactivate. Previously entered values will be preserved and made available.
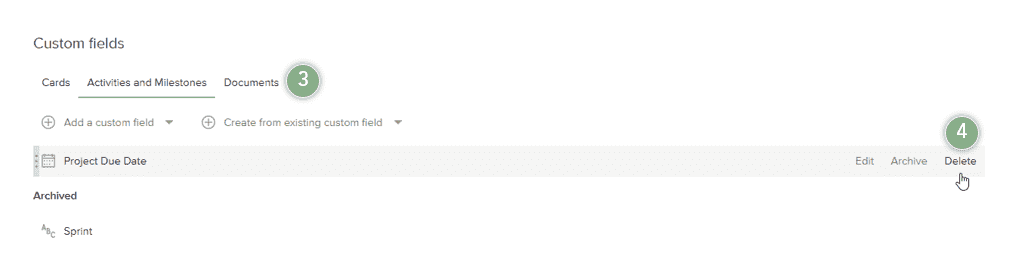
Delete a Custom Field
- Navigate to a workspace you are a member of.
- In the workspace toolbar, click the Administration menu and select Custom fields.
- In the Custom fields section, use the tabs to select the tool (Cards, Activities and Milestones, or Documents) that contains the custom field you want to delete.
- Hover over the custom field and click Delete.
- In the new window that appears, click Delete.
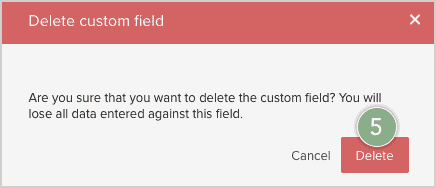
When you delete a custom field, any values entered from the deleted custom field will also be deleted.