
Creating and Managing Workspaces
A workspace is the place where you can communicate, collaborate, plan your project or work to be done, and follow up on progress. You can create an empty workspace, or choose to base it on a template.
Create a Workspace
To create a new workspace:
- Click the tool selector
 and select the Workspaces tool.
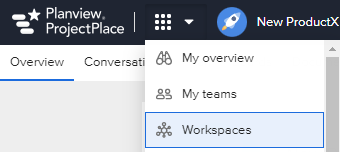
- From the Workspace menu, select the + Add workspace option.

- In the New workspace window, you can choose to create a blank workspace or create a workspace from a template.
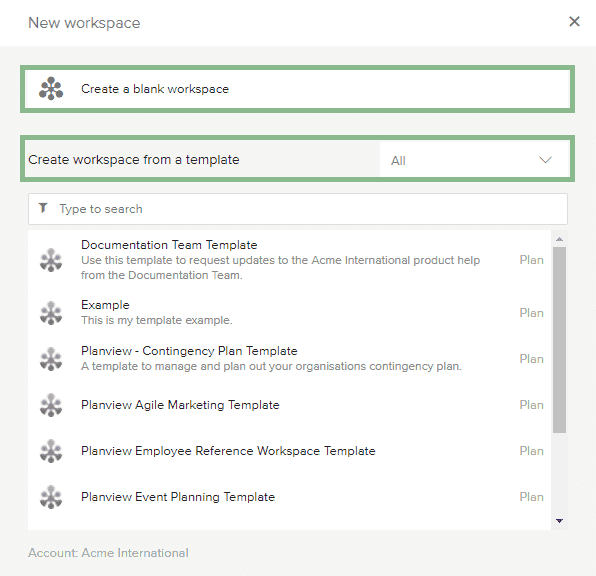
Create a Blank Workspace
- Click Create a blank workspace.
- Select the Plan planning tool to use in the workspace.
NOTE
No further development is done to ProjectPlace Roadmap. Existing Roadmap workspaces will continue working, but the ability to create new Roadmap workspaces has been suspended.
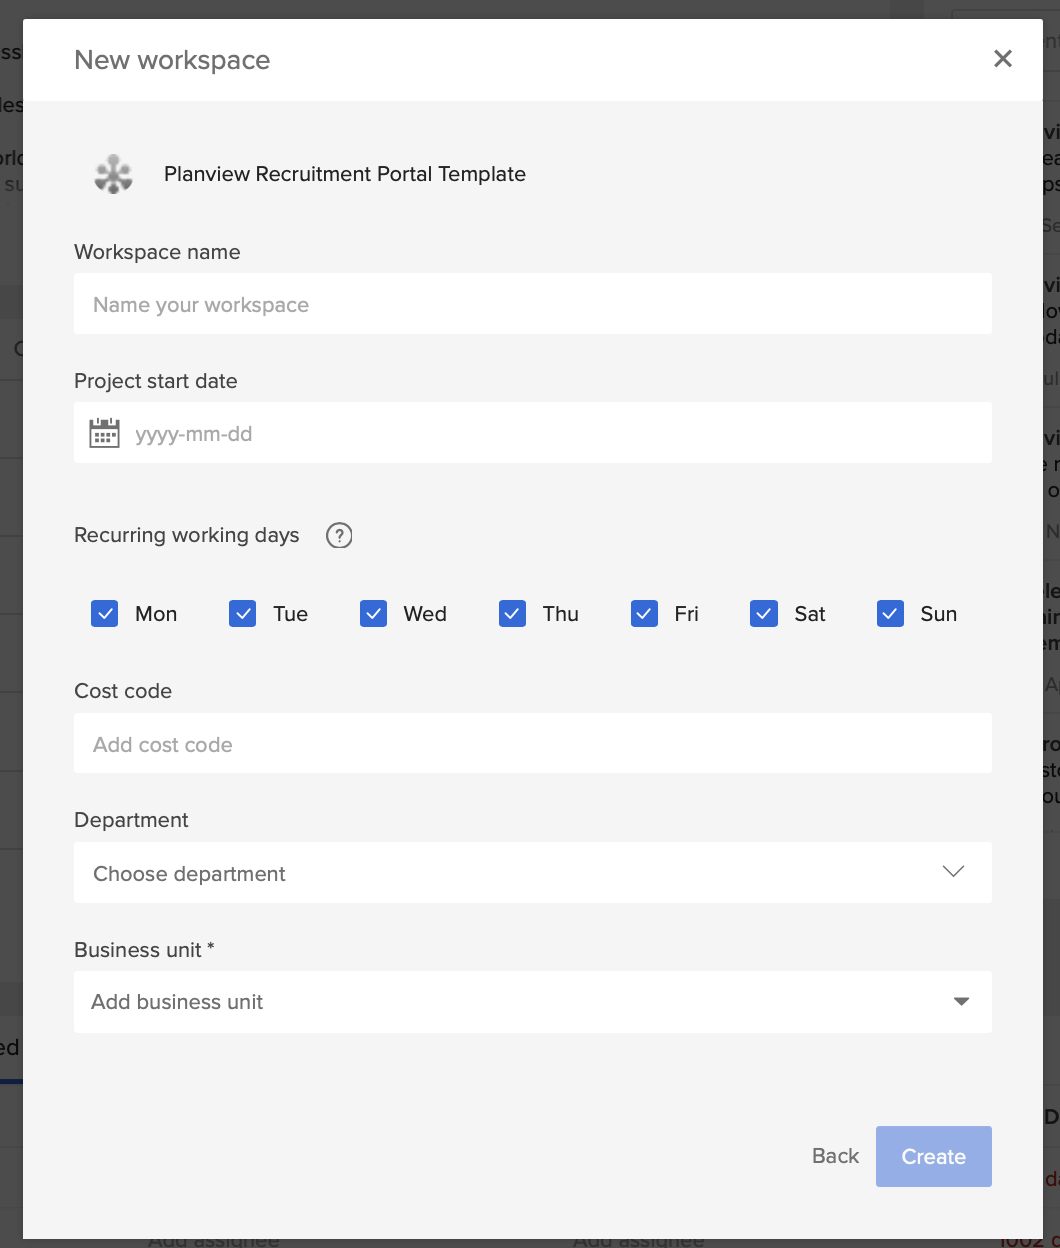
- Complete the relevant details in the provided fields:
- Type the Workspace name.
- Under Recurring working days, click the checkboxes to select the days of the week that you want to set as working, and deselect the days that you want to set as non-working. You will later be able to manage the working days settings, adding more custom days if needed.
- Type the Cost code (if any).
- Use the dropdown menu to select a Department (if any). This field can be set to be optional or mandatory by the account administrator.
- Use the dropdown menu to select a Business unit (if any). This field can be set to be optional or mandatory by the account administrator.
- Click Create.

Create a Workspace from a Template
To create a workspace from a template:
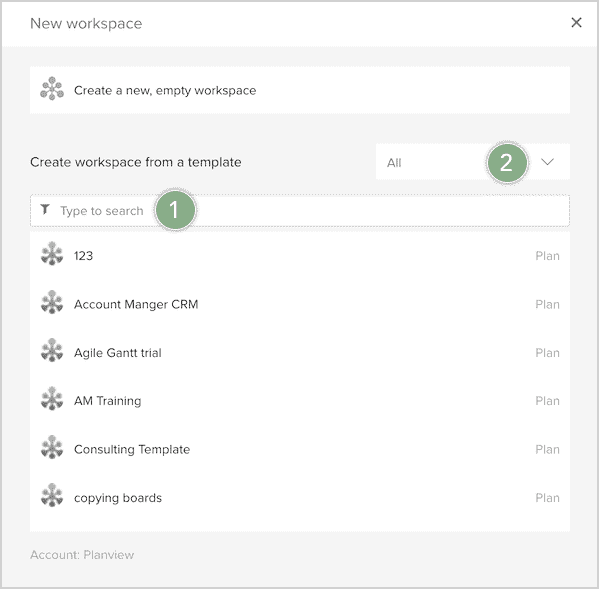
- Search from one of the available templates by typing the name of template in the search field.
- You may choose from one of the four categories when selecting a template:
- Personal templates
- Account templates
- ProjectPlace or Global templates
- Partner templates
- Complete the relevant details in the provided fields:
- Type the Workspace name.
- Select a Project start date.
- Under Recurring working days, click the checkboxes to select the days of the week that you want to set as working, and deselect the days that you want to set as non-working. You will later be able to manage the working days settings, adding more custom days if needed.
- Type the Cost code (if any).
- Use the dropdown menu to select a Department. This field can be set to be optional or mandatory by the account administrator.
- Use the dropdown menu to select a Business unit (if any). This field can be set to be optional or mandatory by the account administrator.
- Click Create.
Global templates are made available to both ProjectPlace and ProjectPlace Trial users who are U.S. customers from the U.S. datacenter.
If you need help getting started, learn the ProjectPlace basics or how to setup a new workspace.
Download Workspace Data
Workspace administrators, owners, and managers can aggregate and download all workspace artifacts into a single file.
To download workspace artifacts:
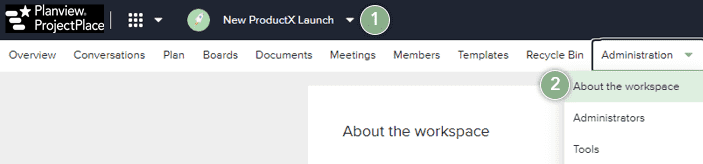
- Navigate to a workspace you are a member of.
- In the workspace toolbar, click the Administration menu and select About the workspace.
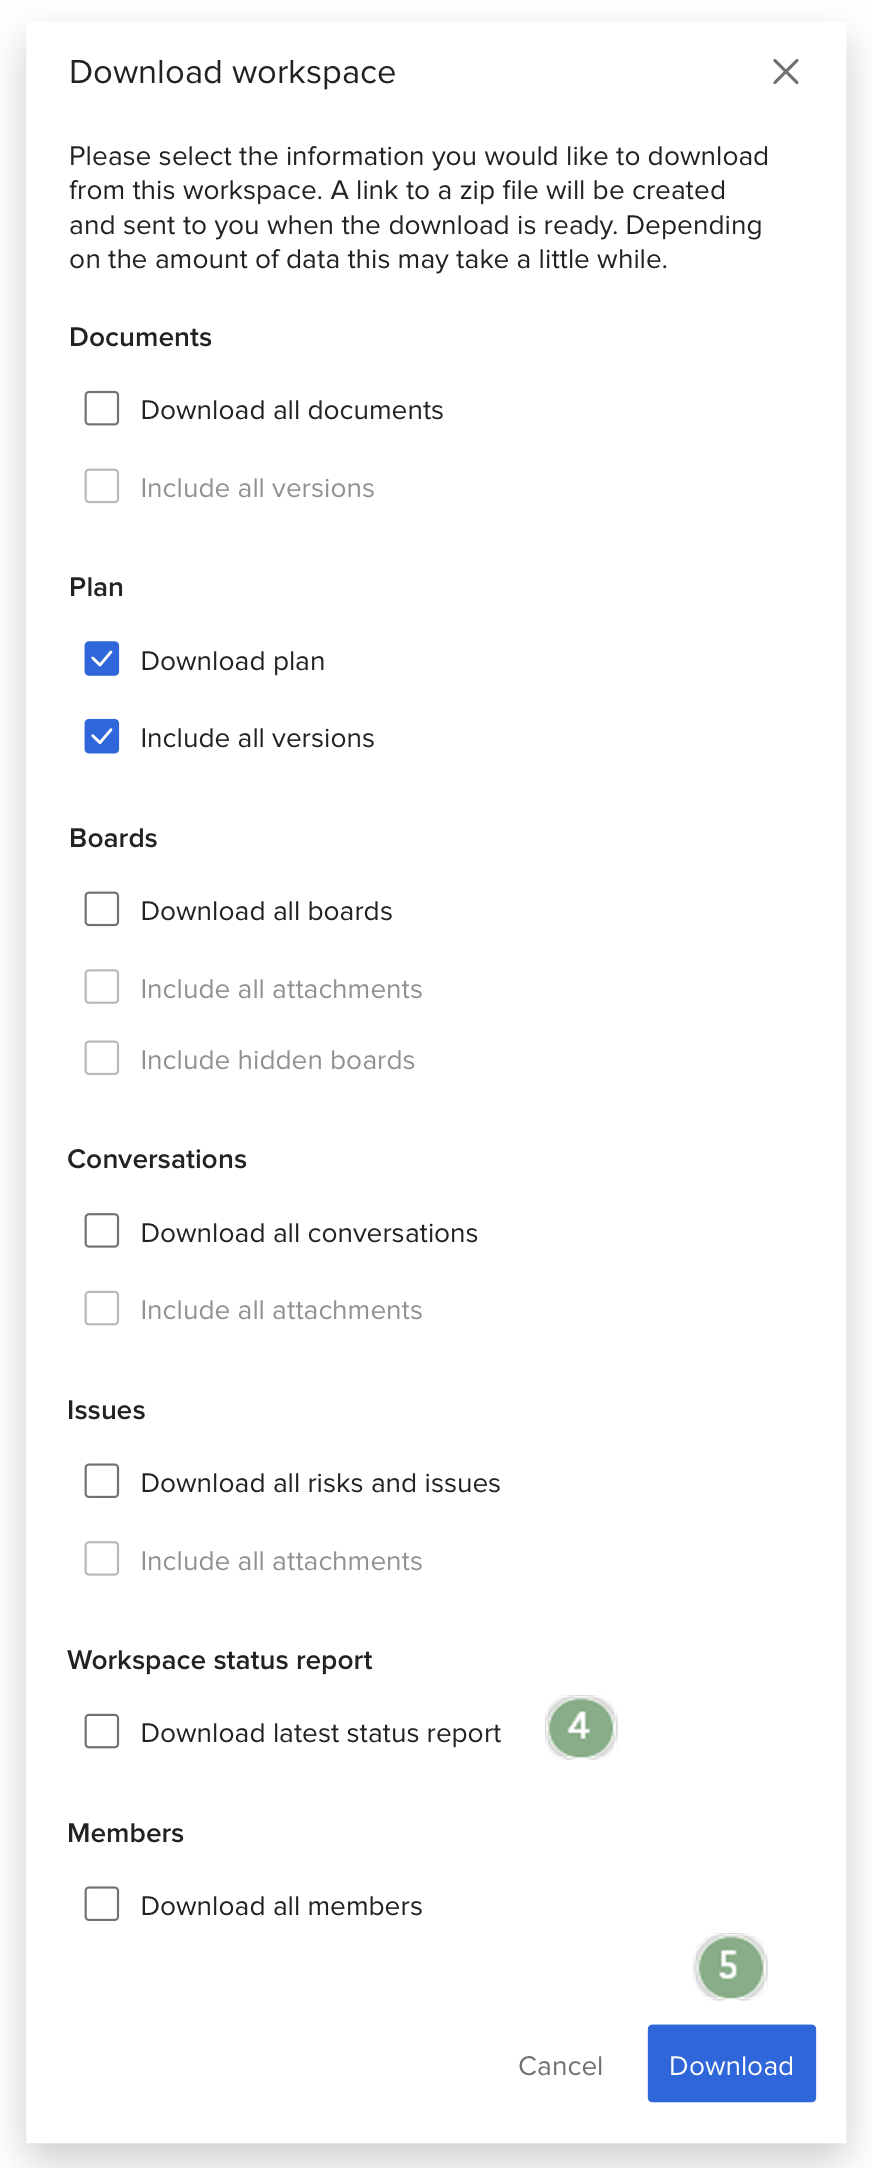
- In the Actions section, click Download workspace.

- From the new window that appears, select the artifacts you want to include in the download. You can include any or all of the following artifacts:
- Documents - Click the checkbox to include all versions of downloaded Documents.
- Plan - Click the checkbox to include all attachments.
- Boards - Click the first checkbox to include all attachments uploaded to cards. Click the second checkbox to include hidden or archived Boards.
- Conversations - Click the first checkbox to include all conversations in the download. Click the second checkbox to include all attachments.
- Issues - Click the first checkbox to include all issues and risks in the download. Click the second checkbox to include all attachments.
- Workspace latest status report - Click this checkbox to download the latest status report.
- Members - Click this checkbox to download all members.
5. Click Download. Note that the download may take as long as 24 hours to complete.
6. Once the download is complete, the workspace administrator will receive an email that includes a link to a file with the downloaded file. Access to the file is available for 14 days after the email has been sent. Click Download file to receive the file.
NOTE
If a tool has been hidden (see Workspace administration > Tools), you can enable the tool(s) to appear on the Download workspace popup, where you can then select them, and perform the download.
Archive a Workspace
You can remove a workspace from the workspace list and save the workspace content and history by archiving completed workspaces. The workspace and all information within it is still accessible in the archive. You must be a workspace administrator to archive a workspace.
To archive a workspace:
- Navigate to a workspace you are a member of.
- In the workspace toolbar, click the Administration menu and select About the workspace.

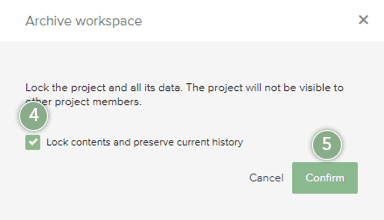
3. In the Actions section, click Archive workspace.

4. If you don't want the contents to be locked for editing, uncheck the Lock contents and preserve current history box.
5. Click Confirm to archive the workspace.
Delete a Workspace
If you delete a workspace, all contents are deleted and those contents cannot be recreated. You must be the workspace head administrator to delete the workspace. Before deleting a workspace you can save contents locally.
Add a post in Conversations to notify all members that the workspace is being deleted. This notification allows members the opportunity to save any relevant information before the workspace is deleted.
To delete a workspace:
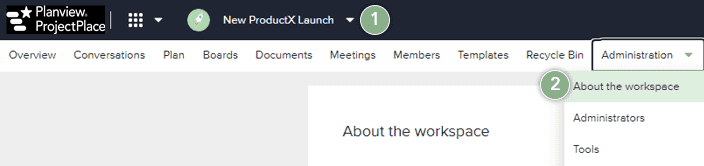
- Navigate to a workspace you are a member of.
- In the workspace toolbar, click the Administration menu and select About the workspace.
- In the Actions section, click Terminate workspace.
. -f
- Confirm that you have read the terms of use and click Confirm to delete the workspace.
The workspace and all of its contents are deleted and cannot be recreated.
To Hide/Unhide a Workspace, see this article.